Stuffed green peppers are yummy. Making them isn't complicated, but it does involve quite a bit of preparation.
So, when I decide to make a batch, I make more than enough for one sitting. It makes the best use of all that prep time.
You can then eat any leftovers later during the week, or if you freeze them, you can eat as and when the fancy takes you.
Many people don't know you can freeze them successfully, but I have discovered the technique.

By using the process I've tested, you can enjoy a meal of delicious, reheated, frozen stuffed peppers anytime without having to find the time to do all of the prep. It's ideal for busy moms.
I had to experiment a bit before I got it right and tried several different processes.
One was reheating them in the microwave, and the others included using a conventional oven or an air-fryer.
They all work well, providing you follow the processes I've laid out below.
In fact, there is very little difference in taste, although the conventional oven method gives you a crustier cheese and a softer pepper.
- Preheat your oven to a temperature of 350°F (180°C).
- Position the stuffed peppers on a baking tray and sprinkle with a bit of water - about a tablespoon.
- Then, cover them with a sheet of aluminum foil, pop them into the oven
- Bake for approximately 20 to 30 minutes until they are thoroughly cooked through, depending on their size.
That's the basic bones of the oven reheating method. But before I go into a little more detail, let's just talk about what stuffed green peppers really are.
Various types of stuffed peppers
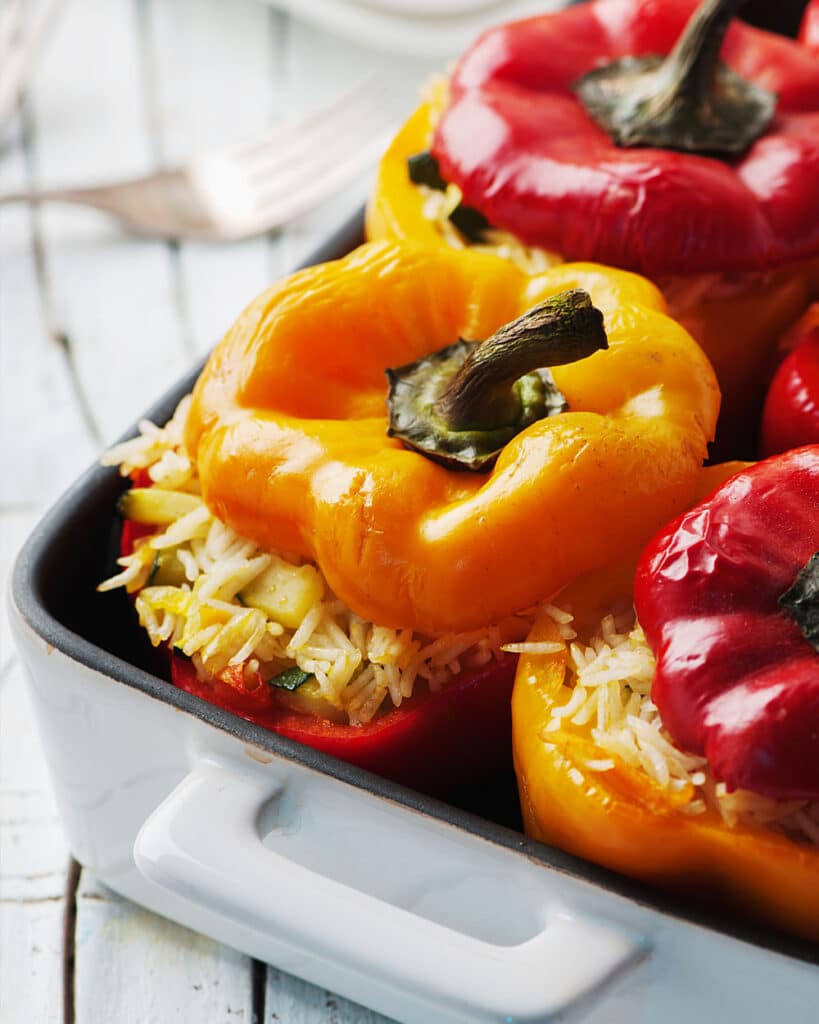
Stuffed peppers are essentially peppers that have been hollowed out and stuffed with various ingredients.
Sometimes they are filled and cooked whole, with the top cut off, then put back on for decoration and presentation.
Alternatively, you can halve them lengthways, so the halved peppers act like a tray where the stuffing sits.
You can make stuffed chili peppers or stuffed bell peppers. Both are fabulous, as you will see if you click on the recipe links.
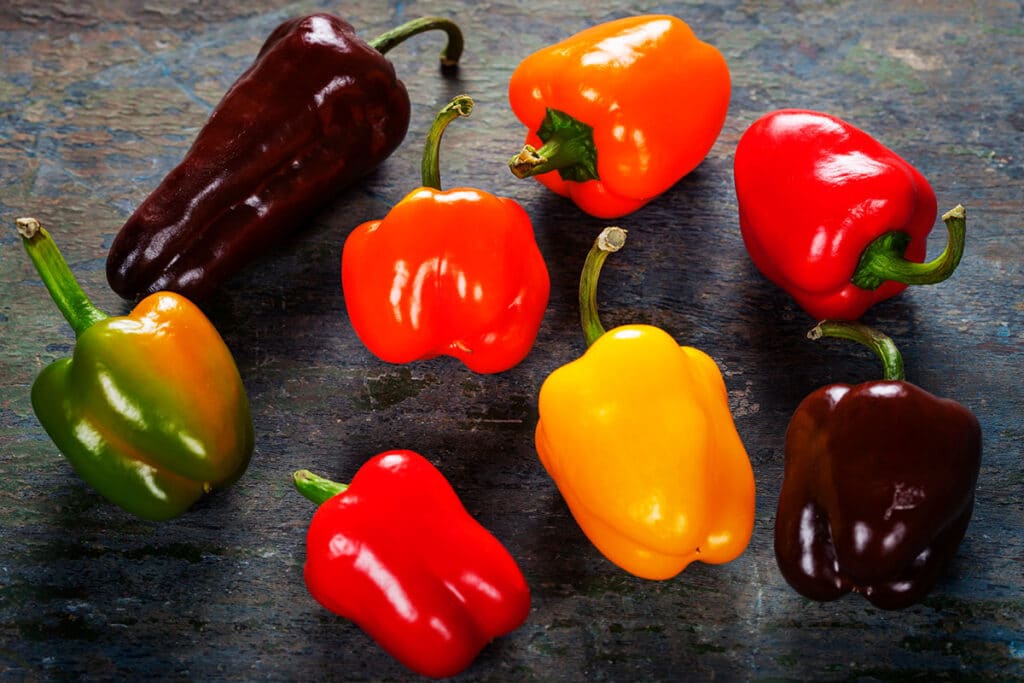
The color of the pepper doesn't matter, creamy, green, purple, orange, red, or yellow. Take your pick. The prep, cooking, freezing, defrosting, and reheating remain pretty much the same.
Whichever chili/capsicum (in the US, capsicums are usually called bell peppers) variants you decide to use, once cooked, you can keep any leftovers:
- In your refrigerator (in a closed airtight container) for up to three or four days,
- In your freezer for up to three months. You can keep them frozen longer, but the quality will begin to deteriorate a little.
I'll go through the step-by-step preparation processes for refrigerating and freezing a little later on.
First, let's tackle reheating them.
How to reheat stuffed peppers
1 How to reheat stuffed peppers in the oven
I briefly covered reheating stuffed peppers above, and now I will get into a little more detail.
As I said, it will take around 20 to 30 minutes to reheat these little beauties in a conventional oven, but if you want to speed the process up a little, you can first give them a 20-second blast in your microwave.
You probably cooked the peppers in the oven originally, so it feels natural to revert to the same method for reheating - especially if you are doing a big batch.
Here's how to do it, step by step.
Step 1
Preheat your oven to a temperature of 350°F (180°C). While doing this, you can give the stuffed peppers a quick 20 to 30-second blast in the microwave if you're in a hurry.
Step 2
Transfer the stuffed peppers onto an oven-proof dish and sprinkle a tablespoon of water over them. Cover loosely with aluminum foil.
Step 3
Place the tray of peppers in the oven and cook for between 15 and 20 minutes. If you don't opt to microwave them first, the cooking time needs to be extended to 20 to 30 minutes.
Step 4
If your recipe included a cheesy topping, take the foil off for the last 5 minutes so that the cheese can crisp up.
Checking for readiness
It is best to use a food thermometer to make sure that your stuffed peppers are heated adequately.
You're looking for an internal temperature of 165°F (74°C). If you don't have a food thermometer, you can stick a knife blade into the stuffing and test how hot it is when you pull the blade out.
If the capsicums or bell peppers are on the large side, the 20-second blast in the microwave will help to ensure the middle of the stuffing properly cooks through.
Another option to reduce the reheating time is cutting the peppers in half.
If you're reheating stuffed peppers that you previously froze, you can extend the cooking time from 40 to 45 minutes.
My thoughts
Reheating stuffed peppers in the oven does take time, but the peppers taste really good.
The peppers themselves are a little softer than when you first cooked them, but only a little.
The stuffing itself was still nice and moist - very similar to when you originally cooked them.
2 How to reheat stuffed peppers in air fryer
As an alternative method to reheating stuffed peppers in a conventional oven, you can reheat them using an air fryer.
Here's how to do it:
Step 1
Preheat your air fryer to a temperature of 350°F (180°C).
As mentioned with the conventional method of reheating, if you want to save a little time and ensure the stuffing is nicely heated in the middle, you can microwave the peppers for 20 to 30 seconds before transferring them to the air fryer.
Step 2
Position the stuffed peppers into the air fryer's basket, ensuring they are upright and not touching each other.
Step 3
Reheat for between 8 and 10 minutes until they're adequately heated all the way through. If you don't microwave them first, the cooking time needs to be extended to between 15 and 20 minutes.
Note:
As mentioned earlier, it's always best to check the internal temperature of the stuffing as the center can sometimes still be lukewarm while the outer is hot.
The denser the filling, the longer it takes to warm through. That's why that initial blast in the microwave can be a good idea, especially if the stuffing is dense with meat and rice.
If you're reheating stuffed peppers in your air fryer from frozen, just increase the cooking time between 10 and 12 minutes.
My thoughts:
I was a little concerned that the filling might have dried out a little, but I needn't have been; I found the filling to be still nice, moist, and delicious.
Pretty much as tasty as they were when originally cooked. If the stuffing you used is on the dry side, it might moisten a little.
As with the conventional oven method, the capsicum was slightly softer after reheating, but the cheese was a little crispier. No worries there.
3 How to reheat stuffed peppers in microwave
If speed is of the essence, a microwave is the quickest way of reheating stuffed peppers. However, you do need to nuke them one at a time.
Follow these steps:
Step 1
Cut the peppers in half. Although this is not absolutely essential, I found this to produce the best results when using the microwave reheating method.
Transfer the cut pepper halves onto a microwave-safe plate.

Step 2
Place a dampened sheet of paper kitchen towel over the top of the exposed stuffing. Set the microwave to 50% power and blast at 30-second intervals.
When they reach the stage where they are almost ready, reduce the blast time to 15 seconds and repeat as necessary until they are satisfactorily heated through.
Step 3
Remove from the microwave and allow the stuffed peppers to stand for 60 seconds before serving.
Cutting the stuffed peppers in half means that they will cook through more evenly. You also get the advantage of judging that they are heated all the way through more easily.
The total cooking time in the microwave is approximately 40 seconds per pepper.
Placing a piece of damp paper kitchen towel over the top creates steam in the microwave, which helps to keep the stuffing moist. If you don't do this, the filling can be a little dry.
If you like your cheese topping to be brown and crispy, flash the peppers under a hot grill for a minute or two before serving.
My thoughts:
I did wonder whether or not the texture of the rice might suffer, but I was more than happy with it.
I found that the bell pepper itself was a little less tasty than when reheated in the conventional oven or air fryer. It missed that hint of roasted sweetness, but it was still delicious.
Microwaving is the fastest way of reheating stuffed peppers by far.
The only slight hassle is that you need to toast the cheese under the grill if you prefer brown. But even so, it's by far the quickest method.
How to reheat stuffed peppers from frozen
When it comes to reheating frozen stuffed peppers, you need to decide whether you will defrost them first.
If you decide to thaw them and provide you with sufficient time, the best way to do so is overnight in your fridge.
Not only is this the safest and most convenient way of defrosting them, but it also reduces the amount of cooking time when reheating.
Options for reheating frozen stuffed peppers
There are two options you can consider when you are thinking of reheating stuffed peppers from the freezer. One is using a conventional oven, and the other, an air fryer.
1 Let's start with the traditional oven.
- Preheat the oven to a temperature of 350°F (180°C).
- Place the still-frozen stuffed peppers into an oven-safe dish.
- If the dish has a lid, use it, or if not, cover it with a sheet of aluminum foil.
- Transfer to the oven and cook for between 40 to 45 minutes.
2 The air fryer option
- Place the stuffed peppers into the basket of your air fryer and heat them at a temperature of 350°F (180°C) for 15-20 minutes (or until heated through).
- Check then after 10 minutes of cooking time and if all looks well, continue to cook for a further 10 minutes.
The bigger they are, the longer it will take to reheat frozen stuffed peppers. The times I've given you above relate to stuffed peppers of medium size.
If you want to lessen the cooking time, then you will need to defrost the stuffed peppers beforehand.
The best way to do this is overnight in your fridge, as mentioned above.
Another option, before you freeze them, is to consider cutting them in half.
3 Avoid microwaving frozen stuffed peppers.
While it's okay to microwave stuffed peppers that have been stored in your fridge, I would not recommend microwaving frozen stuffed peppers.
If you do, they will become quite wet, and the texture will be mushy; not nearly such a joy to eat.
It's okay to use the microwave to defrost frozen stuffed peppers for between 30 and 40 seconds.
It will significantly reduce the reheating time in either a conventional oven or an air fryer, and the hot air environment will prevent them from becoming mushy.
How to freeze stuffed peppers
There is no problem with freezing stuffed peppers which means that if you want to make a large batch to economize on the prep time, there's no reason not to.
Freezing does them no harm at all, as when they are defrosted and reheated, flavor and texture are only minimally affected.
Providing you freeze and defrost them properly (and I am about to tell you how to do just that), they will be almost as good as they were when you first made them.
If you're someone that likes to have pre-cooked foods in your freezer, on tap when you need them, stuffed peppers are ideal.
Will you freeze cooked or raw stuffed peppers?
If you've decided to prepare a batch of stuffed peppers for freezing, the first thing you need to decide is whether or not you will freeze them cooked or raw.
Pre-cooking and freezing mean not having the hassle of preparing them from scratch when you come to reheat them.
Whereas freezing them raw, then defrosting and cooking them, can lead to a slightly better flavor.
The one thing I would say is that while you can freeze stuffed peppers uncooked, it is preferable from a cooking health and safety point of view to freeze cooked rather than uncooked stuffing.
If you go down the cooked stuffed pepper route, it's vital to ensure that any meat used in the stuffing is properly cooked through.
The other critical factor is to make sure you allow the peppers time to cool completely before transferring them to the freezer.
If they are still warm when you start freezing them, they could turn out soggy when it comes to defrosting and reheating.
The freezing process
Stuffed peppers are delicious, and they can be frozen and kept in your freezer for anywhere from 3 to 12 months.
But freezing them correctly is essential to protect the texture and flavor, so please observe the following steps:
Step 1
Whichever recipe you're using for your stuffed peppers, it's vital to ensure they are cooked through properly. This is particularly important when your stuffing contains meat, poultry, or fish.
Step 2
Set the stuffed peppers aside after cooking and allow them to cool down completely.
They should be sufficiently cool after 40 to 60 minutes (depending on their size), but you must be sure not to leave them out in the open for longer than 2 hours maximum.
Step 3
Transfer the peppers into a freezer-safe dish or casserole.
- If the dish or casserole has a lid, put it in place and wrap it completely with plastic food wrap to provide a complete seal. Or you can use aluminum foil instead for a cover.
- If you prefer to freeze your stuffed peppers individually, you can do so by wrapping each in plastic food wrap (once they cooled, of course).
Make sure each pepper is completely covered, or they will be susceptible to freezer burn.
Vacuum sealers are invaluable for sealing anything for the freezer. Check out these models from the goodhousekeeping.com website.
The individually wrapped peppers can then be placed on a baking sheet for pre-freezing, after which you can transfer them into freezer-safe Ziploc bags.
As I said above, frozen stuffed peppers will be good for between 3 and 12 months, although personally, I like to use them within three months as any longer, and the flavor starts to deteriorate a little.
On defrosting stuffed peppers
You don't necessarily have to defrost frozen stuffed peppers. You can pop them straight from the freezer into a conventional oven or an air fryer, as discussed earlier.
If you want to defrost them before reheating, the safest way to do so is by popping them into your refrigerator and leaving them overnight.
Never leave frozen stuffed peppers out in the open air for defrosting for any length of time.
If the air temperature allows them to warm up to the food temperature danger zone, bacteria could multiply to dangerous levels and cause serious illness.
Storing stuffed peppers in uncooked pepper casings
I tend to cook my stuffed peppers before I freeze them, but that's only my preference.
Whether you store them cooked or uncooked is up to you.
Some people prefer to cook the stuffing and then use it to fill raw, hollowed-out capsicum casings.
They think it makes them look a little fresher when served up. If you want to go down this route, here are the steps to follow:
Step 1
Prepare and cook your stuffing as per the recipe, ensuring it is properly cooked through, then set aside.
Step 2
Blanche the peppers for 1 minute in boiling water to allow them to soften slightly, then set aside to cool.
Step 3
Once cool, stuff the peppers to just below the brim and proceed to pack for freezing as discussed earlier.
About the cheese topping
Some recipes call for stuffed peppers to have a cheese topping.
You can use any cheese, including mozzarella, Parmesan, pepper jack, etc. but if you are freezing your stuffed peppers, it is recommended to omit the cheese until it comes to reheating them.
Adding it at the last minute and flash-browning it under the grill is my preferred way. If you cook them for too long in a conventional oven or air fryer, the cheese will burn.
How to cook stuffed peppers
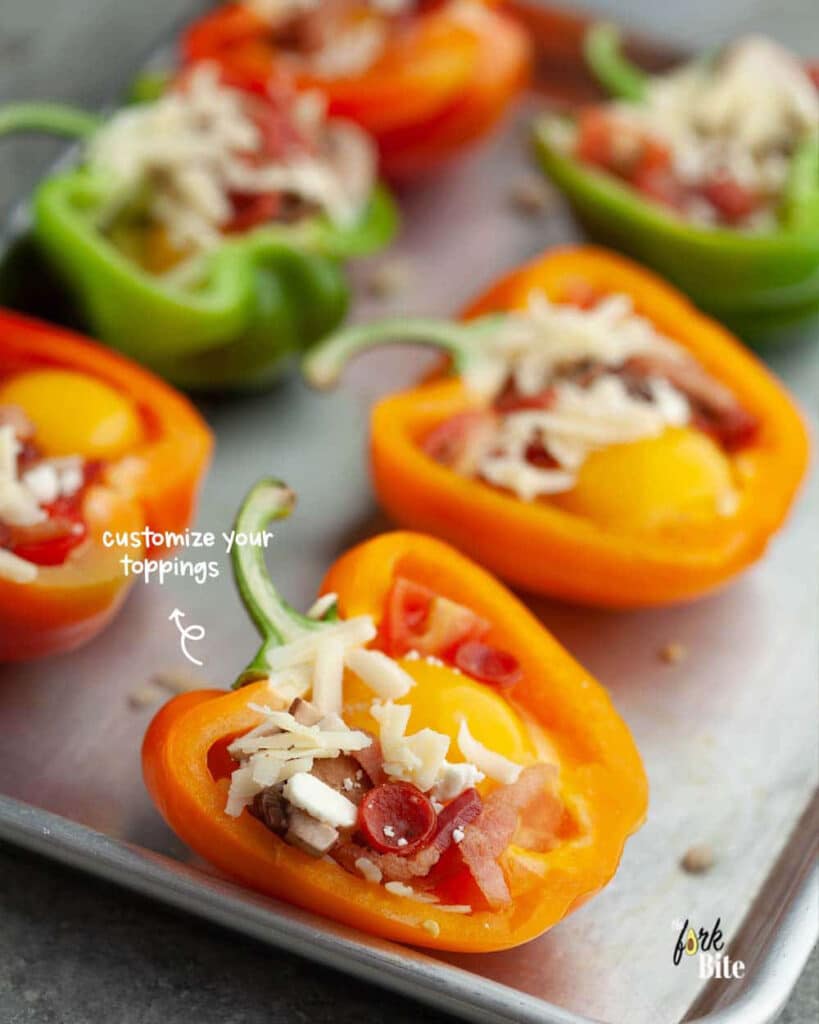
Bell pepper egg boats are fun, easy-to-make, and healthy to have on busy mornings. You can prepare them ahead over the weekend and then enjoy them with your family each day of the week.
Check the step-by-step instructions for the recipe with pictures of Bell Pepper boat recipe.

Related questions
Why freeze stuffed peppers?
Freezing stuffed peppers is a great way of having freshly prepared stuffed peppers ready to enjoy at almost the drop of a hat.
In terms of preparation, it's a massive timesaver.
Any time you, your partner, or one of the kids fancies one, just raid the freezer, and away you go. You can take them straight out of the freezer and have them cooked in a matter of minutes.
For how long can I keep stuffed peppers in my freezer?
You can keep stuffed peppers in your freezer for anywhere between 3 and 12 months. For me, the optimum time is before three months, but they are still very edible anywhere up to a year.
It's important, though, to make sure that the temperature never gets above 0°F.
Transfer them straight from your freezer into a prewarmed oven at 350°F, and within a few minutes, you've got a delicious meal almost as good as it was when you first prepared it.
For how long can I keep cooked stuffed peppers in my fridge?
You can store cooked stuffed peppers in your refrigerator for up to 3 to 4 days providing you cover them completely in food wrap and aluminum foil.
However, it's important to remember not to refrigerate them again once they have been taken out and reheated.
How can I prevent my stuffed peppers from getting soggy when reheated?
It's all about prepping them properly for storing. It would be best if you let them cool down completely after cooking.
Otherwise, condensation can form, which could, in time, turn the peppers mushy.
How long can I keep cooked stuffed peppers after they've been frozen and defrosted?
After defrosting frozen cooked stuffed peppers, You can keep them for another 3 to 4 days in your fridge before reheating.
Please note that this only applies to stuffed peppers that have been defrosted overnight in your refrigerator.
If you thaw the stuffed peppers in cold water or the microwave, you should eat them immediately.
What are the signs that cooked peppers have gone off?
If a cooked pepper looks as if it's on the turn, you should dispose of it.
If you're not sure, smell it, don't taste it to make sure; just throw it away.

