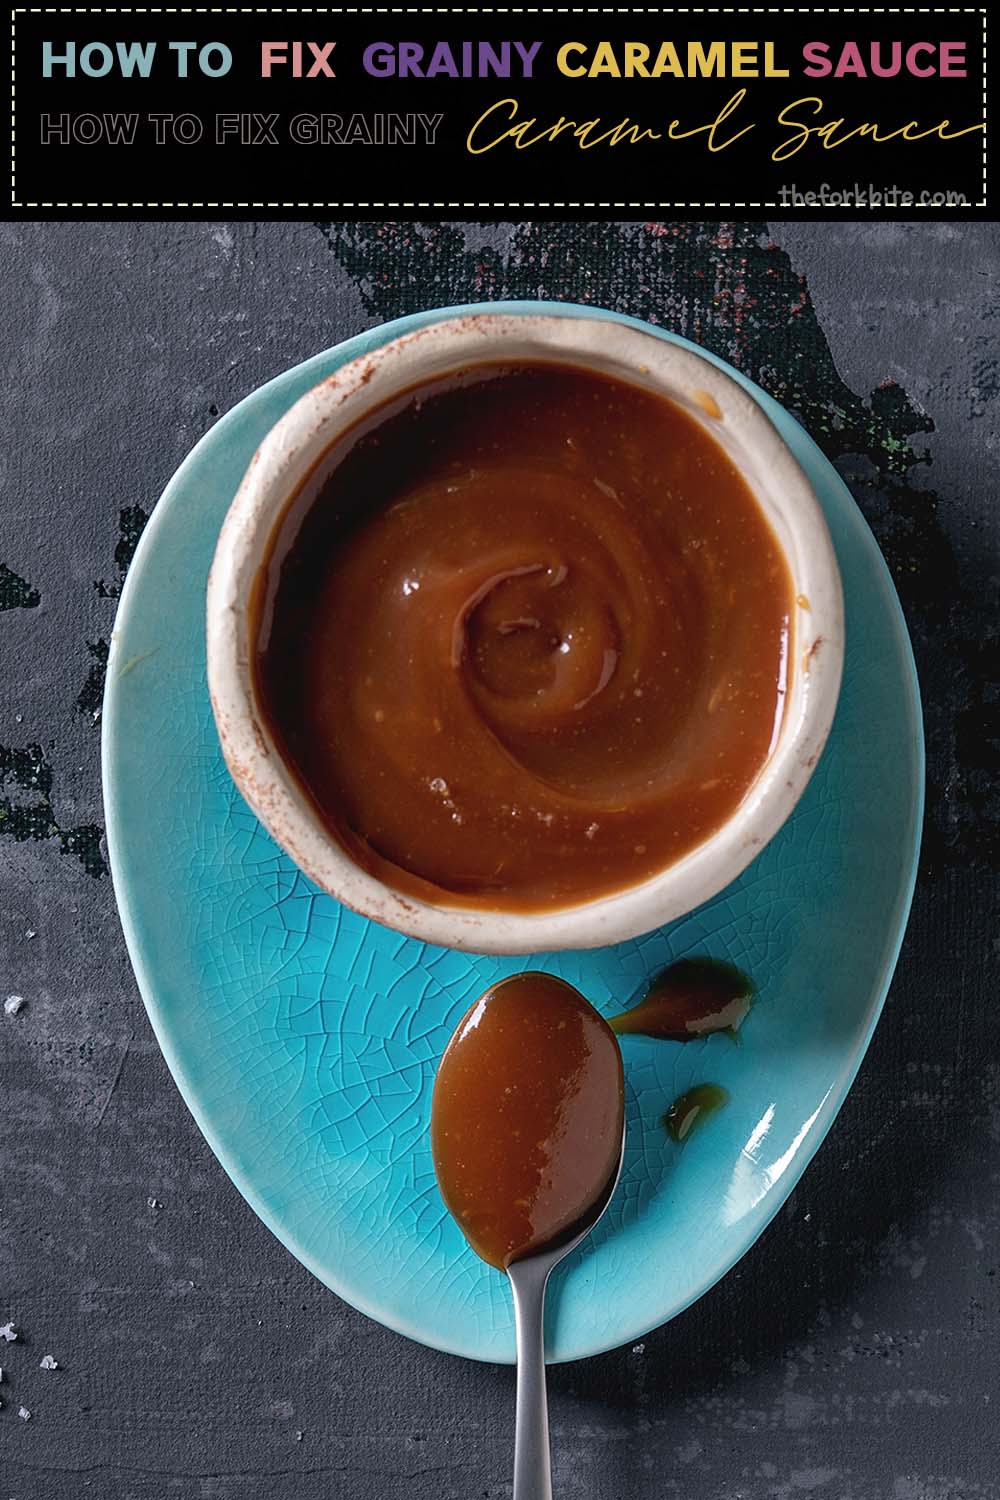
How to fix grainy caramel sauce? If caramel does turn grainy, it is not the end of the world. You can fix it and make it smooth once again. Raise your hands if you know the common denominator between butterscotch, crème brûlée, and toffee. If you said caramelized sugar, go to the top of the class.
Caramelized sugar, most often referred to simply as caramel, is one of the special ingredients that desert chefs use to make some of the most fabulous puddings in the world.
Jump to:
Although in theory, it is simple to make, in practice, it so often goes wrong.
If you'd like to know more about this magical ingredient and how to make it perfectly time after time, please read on.
What is caramel?
Caramel is made by heating sugar to a temperature of 340°F or 170°C. As the granules of sugar approach this temperature, the molecules begin to break down.
As they do so, they change into different compounds, including bitter phenols and fruity esters, plus buttery, multi-and nutty taste notes. This process is called caramelization, and it creates the aroma and flavors that go to make caramelized sugar.
The stages caramel goes through as it heats up
As it heats up, caramel takes on a life of its own, and the hotter it gets, so its characteristics begin to change in the following sequence:
- When sugar reaches a temperature of approximately 320°F, the process of caramelization kicks off.
- Between the temperature range of 340 to 350°F, the color begins to change to light gold.
In this temperature range, you can slowly pour caramel from a spoon in fine strands, which quickly solidify as they cool. This is the process that confectioners use to spin caramel cages and other creations to adorn their desserts.
- As the temperature rises to between 355° and 360°F, the caramel's color becomes a medium brown, and if allowed to cool, it will harden without being quite as brittle as it was at the lower temperature range.
- As the temperature rises even further, reaching between 365° and 380°F, the caramel turns dark brown, and as it calls it will become softer and stickier.
This is the temperature range at which you can add butter, cream, and vanilla to form a translucent caramel that can be used as a dessert sauce or decorating candies.
- If heated further, the caramel will carry on darkening in color until it reaches a temperature of approximately 410°F. At this stage in its metamorphosis, it is known as bakers or black caramel.
This very dark caramel has a not unpleasant bitter taste. It can be used as a coloring agent in various foodstuffs, including gravies, pumpernickel bread, and fizzy drinks such as Coca-Cola.
2 Ways caramel can be made
You can make caramel in two basic ways: dry and wet. We will now look at each one in its own right, starting with the dry method.
#1 Dry Method
Creating caramel by the so-called "dry method" relies on heating the sugar on its own in a dry pan until it begins to liquefy and turn brown.
If you use this particular method, you have to keep a very close eye on the process as sugar tends to darken rapidly and un-evenly if there are any hotspots either in the pan or the heat source.
When using this method, it is best to use a pan that has a wide surface area. It enables the sugar to be spread out in a thin layer, which means that it will heat and begin to brown more evenly.
#2 Wet Method
This second method of creating caramel involves adding moisture to the sugar. This is done by adding water. As the water dissolves, it distributes its way through the sugar and produces a more even browning effect.
A particular advantage of making caramel via the wet method is that the evaporation of the water means a longer processing time during which the sugar develops more complex flavors.
Another advantage of the wet, slower method is that it makes it easier to control the caramel's ever-changing color. It's much simpler to get it in the color you prefer.
How does caramel taste like?
The taste of caramel is best described as rich and extremely sweet. It has a sticky consistency that becomes gloriously and comfortingly gooier in the warmth of your mouth.
The darker it is, the more bitter its flavor, and it tends to get used in this format more as a coloring agent than a taste enhancer.
Things that can go wrong when making caramel
While caramel is quite simple to make at home, unless you keep a very close eye on it when cooking, several things can go wrong and very quickly.
#1 Caramel turns grainy
One of the most common things that go amiss when making caramel sauce is when it becomes too grainy. This is more prone to happen when you use the wet method, but not exclusively so.
Graininess is caused by crystallization. What happens when sugar and water boil is that sugar syrup that is formed can splash or splatter onto the sides of the pan. It then immediately evaporates and turns back into crystals.
It only takes one of these crystals to drop back into the sugar syrup to start up a chain reaction, resulting in the clear syrup into an opaque, grainy goo.
Other things that can cause crystallization
Crystallization isn't the only thing that can result in your caramel turning grainy.
There are several other causes, and they include:
- The sugar not thoroughly dissolving before getting to a temperature of 238°F.
- Being too aggressive with stirring.
- Making caramel is quite a delicate operation, and if you are not observant enough, you react too slowly, or you simply have some bad luck, you can end up with grainy caramel.
How to fix grainy caramel sauce
As they say, prevention is better than cure, and if you can avoid making your caramel grainy in the first place, so much the better.
However, none of us are perfect, and if your caramel does turn grainy, it is not the end of the world. You can fix it and make it smooth once again.
What to do?
The best way to resolve this issue of crystallization or grainy caramel sauce is to add more water. This means you should start over so the gritty sugar crystals dissolve once again.
- Immediately remove the pan from the stovetop. Repeat the process by re-heating the sugar in low heat (understand that this will take time, patience is the key).
- Carefully add two, three, or more tablespoons of water.
- Put it back on medium-low heat, and very gently, stir the syrup to dissolve the crystals.
- Once the water has all evaporated and the sugar is warm enough, the caramelization will start. Give the pan a swirl.
- Turn off the heat and let the mixture cool down a bit before transferring it into a glass container for storage.
Ways to prevent graininess from happening:
As I said, prevention is better than cure, so here are the measures you can take to prevent your caramel from turning grainy.
- Before you begin cooking, lightly oil the sides of the pan to discourage crystals from sticking.
- Halfway through the cooking process, dissolve any crystals that form on the sides of the pan using a dampened pastry brush.
- Another way of dissolving crystals that form on the pan's sides is to put a lid tightly in place, which will create steam and liquify them.
- Another technique is to add a little corn syrup into the mixture. The syrup crystallizes when it is pure. By adding corn syrup, you are introducing another element into the mixture. It limits the chances of a crystal-forming chain reaction taking place.
- Other additions that do the same job include acids such as cream of tartar, lemon juice, or vinegar.
- Refrain from stirring the syrup until it starts to change color, which is an indication that the water has evaporated. Before the color change begins, the syrup might still have undissolved sugar crystals in it. Which, if moved, can act as a catalyst to the crystallization process.
Instead of stirring, you may come across some recipes that suggest swirling the syrup.
However, it is recommended to leave the syrup well alone to do its thing.
Light golden streaks will begin to appear, but I still advise you not to disturb the caramelizing syrup. Only do so if you notice the appearance of any dark spots.
#2 When caramel burns
Apart from becoming grainy, the other common problem people have when making caramel is burning. Once around 80% of the water has evaporated out of the sugar syrup, its boiling point will rise extremely fast.
It is so easy to allow it to become too hot and burn.
Here are ways of preventing this from happening.
- Prepare a large bowl of cold water, large enough to accommodate the pan, and as soon as the caramel reaches the color you're aiming for, lower the bottom of the pan into the cold water. It will bring about rapid cooling, which will stop the color from darkening further.
- Don't use a dark-colored pan. The darkness of the pan can disguise the darkening of the caramel, making it difficult to spot. Stainless steel cookware or copper cookware lined with stainless is perfect if you have it.
- Whatever you do, do not use a tin-lined copper pan. The melting point of tin is lower than that of caramel.
If you have no choice other than to use a pan with a dark-colored bottom, you can try spooning up some of the caramel into a bright, shiny spoon to help you gauge the mixture's color.
Be careful. Caramel is not the easiest of liquids to working with due to its stickiness. Also, if you get any on your skin, it will cause a nasty burn.
If you do accidentally burn your caramel sauce, it's not the end of the world. Sugar is hardly expensive, so throwing the burnt batch away and starting afresh is not a major problem.
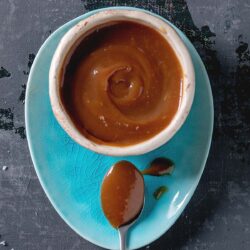
How to make the caramel sauce
I will tell you about a great recipe for making a delicious caramel sauce that will remain soft even when you refrigerate it.
We've already discussed the two ways of making caramel (wet and dry method), either of which is the first stage to creating a wonderful caramel sauce.
Personally, I prefer the "wet method" as the extra liquid gives you a bit of insurance. It slows down the cooking process, therefore, giving you a better chance of staying in control.
Ingredients
- 1 cup granulated sugar
- ½ tablespoon citrus juice or vinegar
- 3 tablespoon water
- ¾ c heavy cream (warmed cream will incorporate smoothly into hot caramel than cold cream)
- 3 tablespoon unsalted butter, cut into 1 tablespoon pieces
Note: Adding a tiny bit amount of acid prevents any crystallization - from subtle graininess to total mess. This means you can hear that cheesecake cheer that leads you toward the silkiest, smoothest, shiniest caramel sauce.
Helpful tips when going down the "Wet" Route
- Before heating the pan, wipe the sides with a pastry brush or a wet fingertip to eliminate any stray granules of sugar.
- Turn up the heat under the pan to a high setting.
- Watch and wait. Refrain from stirring.
As you get further into the cooking process, the sugar will liquefy and start bubbling and might be more cloudy than clear. Don't worry - it's time to reach for your secret weapon - acid.
The type of acid you can use comes in many formats, including the cream of tartar. I like to use either apple cider or balsamic vinegar, but my favorite is lemon or lime juice.
Whichever you prefer, only add a smidgen so as not to alter the taste of the caramel.
Step-by-step instructions
Let's now get down to the basics of making your scrummy caramel sauce.
Besides the sugar and whatever form of acid, you will use, set aside some heavy cream and salted or unsalted butter.
Step #1: Melting the sugar
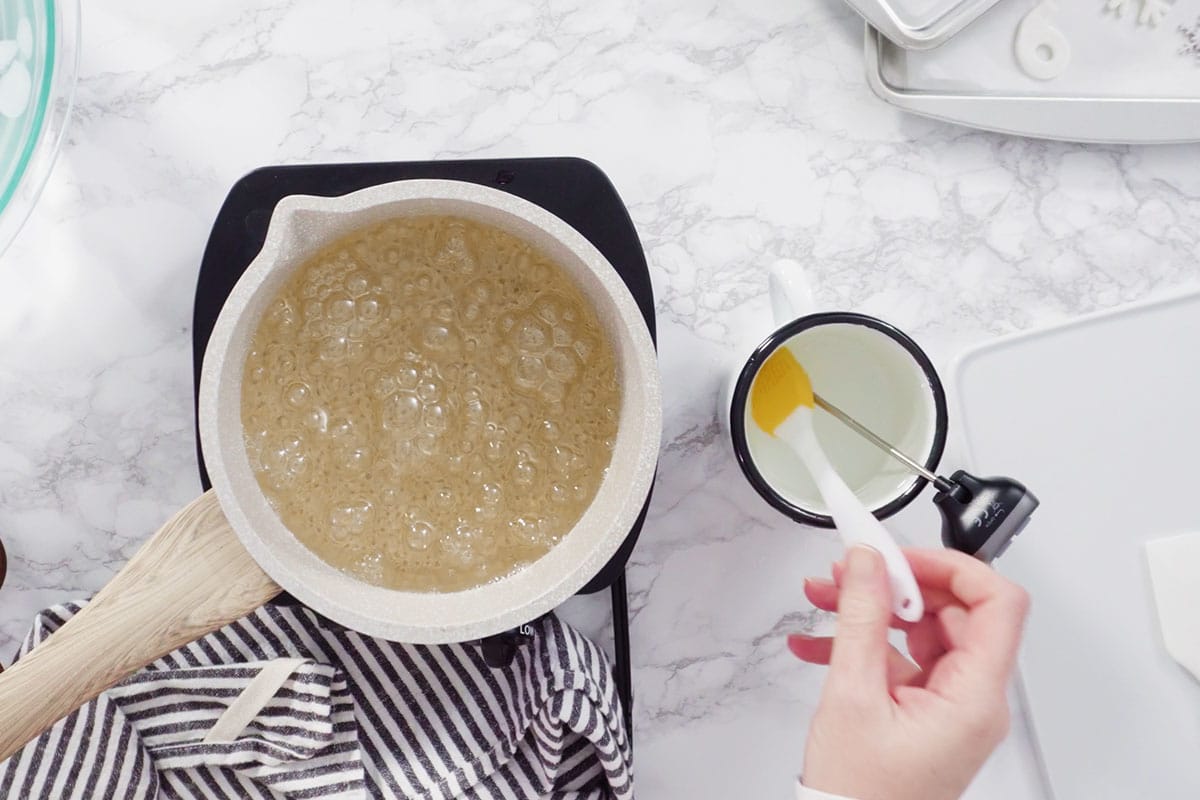
- We are going down the "wet" route here, so the first thing to do is take a heavy-bottomed pan (light rather than dark-colored if you have one), and into it, pour the sugar, lemon juice, and water. Don't forget to brush away any extra sugar granules from the sides of the pan, as mentioned earlier.
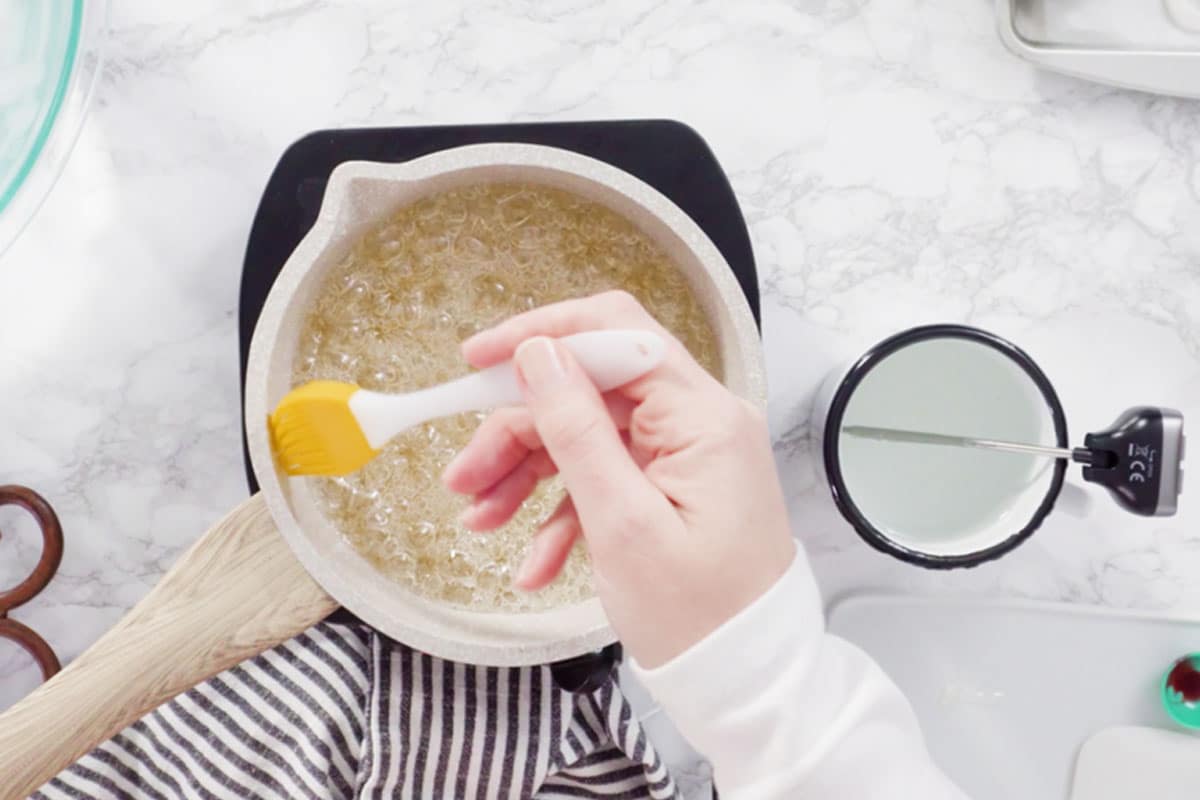
- Put the pan onto the stovetop on a medium-low heat setting.
- Do not stir. Let nature take its course. Note: this process takes time, so be patient.
- As the sugar is liquefying, get your other ingredients to hand.
Remember to keep brushing off any sugar crystals that might form on the sides of the pan. As the pan will be hot, use a dampened pastry brush.
- With the sugar completely liquefied, if necessary, gently swirl the hot syrup.
- Reduce the heat setting, and keep your eyes peeled. You're looking for when the color begins to change. This will happen after about four or five minutes, but you can't afford to look away as the color change takes place in an instant.
Step #2: Time to add the cream
- When the bubbling syrup gets to a light golden color, immediately turn the heat off, then add three tablespoons of butter and three-quarters of a cup of slightly warmed heavy cream whisking as you do so.
- Carry on whisking until everything comes together evenly and any lumps are dissolved. You might find it necessary to turn the heat back on to a low setting as you continue to stir to create a lovely smooth caramel sauce.
Substituting ingredients in recipes with only a few components can be risky; however, this is one ingredient swap that you don't have to be afraid of.
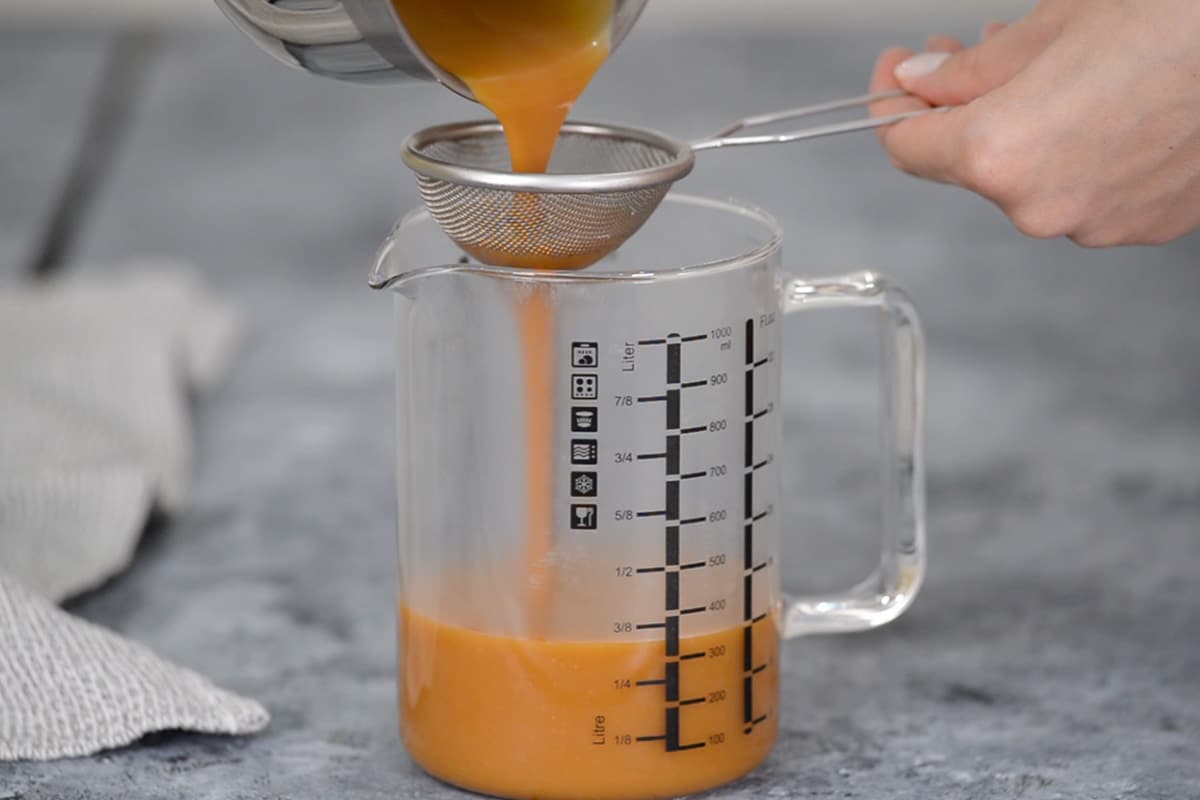
Step 3: Storing the caramel
- Pour the caramel into a heat-proof container. If possible, refrain from scraping the bottom of the pan, as there lies some lingering crystallized sugar down there.
- Let the caramel cool down before storing it in the fridge. It will last for up to 10 days.
How long caramel sauce last in the fridge?
You can keep the caramel for up to 10 days in the refrigerator but beyond that, the sugar will start to crystallize hence, you will notice some little gritty textures.
Can you substitute milk instead of heavy cream?
There can be no doubt that adding heavy cream to your caramelized sugar syrup is the way to go.
In the early days of my caramel sauce-making days, I experimented a little. Who doesn't? It's what good cooking is all about.
On one occasion, I substituted milk instead of heavy cream. Bad idea - it doesn't work. It ruins both the flavor and the texture.
You can, however, get away with substituting canned milk. You need to warm it gently before you add it, though, or it will splatter and could give you some nasty little burns.
On using evaporated milk
During my experimental phase, which coincided with when I tried dieting, I tried using evaporated milk, as it has a lot fewer calories than heavy cream. I can report it works pretty well.
If you want to try this alternative:
- You need to reduce the evaporated milk down until 60% of the moisture has boiled out. It will leave you with a thick and gooey, fat-free milky substance.
In my earlier experiments with milk, I found that it tended to curdle at high heat. Reduced evaporated milk is much more stable and results in an excellent caramel sauce that is a good copy of the real thing.
Note: If you want to try making caramel sauce with evaporated milk instead of heavy cream, add the same proportion after it has been reduced.
Caramel from a health point of view
Let's face it, with all that sugar, caramel is never going to be the healthiest thing to eat, nor is caramel sauce with all of that scrummy heavy cream.
However, having said that, it's not all doom and disaster. The caramel itself, when layered onto a crème brûlée, for example, is low in fat.
The other thing worth bearing in mind is that sugar gives you an energy boost.
While it's true that caramel can hardly be described as being nutritious, it is possible to keep the calories down when making caramel sauce.
The evaporated milk substitution we just talked about is a good case in point.
- A whole cup of heavy cream comes laden with 821 calories, plus 88 grams- worth of fat. 55 of the 88 grams are saturated fat too.
- By comparison, a cup of evaporated milk contains only 340 cal and just 20 g of fat, 12 of which are saturated.
There you go. You can indulge yourself and feel relatively less guilty into the bargain.
Using Half and Half instead of heavy cream
Another way of cutting the calories of caramel sauce is to swap the heavy cream for half and half.
Heavy cream is gorgeously indulgent, but indulgence comes at a price, and that price is the heavy fat content.
Heavy cream has a 38% fat content, whereas half and half contain only a 12% content - less than one-third of its heavy counterpart.
Half and half is not really suitable to use as whipping cream, but you can use it to make a less calorific caramel sauce.
Use it in the same amount as you would heavy cream. Unless you're an absolute caramel sauce connoisseur, it is unlikely you'll spot the difference.
Don't let it go to waste.
Once you've gone to the trouble of making that heavenly caramel sauce, be it the full fat or lighter version, you want to make sure you use it all up.
- It's great with apple pie, caramel macchiato cheesecake, and of course, on top of ice cream.
- It's also heavenly on bananas.
- It will take almost any dessert to the next level.
If you got any leftover, pour it into a glass or plastic container and store it in your fridge at 40°F, where it will be safe for up to five days.
How to soften caramel that is too hard
Caramel's texture is pretty much reliant on how much moisture it has. The more that evaporates during the cooking process, the harder the caramel will become, even when it's still quite hot. It's when it begins to cool that it will start to crystallize.
If you want to keep an eye on your sugar syrup's temperature while cooking it, you need to get a candy thermometer.
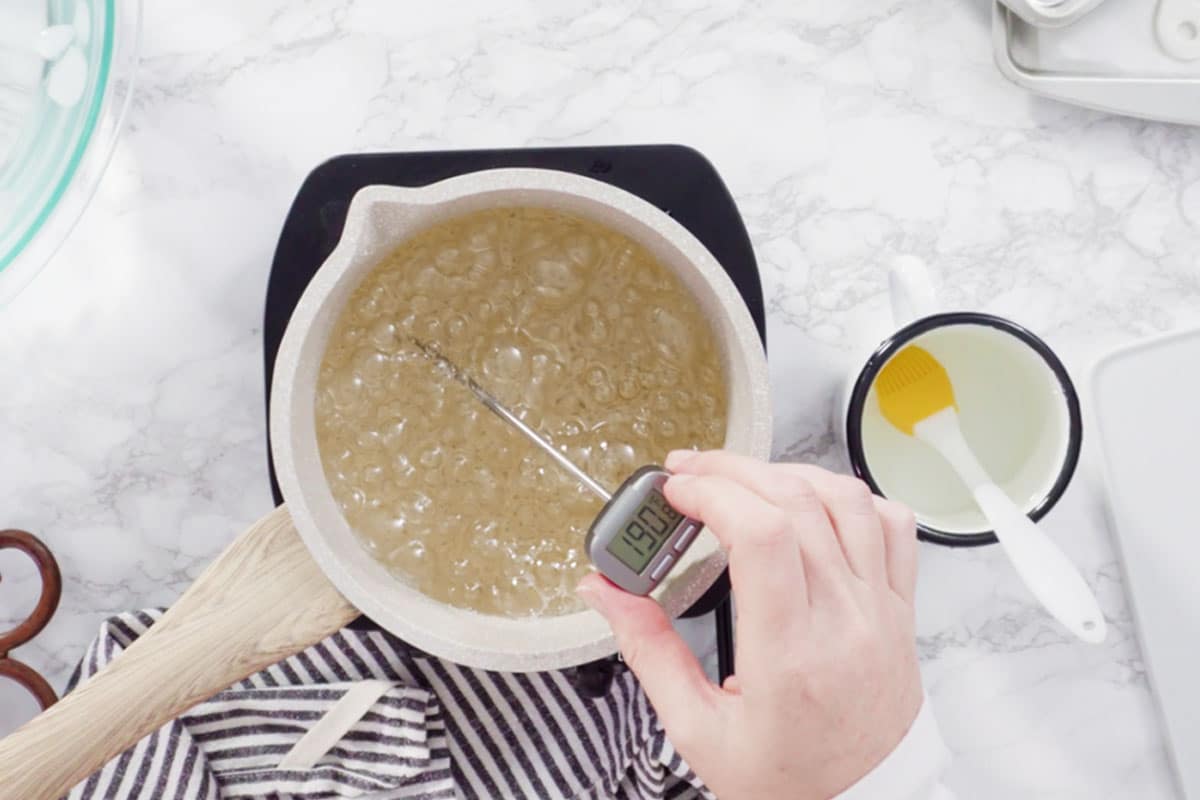
You can buy them at most kitchens and some grocery supply stores. They are very easy to use and are the perfect tool for measuring hot sugar syrup's temperature.
If you ever need to check that your candy thermometer is functioning properly, pop it into a pan of boiling water.
If it shows a temperature of 212°F or 100°C, it's working accurately.
Here's how to do it:
- When a caramel sauce mixture is too solid, and you want it to soften, transfer it back into a pan
- Add two tablespoonfuls of water, then heat, stirring all the while, until your trusty candy thermometer shows the temperature of the caramel to be 242°F.
- Be sure to heat it gently and keep stirring to avoid it burning.
- Once the caramel has completely liquefied, you can test the consistency using a spoon.
- Gather up a spoonful of sauce, cool it down under cold water, and when it's cool enough, try a bite. If you feel it is too soft, carry on cooking to get more moisture.
- If it's too hard, add another two tablespoons of water, and cook until it reaches that same 242°F benchmark.
- Once you are happy with the consistency, transfer it into a pre-buttered pan and allow it to cool.
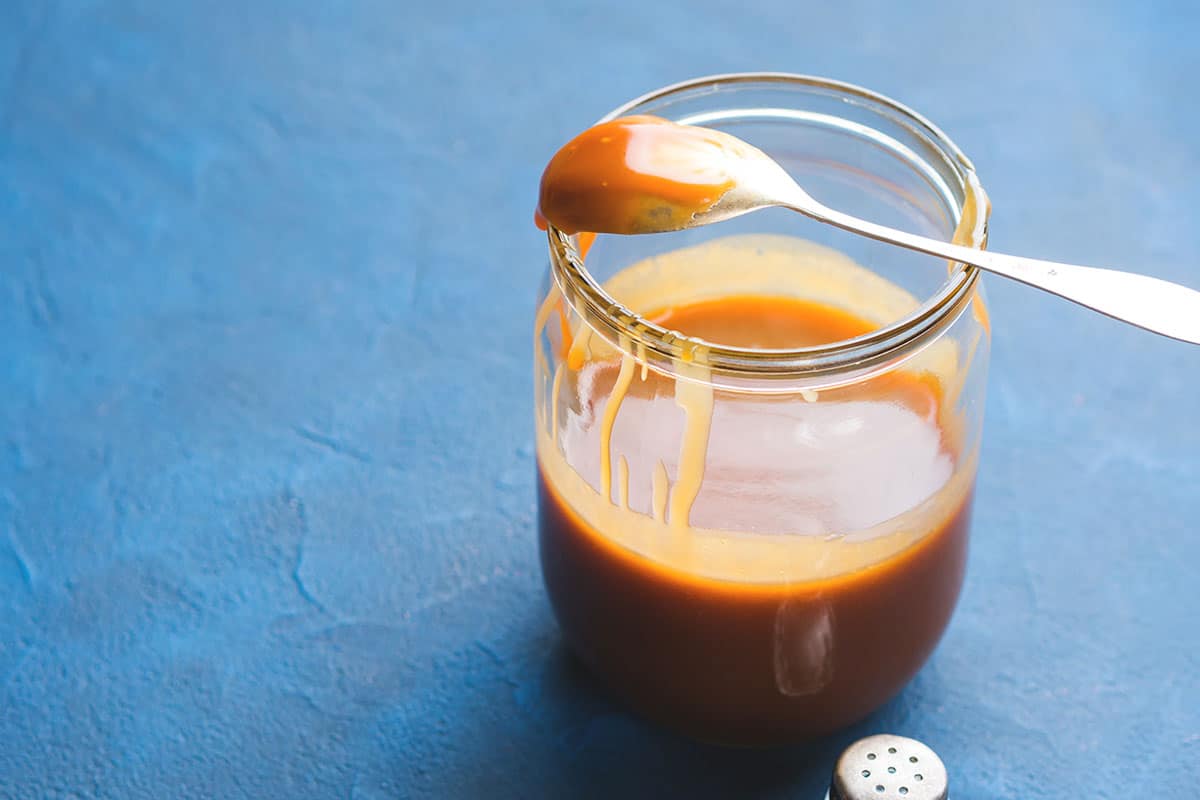
How to store your caramel sauce
- As soon as your caramel sauce is beautifully smooth, transfer it straight away into a heat-resistant container.
- Using a heat-proof dish is essential because hot caramel is a bit like hot lava. It will quickly melt many plastics and give you a nasty burn if accidentally you splash yourself.
- Try not to scrape the bottom of the pan, as you might unwittingly free up any lingering sugar crystals and ruin your wonderfully smooth source.
- Allow the caramel sauce to cool down, after which you can put it into your fridge. It will keep for as long as 14 days - any longer, and it will begin to get grainy as the sugar starts to crystallize.
Fridge stored caramel sauce will harden as it cools, which is easy to microwave when you need it - see below.
If you want to keep your caramel sauce for longer than two weeks, you can store it in your freezer, where it will be good for up to 3 months.
Re-heating caramel sauce in the microwave
The easiest and quickest way to re-heat caramel sauce is in your microwave.
- First, you need to transfer the caramel sauce into a microwave-safe dish.
- Then, with your microwave on a high setting, blast the sauce for 10 to 15-second intervals until it is nice and soft.
- Give it a quick stir before using.
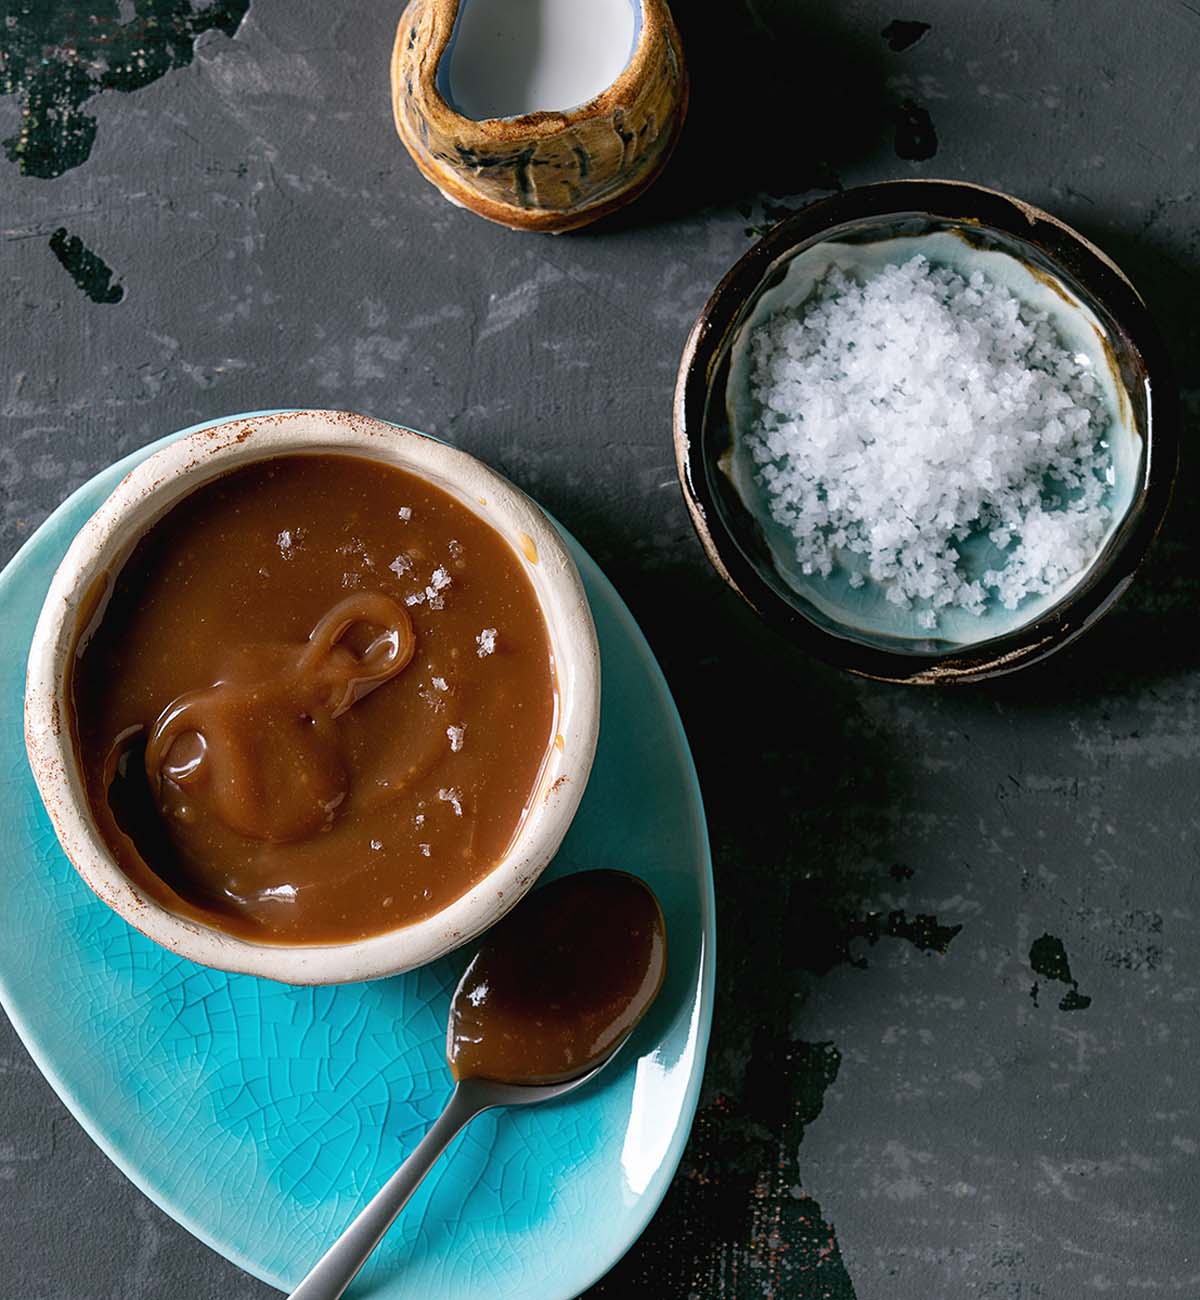
Salted caramel is double yummy
If you have a sophisticated palate, you should try salted caramel. It tastes superb.
Because caramel sauce is the ultimate sweetness and is incredibly rich, a tiny pinch of salt gives it a whole new dimension and balances that sweet richness to perfection.
If you get hooked on salted caramel, you can go one step further and top it off with large flakes of salt. Heavenly.
Cleaning up after making caramel sauce
Making caramel for something like a Tarte Tatin (a recipe for another day) or caramel pouring sauce can be a messy business. Luckily, cleaning up afterward is a bit of a breeze.
- All you need to hot water - the hotter, the better. It will quickly remove any residue left in the pan, with the aid of a gentle scrape and any tools you might have used - a whisk, a spoon or a spatula, or all three - just soak them in hot water for a few minutes, and any residual gooey will come away easily.
- If you had a bit of a disaster when you made your caramel, and it got burnt - scorched to the pan, you can fill the pan with water and bring it to the boil on your stovetop.
- Take a wooden spoon or heat-proof spatula and gently scrape the pan's bottom and sides to remove any stubborn bits. Then take off the heat, pour out the hot water and wash in warm soapy water.
Mistakes to watch out for and avoid when making caramel sauce
Caramel is incredibly easy to make and requires few ingredients, but nonetheless, several things can go wrong.
1.) Using the wrong type of pan
Whatever you do, don't use a thin pan. They don't conduct heat that well, and you can end up with hot and not-so-hot spots in the pan.
Instead, use a heavy-bottomed pan with high sides. If it is light in color, so much the better as you will be able to monitor the caramel's color changes more easily.
2.) Using the wrong sugar
Not all sugars are equal, especially when it comes to making caramel.
Fancy sugars are out. Ordinary, granulated, refined white sugar is the one to use.
It melts nice and easy and doesn't clump as other sugars do. It's the best sugar to use for a super smooth caramel sauce.
3.) Keep your hands to yourself
Hot sugar syrup is sticky, gooey stuff. It doesn't take well to stirring and will stick to any implement you use.
So, rather than stirring, it's best to lift and swirl the whole pan.
4.) Use a candy thermometer
Once you get used to making caramel, you will probably be able to get away with making it by eye. For caramel novices, however, I recommend using a special thermometer - something like a Thermapen thermometer.
Temperature is key when making caramel, and this tool will help you be on top of your game. Use it to gauge when you are approaching the various temperatures referred to earlier (thread, soft-ball, firm-ball, hard-ball, soft crack, or hard crack).
5.) Avoid overheating
It is so easy to overheat caramel, and in the instant of any eye, it can scorch and burn and become bitter.
That is why I am so adamant about recommending the use of a candy thermometer for caramel newbies.
6.) Beware of the dark
The darker the caramel, the better the flavor - at least, up to a point. So, don't get tempted to overdo it, or you will up with a dark, acrid-tasting mess.
Keep the heat under the pan low and even, and use your candy thermometer to monitor progress.
If it does look like it's gone a bit too far, you can try and revive it with a tablespoon or two of water.
7.) Don't scrape the bottom of the pan
When removing the cooked caramel from the pan, don't scrape the pan's bottom. If you do, you might inadvertently pick up some crystals, which will ruin the whole batch. If you leave a little sauce behind in ht pan, so be it. It's a case of less is more.
So, there you have it. If you closely follow my instruction, you will end up with the most delicious, rich, and indulgent caramel sauce ever-way to go.
Other interesting recipes:
- Keto Caramel Sauce
- Super Smooth Instant Pot Flan
- Cheese Tea Recipe
- Breakfast Stuffed Bread Nutella French Toast
Caramel Sauce has Crystallized? (Here's How to Fix it)
Pin RecipeIngredients:
- caramel sauce
Instructions:
How to fix grainy caramel:
- The best way to resolve this issue of crystallization or grainy caramel sauce is to add more water. This means you should start over so the gritty sugar crystals dissolve once again.
- Immediately remove the pan from the stovetop. Repeat the process by re-heating the sugar in low heat (understand that this will take time, patience is the key).
- Carefully add two, three, or more tablespoons of water.
- Put it back on medium-low heat, and very gently, stir the syrup to dissolve the crystals.
- Once the water has all evaporated and the sugar is warm enough, the caramelization will start. Give the pan a swirl.
- Turn off the heat and let the mixture cool down a bit before transferring it into a glass container for storage.
Ways to prevent grainy caramel from happening:
- Before you begin cooking, lightly oil the sides of the pan to discourage crystals from sticking.
- Halfway through the cooking process, dissolve any crystals that form on the sides of the pan using a dampened pastry brush.
- Another way of dissolving crystals that form on the pan's sides is to put a lid tightly in place, which will create steam and liquify them.
- Another technique is to add a little corn syrup into the syrup. The syrup crystallizes when it is pure. By adding corn syrup, you are introducing another element into the mixture. It limits the chances of a crystal-forming chain reaction taking place.
- Other additions that do the same job include acids such as cream of tartar, lemon juice, or vinegar.
- Refrain from stirring the syrup until it starts to change color, which is an indication that the water has evaporated. Before the color change begins, the syrup might still have undissolved sugar crystals in it.
Please note that all nutrition information are just estimates. Values will vary among brands, so we encourage you to calculate these on your own for most accurate results.