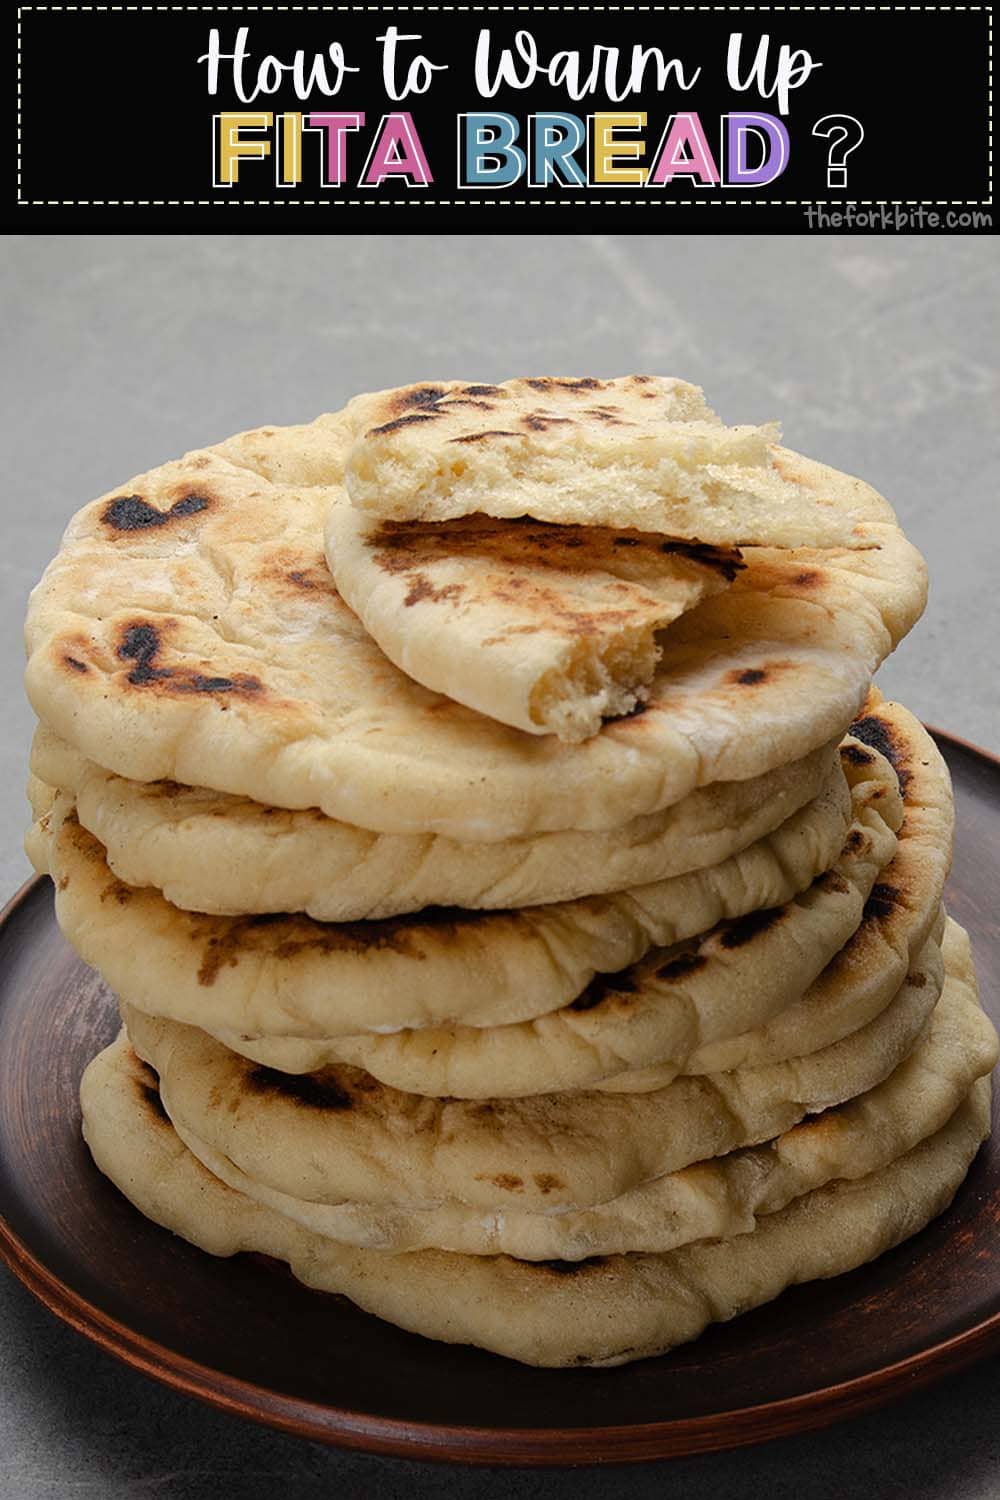
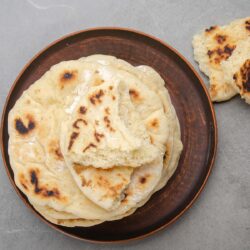
How to warm up Pita bread. Warming Pita bread is so fast and convenient. To microwave pita successfully, you need to do a few seconds of prep.
There is something magical about pita bread. The fact that you open them up like pockets and stuff them full of goodies makes them fun, and with a little bit of invention, exciting things to eat.
They are a great alternative to sandwiches and pizzas and can be used to make the best ever snacks, hot or cold.
Where did Pita bread originate?
Pita bread originated in the Middle East - in fact, it has been a staple in Middle Eastern and Mediterranean countries for more than 4,000 years.
Farmers and desert nomads in countries to the West of the Mediterranean Sea have enjoyed pita bread since it arrived, courtesy of travelers from the Arabian and Sahara deserts who visited all those centuries ago.
The product we know here in the US as Pita Bread is sometimes called Arabic or Syrian bread. The word "Pita" comes from Greece ( πίτα, píta, "bread, cake, pie, pitta").
In Mediterranean countries, pitas are often stuffed with a wide range of things, including falafel, various meats, and exotic veggies.
In nations where the natives eat with their hands rather than knives and forks or chopsticks, pitas are used like little shovels to scoop up baba ghanoush, hummus, and other local delicacies.
You'll find pita bread on the shelves of most supermarkets across the US, but it is never quite as good as the genuine article you can buy on the streets of towns in the Middle east.
However, you can turn store-bought pitas into something very close to the genuine article by heating.
How to warm up Fita bread
There are four ways on how to toast Pita bread. Read on to find out more. We will begin with heating Pita bread over an open flame.
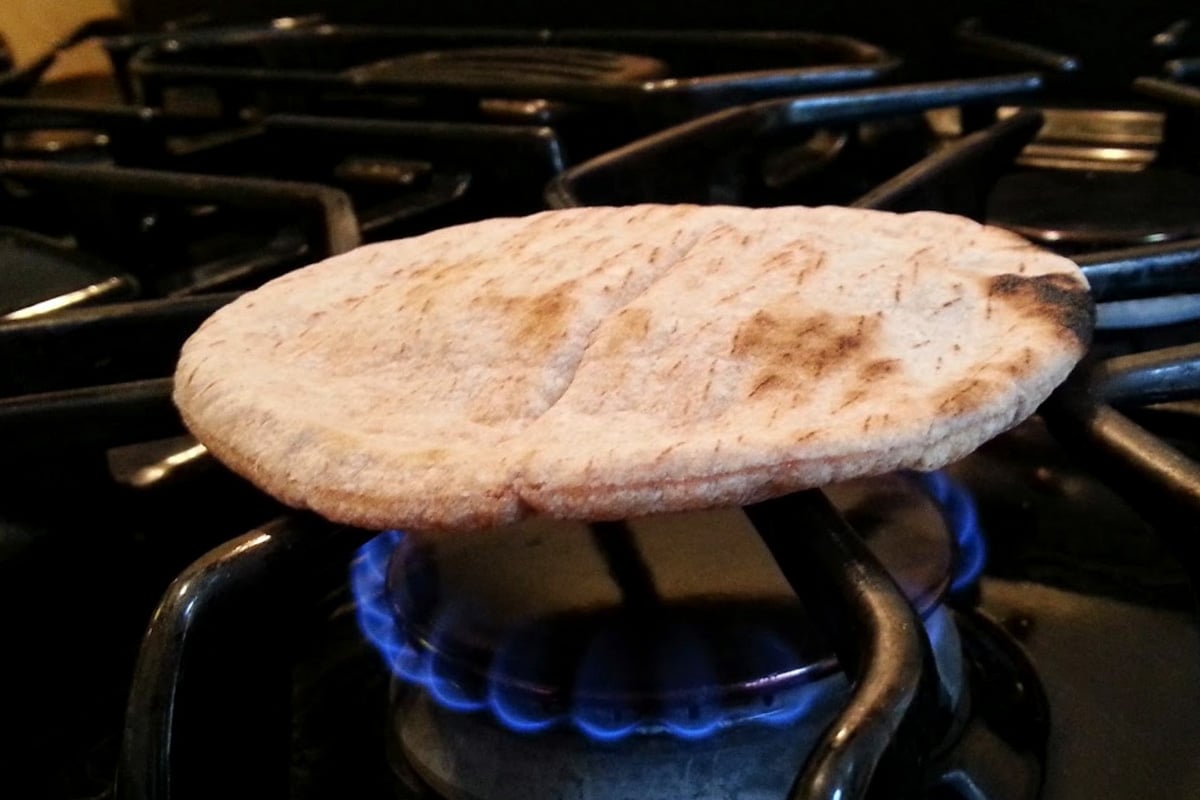
1 Flame-warmed Pita bread
The easiest way to flame warm pita is using a gas-powered stove. If you haven't got one, you can improvise by using any other source of fire, such as a portable camper-stove, or a barbecue, etc.
- Using a pair of tongs, place the pita bread over an open flame
- Leave it there for approximately 40 seconds
- With your tongs, flip it over to warm the other side for another 40 seconds.
The warming time is down to the individual. Some people want it just warmed through; others like to have their pita a little charred in places. - Adjust the time to your preference.
A trick learned in Riyadh
A few years ago, I visited an old university friend, Anisah, now living in Riyadh, Saudi Arabia. I was surprised to see store-bought pita bread in her pantry. I guess I shouldn't have been. She spent a few years in the States.
Not only that, but when she gets the urge for a warm pita pocket in Saudi, she didn't necessarily want to have to go out onto the street, so, for convenience, she keeps some on hand.
This is what she does.
- Start by warming over a naked flame as described above. Once it puffs up with hot air, take off the flame and put it back into the plastic bag from whence it came.
- Putting it into the plastic wrapper or Ziploc bag allows the pita to steam in its own hot air inside the bag.
It gives it that oven-fresh texture midway between being toasted and chewy. It's great. Give it a try.
2 Oven-warmed Pita bread
This is how most people in the US like to warm their pita pockets.
- Preheat the oven to a temperature of 350° Fahrenheit.
- Take however many pitas you want to warm out of the packaging.
- Take a sheet of aluminum foil and wrap the pockets
- Put the foil parcel into the prewarmed oven and warm through for between 5 to 10 minutes.
- Wearing an oven glove or using a pair of tongs, remove the package from the oven.
- Unwrap carefully to avoid burning your fingers.
Here is another method you can try when you want to take your pitas to the next level by adding a herby or spicey flavor hit.
This works for both fresh or frozen pitas.
- Preheat your oven to 325°F.
- Take the bread out of the packaging.
- With a pastry brush, coat each pita with a thin film of olive oil
- Add whatever herbs or spices you desire and place them on the top rack in the oven.
- Heat for between 5 and 10 minutes.
3 How to heat up Pita bread in a pan
If you prefer to warm your pita bread in a skillet, it's important that the pan is big enough to allow the pita to sit completely flat.
Pitta bread is usually quite small in diameter is so it shouldn't be a problem.
- Preheat the skillet on your stovetop over medium to high heat.
- Have a large pot with a lid together with some tongs and a fork or spatula stood by in preparation for handling the hot pita bread.
- Remove a pita pocket from the packaging, and with a pastry brush, lightly coat on each side with a thin layer of olive oil.
- Transfer the pita into the skillet and cook for approximately 10 seconds.
- Using your spatula or tongs, flip the pita over and heat on the other side for another 10 seconds.
- The pita is ready when it is soft and springy. Be careful not to scorch it or overheat it as it will become dry.
- Transfer the warmed pita bread from the skillet into the pot with the spatula or tongs and put the lid firmly in place.
- Depending on how many pitas you intend to prepare, warm them through one at a time, following the same procedure.
- When you finished warming the batch, transfer them to a cloth-lined basket and serve
4 Microwaving Pita bread
Warming food in the microwave is so fast and convenient. To microwave pita successfully, you need to do a few seconds of prep.
- Cut the pita bread into small triangular slices.
- Take a sheet of kitchen paper or a towel. Dampen it and spread it over a microwave-safe plate or shallow dish.
- Transfer the triangular slices of pita onto the lined plate and microwave for 30 seconds.
- Try not to overheat as the pita pocket will dry out.
The first few times you do this, you can microwave in 10-second blasts and check after each one to see how it's progressing.
You are aiming to get the pitas warmed through but still soft and flexible. Don't forget that when you remove microwaved food, it continues to cook for a few seconds.
So don't put it back into the microwave until you've given it a little rest and test.

They call them Pita pockets for nothing.
Pita bread is often referred to as pita pockets, and with good reason.
You can open them along one side to create a pocket, and into that pocket, you can load them full of culinary goodies.
Here are a few ideas to get those gastronomic juices flowing.
1 Beefy pita bread
Leftover, pink roast beef is a great meat to put into a pita pocket. But if you don't have any leftovers handy, you can use a leftover hamburger pattie instead.
If using roast beef, slice it finely, and if using hamburger, crumble it into the pita pocket.
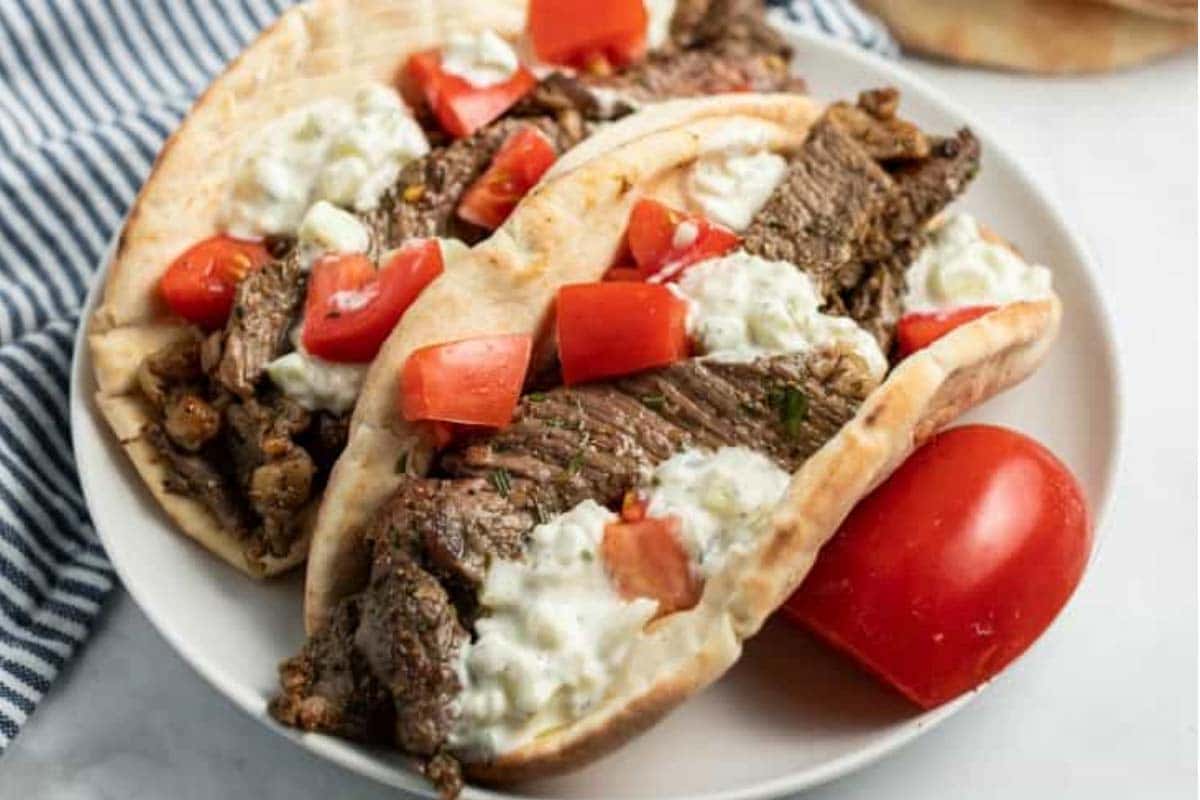
Throw in some chopped lettuce with some slices of onion and tomato, dress with a bit of mayonnaise, and you've got yourself a delicious beefy salad pocket.
Alternatively, in addition to the meat and salad items, add some grated cheese of your choice, and a little (or a lot) sweet honey mustard, or some horseradish, or a few drops of vinaigrette. (recipe here).
2 Asian chicken Pita pocket
How about this for a tasty Asian chicken pita pocket. Whisk up a dressing with mayonnaise, garlic, ginger, lime juice, oil (sesame oil is the best, but any light veggie oil will do), and sriracha.
Spread the dressing evenly over the inside surface of a cut pita pocket.
Take some leftover cooked chicken, put it into a bowl, and add some chopped cabbage, carrot, scallion, and cilantro.
Sprinkle over with lime juice and toss. Then fill the pocket, eat and enjoy.
3 Chinese style pulled pork Pita
Still, on the Asian theme, I absolutely love Chinese belly pork in Bao Buns (steamed buns).
But when I am short of time, and there are no bao buns around, a great substitute is warm Chinese style pulled pork in a warm pita pocket. Just the thought of it makes my mouth water.

Take some leftover pulled pork, add a mixing bowl with some chopped scallions, and chopped leftover bok choy.
Add a couple of generous tablespoons of a good hoisin sauce, mix together, and microwave for 20 to 30 seconds until warmed through.
Warm a pita pocket, slice open, and insert the warm pulled pork filling. If you don't have any leftover bok choy, nice crispy lettuce will do. Yum!
4 Baked smoked salmon Pita bites
If you are in the party mood, why not kick off with some delicious little triangular baked pita bites with cream cheese, smoked salmon, and a sprinkling of dill?
These are so easy to make, and your friends and family will love them.
Here's a recipe at which you might like to take a peek.

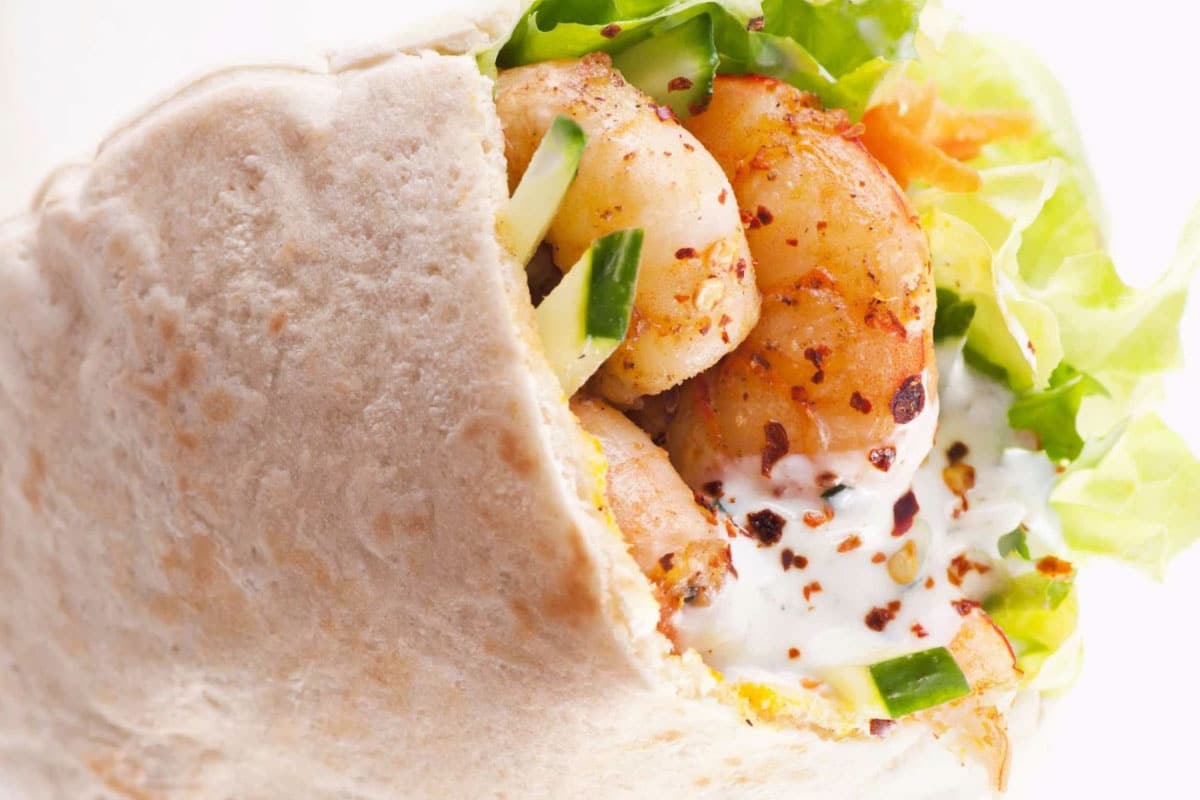
5 Shrimp Pita Mediterranean style
Stuffed pita pockets are a great idea for picnics, and shrimp stuffed pitas Mediterranean style are awesome.
They are a heavenly combination of pita, shrimp, garlic, crunchy lettuce, sun-dried tomatoes, hummus, a mixture of herbs, and a liberal squeeze of lemon juice.
You'll find the full recipe on the nutriciousfood.com website.
They are luxuriously indulgent but at the same time lovely and fresh.
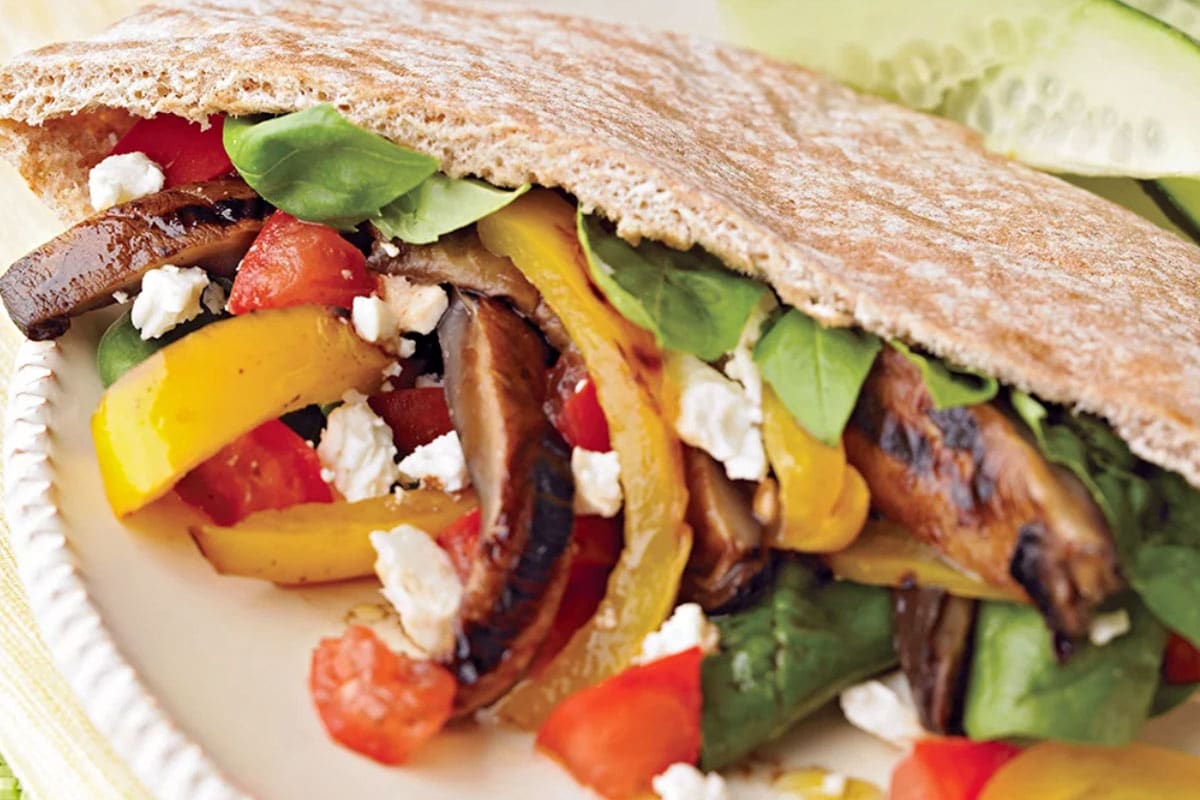
6 Grilled veggie Pita pockets
This heavenly recipe is the taste of sun-kissed Greece thanks to the inclusion of Feta cheese. It's a great dish to prepare on a barbecue, but you can cook it equally well on your indoor kitchen grill.
It's all about olive oil-coated grilled mushrooms and bell peppers, combined with fresh basil leaves, shredded spinach, and chopped tomatoes, with crumbled feta cheese.
You can find the full recipe on the eatingwell.com website. But don't stick religiously to this recipe.
Invent some fillings of your own using things like bulgar wheat, couscous, cucumber, celery, olives, and tabbouleh. The sky's the limit.
Fun things to do with Pita bread
There are lots of different loaves of bread around, but there is only one pita pocket, and it's the pocket feature that makes them such fun.
Here are a few ideas you can try out.
1 Breakfast Pita Pizza
Fancy a different breakfast? Try this tasty breakfast idea from the chowhound.com website that uses a pita bread base with eggs, baby spinach leaves, mozzarella, oregano, and red pepper flakes.
It's quick and easy, taking only about 15-minutes to prepare and cook.
2 Jelly and Peanut Butter Pita
Your kids will adore this. A jelly and peanut butter lined pocket. What's not to like? You can microwave it for 15 to 30 seconds and serve warm too.
3 Jalapeño Pita Poppers
Jalapeño Poppers are right up there for me regarding the snacks I adore. The crunchy outer, the soft cream cheese filling, and the heat of the jalapeño are just amazing.
In this recipe, sliced and thrown onto a pita base with ranch sauce, grated cheese, and panko breadcrumbs and oven cooked for 10 to 12 minutes, and you'll be in gastro-heaven.

4 Spiced Pita Chip with Hummus
This dish is an excellent addition to any finger bowl party. It's informal and fun. It consists of a hummus dip made using chickpeas, garlic, lemon, and tahini, with some oven-baked pita triangles for scooping.
Once you've tried this recipe, it will be one of your regular party pieces.
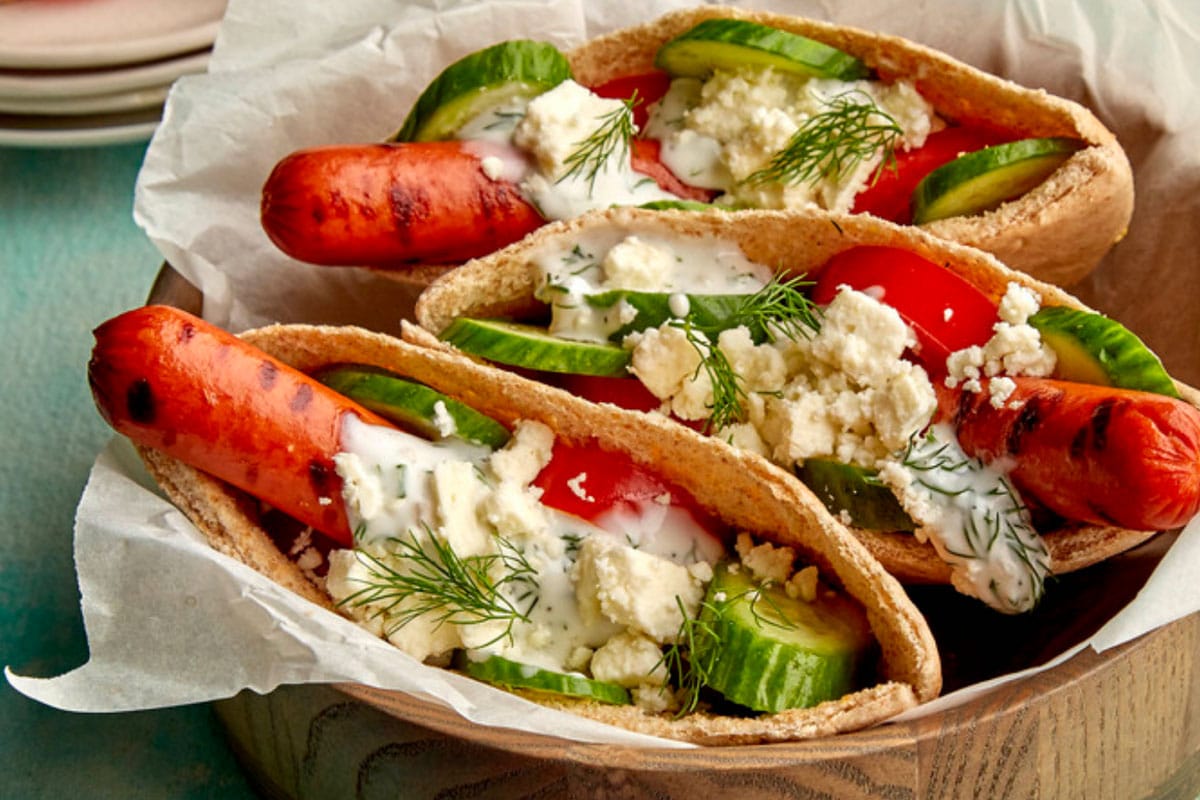
5 Pita Dogs
Ditch the hot dog buns, and instead, wrap your weenies in a pita pocket. Eat with a great big dollop of your favorite mustard.
It also works great with lamb koftas smothered in a yogurt dressing.
Pitas are just so versatile, so why not get inventive and try some recipes of your own.
Please feel free to let me know when you find one worthy of sharing.
Freezing Pita bread
Pita bread freezes really well. For the best results, follow these steps.
- If your pita bread is still in its original, unopened packaging, all you have to do is wrap everything in some aluminum foil and throw it in the freezer.
The foil wrapping will help to protect the pita from freezer burn.
Suppose you've opened the packaging and discarded it, and you've got some leftover pitas you want to freeze.
In that case, you'll need to put the pockets into a Ziploc freezer bag, evacuate as much air as possible, then wrap in aluminum foil.
They should be okay for up to three months.
Defrosting frozen Pita
Defrosting frozen pita bread couldn't be easier. All you have to do is remove it from the freezer and leave it on your kitchen working surface until it thaws.
- If you like your defrosted pita to be warm and a little crispy, warm it straight from the freezer, one pocket at a time, over a naked flame.
- Move it about every five to ten seconds, so it doesn't burn. Within one minute, you'll be good to go.
You can defrost it in the microwave if you want it cold or coldish and pliable.
If you do use the microwave, I suggest sprinkling a few drops of water over the pita. It helps to speed the thawing and keeps the bread moist.
Make your own Pita bread
Making our own pita is easy. There is only a little kneading involved, but it is a little time-consuming because you have to let the dough rise.
All you need is:
- Dry, active yeast - 2 tsp
- Sugar - ½ tsp
- Whole wheat flour - ¼ cup
- All-purpose flour - 2 ½ cups
- Salt - 1 tsp
- Extra virgin olive oil - 2 tbsps
Step by step instructions:
Step 1
Pour one cup of lukewarm water into a large mixing bowl, add yeast and sugar and stir until dissolved.
Step 2
Add half the whole wheat flour and a ¼ cup of the all-purpose flour and gently whisk.
Step 3
Position the bowl in a warm location and leave (uncovered) for approximately 15 minutes.
Step 4
The mixture should become frothy and bubbly. If it doesn't, it means the yeast is dead, and you will need to start over.
Step 5
Add almost the rest of the all-purpose flour but holding back ½ a cup.
Step 6
Add the olive oil and salt and gently combine all the ingredients with a wooden spoon. Dust with some of the reserved flour and knead for one minute.
Step 7
Transfer the dough onto the working surface and lightly knead for two minutes until it becomes smooth.
Step 8
Cover it with a kitchen towel and let it stand for 10 minutes.
Step 9
Knead again for a further two minutes. While kneading, you can use a little of the reserved flour as a light dusting to prevent the dough from sticking to your hands.
Step 10
The dough can now be refrigerated in a Ziploc bag for a few hours or overnight if you wish.
If you follow this step, you will need to bring the dough back to room temperature and knead it into a ball before proceeding.
If necessary, clean the mixing bowl before transferring the dough back into it.
Step 11
Using plastic wrap, cover the bowl tightly and drape a towel across. Place the bowl into a warm place and leave for approximately one hour until the dough has doubled in size.
Step 12
Preheat an oven to 470°F. Place a heavy-duty baking sheet or a ceramic baking tile or cast-iron pan on the bottom shelf of the oven.
Step 13
Divide the dough into eight equal-sized pieces and form into small balls.
Put the balls on the work surface, cover them with a damp towel, and leave to stand for 10 minutes.
Step 14
Take one dough ball at a time (leaving the others covered) and form into a flat disc using a rolling pin. Roll to an 8-inch diameter circle approximately ⅛ of an inch thick, dusting with flour during the process if necessary.
Step 15
Gently but quickly transfer the circular dough onto a hot baking sheet. After a couple of minutes, the dough should have puffed up nicely.
Step 16
Flip the pitta over with a spatula or pair of tongs and bake for a further minute. The pitta pocket should be pale with a few dark speckles dispersed across its surfaces.
Step 17
Transfer to a lined basket and cover so that the pita bread remains soft. Repeat until all of the batches have been cooked.
Cutting Pita Bread
You can cut pita bread in one of three ways.
- Holding the pita flat against a breadboard.
- Cut with a sharp serrated knife.
- With a pair of kitchen shears, or using my favorite method and cut with a pizza cutter.
If you ruin any pita in the process but don't want to waste it, you can always make a Fattoush with it.
Naan vs Pita
Some people get confused between Naan and Pita bread. Which is which?
Naan bread originates from Persia or Iran as it now is. Historically, it was cooked on hot stones around campfires.
In India, which is the country that most people associate with naan bread, it is cooked on the vertical walls of a tandoor oven.
If like most people, you do not own a tandoor oven, you can still cook naan by putting it onto a hot pizza stone hot and inserting it into a hot, regular oven.
As well as being cooked differently, naan bread differs from pita bread because its recipe contains more salt and sugar. The dough sometimes also contains yogurt.
Interesting recipes
How to Warm Up Pita Bread (How-to)
Pin RecipeEquipments:
- stovetop
- Oven
- Microwave
- Open flame
Ingredients:
- Pita bread (leftover)
Instructions:
Warming up in Stovetop
- Using a pair of tongs, place the pita bread over an open flame. Leave it there for approximately 40 seconds.
- With your tongs, flip it over to warm the other side for another 40 seconds. The warming time is down to the individual. Some people want it just warmed through; others like to have their pita a little charred in places.
- Adjust the time to your preference.
- Once it puffs up with hot air, take off the flame and put it back into the plastic bag from whence it came.
- Putting it into the plastic wrapper allows the pita to steam in its own hot air inside the bag. It gives it that oven-fresh texture midway between being toasted and chewy.
How to toast Pita bread in the Oven
- Preheat the oven to a temperature of 350° Fahrenheit.
- Take however many pitas you want to warm out of the packaging.
- Take a sheet of aluminum foil and wrap the pockets. Put the foil parcel into the prewarmed oven and warm through for between 10 and 12 minutes.
- Wearing an oven glove or using a pair of tongs, remove the package from the oven. Unwrap carefully to avoid burning your fingers.
How to heat up Pita bread in the pan
- Preheat the skillet on your stovetop over medium to high heat.
- Have a large pan with a lid together with some tongs and a fork or spatula stood by in preparation for handling the hot pitta bread.
- Remove a pita pocket from the packaging, and with a pastry brush, lightly coat on each side with a thin layer of olive oil.
- Transfer the Pita into the skillet and cook for approximately 10 seconds. Using your spatula or tongs, flip the pita over and heat on the other side for another 10 seconds.
- The pita is ready when it is soft and springy. Be careful not to scorch it or overheat it as it will become dry.
- Transfer the warmed pita bread from the skillet into the pot with the spatula or tongs and put the lid firmly in place.
- When you finished warming the batch, transfer them to a cloth-lined basket and serve.
How to heat up Pita bread in the Microwave
- Cut the pita bread into small triangular slices. Disregard the cutting if you want your Pita as a whole.
- Take a sheet of kitchen paper or a towel. Dampen it and spread it over a microwave-safe plate or shallow dish.
- Transfer the triangular slices of pita onto the lined plate and microwave for 30 seconds. Try not to overheat as the pita pocket will dry out.
- The first few times you do this, you can microwave in 10-second blasts and check after each one to see how it's progressing.
- You are aiming to get the pitas warmed through but still soft and flexible. Don't forget that when you remove microwaved food, it continues to cook for a few seconds.
- So don't put it back into the microwave until you've given it a little rest and test.
Notes:
Please note that all nutrition information are just estimates. Values will vary among brands, so we encourage you to calculate these on your own for most accurate results.