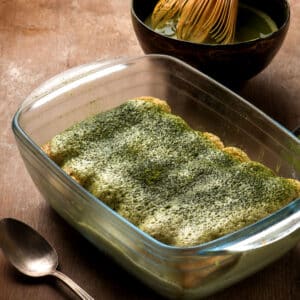
Why This Matcha Tiramisu Recipe Shines? The traditional Italian Tiramisu recipe often calls for raw eggs whisked over a double boiler, which can be tricky even for seasoned bakers. In this recipe, we switch things up by using fresh whipped cream. This substitution gives you that delectable creaminess and fantastic flavor without working with eggs.
The result? A Matcha Tiramisu that's simple to assemble and swift to make yet doesn't compromise on flavor. You'll find a silky, creamy mascarpone filling graced with ceremonial-grade Matcha nestled between layers of gluten-free ladyfingers.
Take aways:
- Fusion of Flavors: Matcha Tiramisu is a delightful blend of Italian and Japanese culinary traditions, creating a unique dessert experience that's both exotic and familiar.
- DIY Delight: Making this recipe at home, from the ladyfingers to the mascarpone cream, can be a fun and rewarding culinary project.
- Your Recipe, Your Rules: This recipe is highly adaptable. You can adjust the matcha intensity, add alcohol for an extra kick, or keep it gluten-free, depending on your preferences.
Jump to:
In Matcha Tiramisu, Japanese and Italian culinary traditions intertwine. Tiramisu leaps across the globe to embrace the vibrant energy of Matcha. This harmony of distinct flavors creates a unique, unforgettable dessert experience. Let's delve deeper into this delicious fusion!
Matcha: More than just green tea
Let's unravel the rich tapestry of Matcha. Steeped in centuries of tradition, this vibrant green tea powder is central to Japanese culture and ceremonies. It's more than a beverage; it symbolizes hospitality, mindfulness, and respect. Matcha packs a healthful punch with antioxidants, amino acids, and vitamins.
Highlighting its unique flavor profile and uses
Now, think about Matcha's distinct flavor - a balance of umami and sweetness with a hint of bitterness. Matcha adds depth and complexity to desserts, making every bite an adventure. It's the secret weapon in our Matcha Tiramisu recipe, adding a burst of color and a flavor that sets it apart.
Tiramisu: The crown jewel of Italian desserts
Tiramisu is a timeless classic with roots in Italy. It began charming taste buds in the 1960s in the Veneto region. Over time, Tiramisu evolved, gaining popularity worldwide for its exquisite balance of coffee, Mascarpone, and cocoa. It's a true testament to Italy's rich culinary history.
Essential components of a classic Tiramisu recipe
Ah, the delight of learning how to make a Tiramisu recipe! It's all about the symphony of key components. We begin with ladyfingers, briefly dipped in a deep coffee brew - yes, tiramisu does have caffeine, courtesy of this brew. This forms an enticing foundation, amplified by the traditional addition of a quality Marsala wine or rum, answering the query of what alcohol is in tiramisu.
We layer a creamy blend of Mascarpone, eggs, and sugar atop this base for a luxurious contrast. And to crown this culinary work of art, we lightly dust it with cocoa powder. Yet, our Matcha Tiramisu recipe takes it a step further, adding captivating notes of Matcha into the ensemble. Every ingredient shines in its own right, but together they orchestrate a dessert that transcends the sum of its parts.
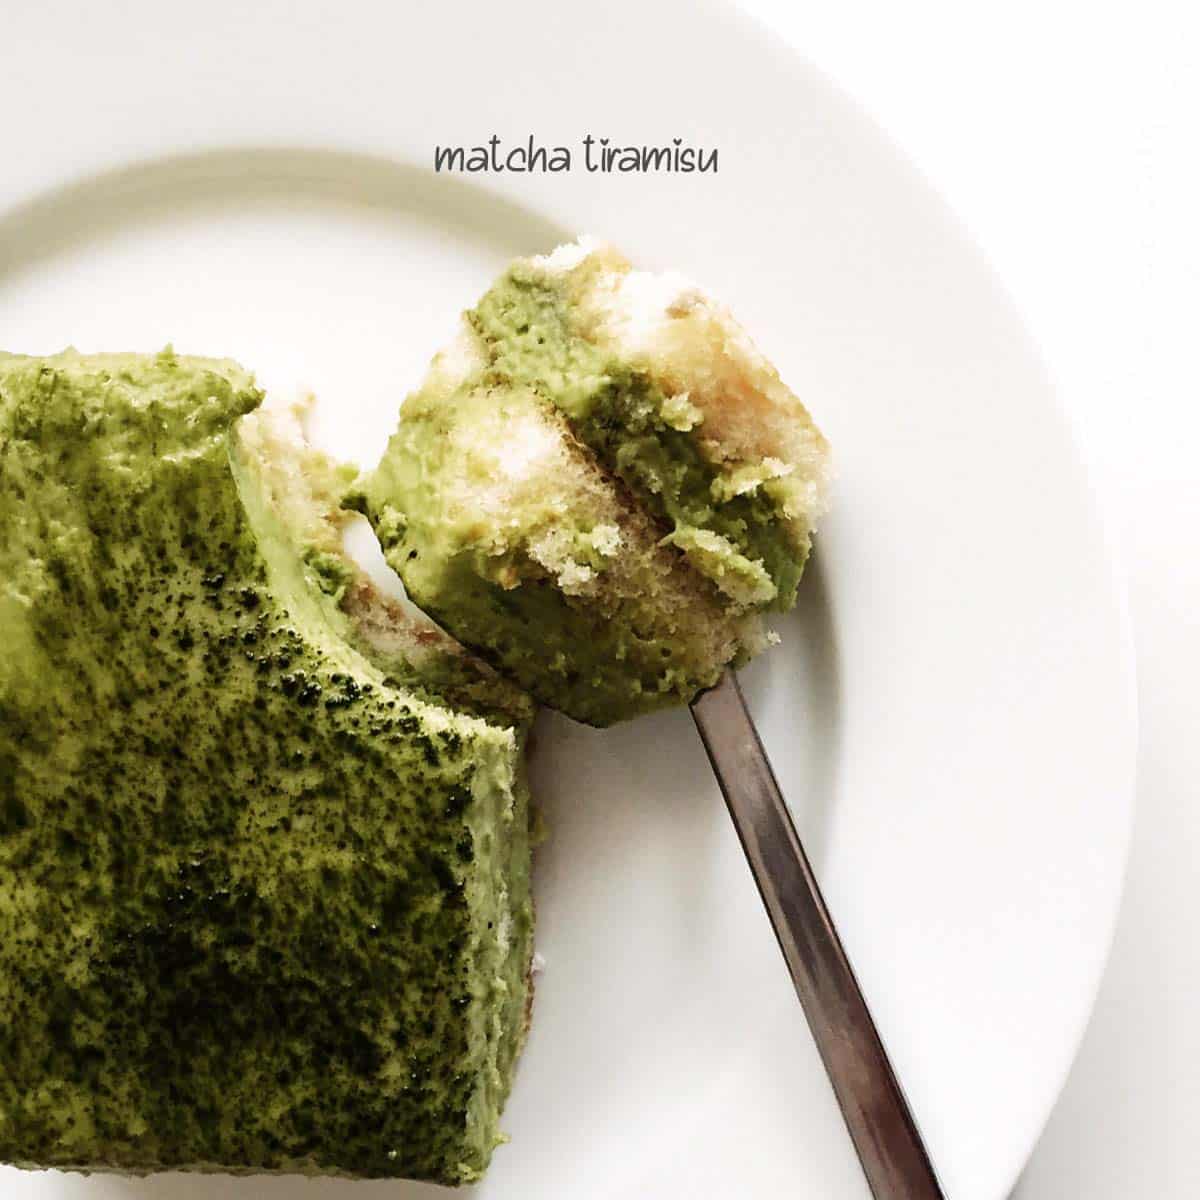
How to make Matcha Tiramisu
Matcha Tiramisu is a fusion dessert, combining earthy Matcha green tea and the creamy sweetness of Italian Tiramisu. Each ingredient contributes to a symphony of flavors that delights with every bite.
Ingredients you'll need:
Matcha Mascarpone Cream:
- 1½ cups of heavy whipping cream
- ½ cup of granulated sugar
- 2 teaspoon of matcha powder
- 1 teaspoon of vanilla extract
- 8 oz of room-temperature mascarpone cheese
Cookie Layer:
- ½ cup of hot water
- 2 teaspoon of matcha powder
- 12 ladyfingers (or use gluten-free)
For Toppings:
- 2 tablespoon of matcha powder (for dusting)
Step-by-Step instructions
Making the Matcha Mascarpone Cream. Begin by adding the heavy whipping cream into a mixing bowl. Use an electric mixer to whip it at medium speed until it thickens. Proceed to incorporate the granulated sugar, vanilla extract, and matcha powder. Continue whipping until the mixture forms stiff peaks.
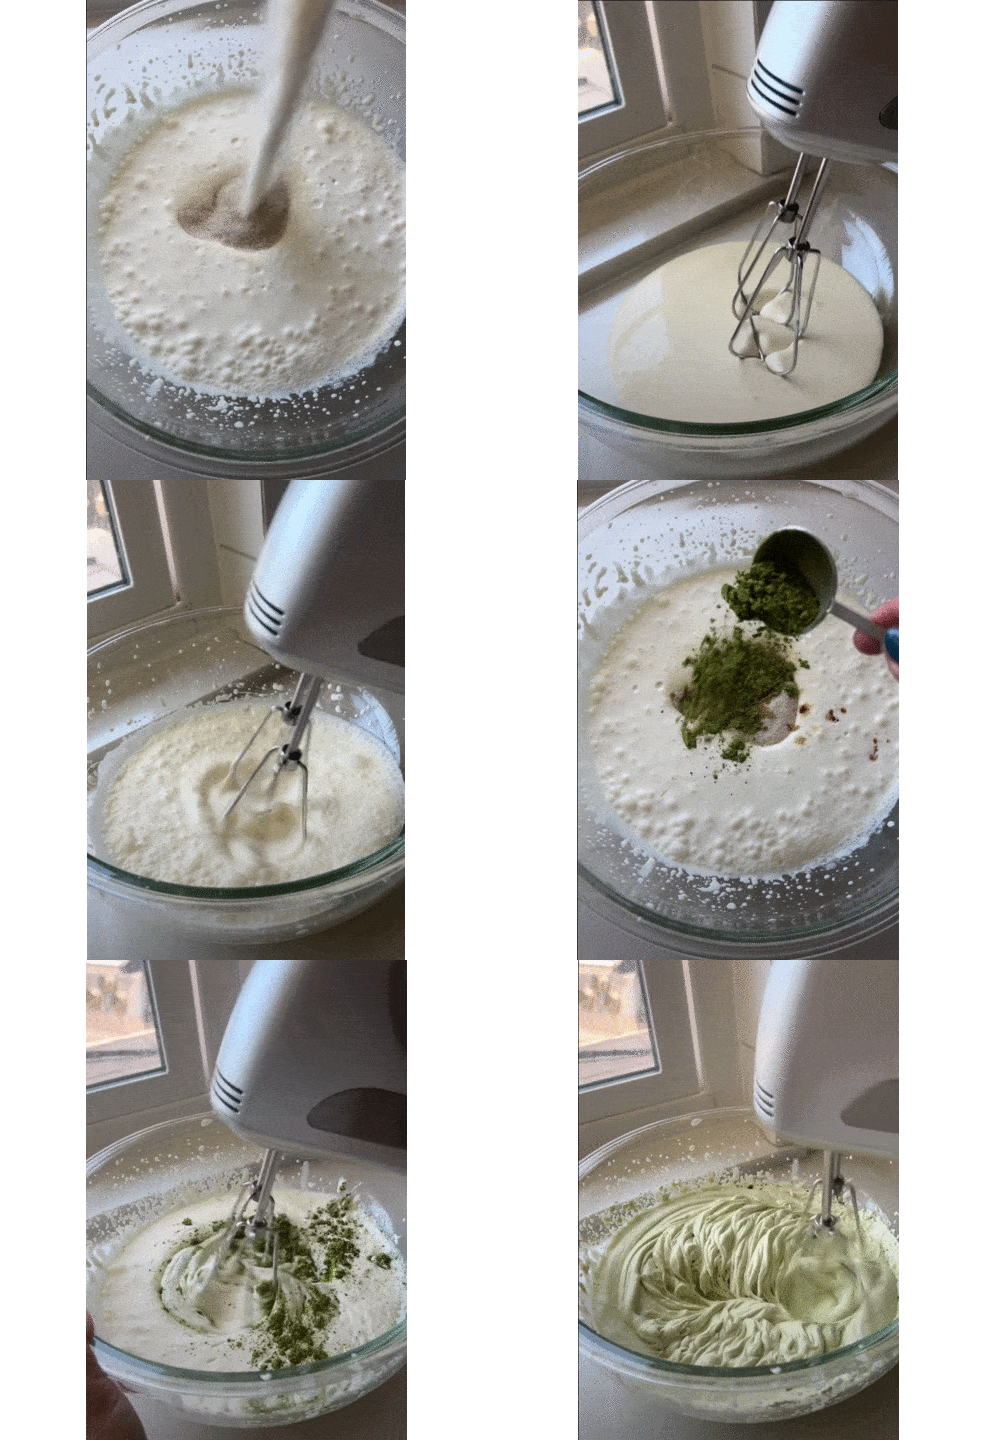
Incorporate the Mascarpone. Gently fold in the mascarpone cheese until it's well combined, being careful not to overmix. Set aside.
Preparing the Cookie Layer. Dissolve matcha powder in hot water using a shallow bowl for this part. Make sure the Matcha is fully integrated into the water.
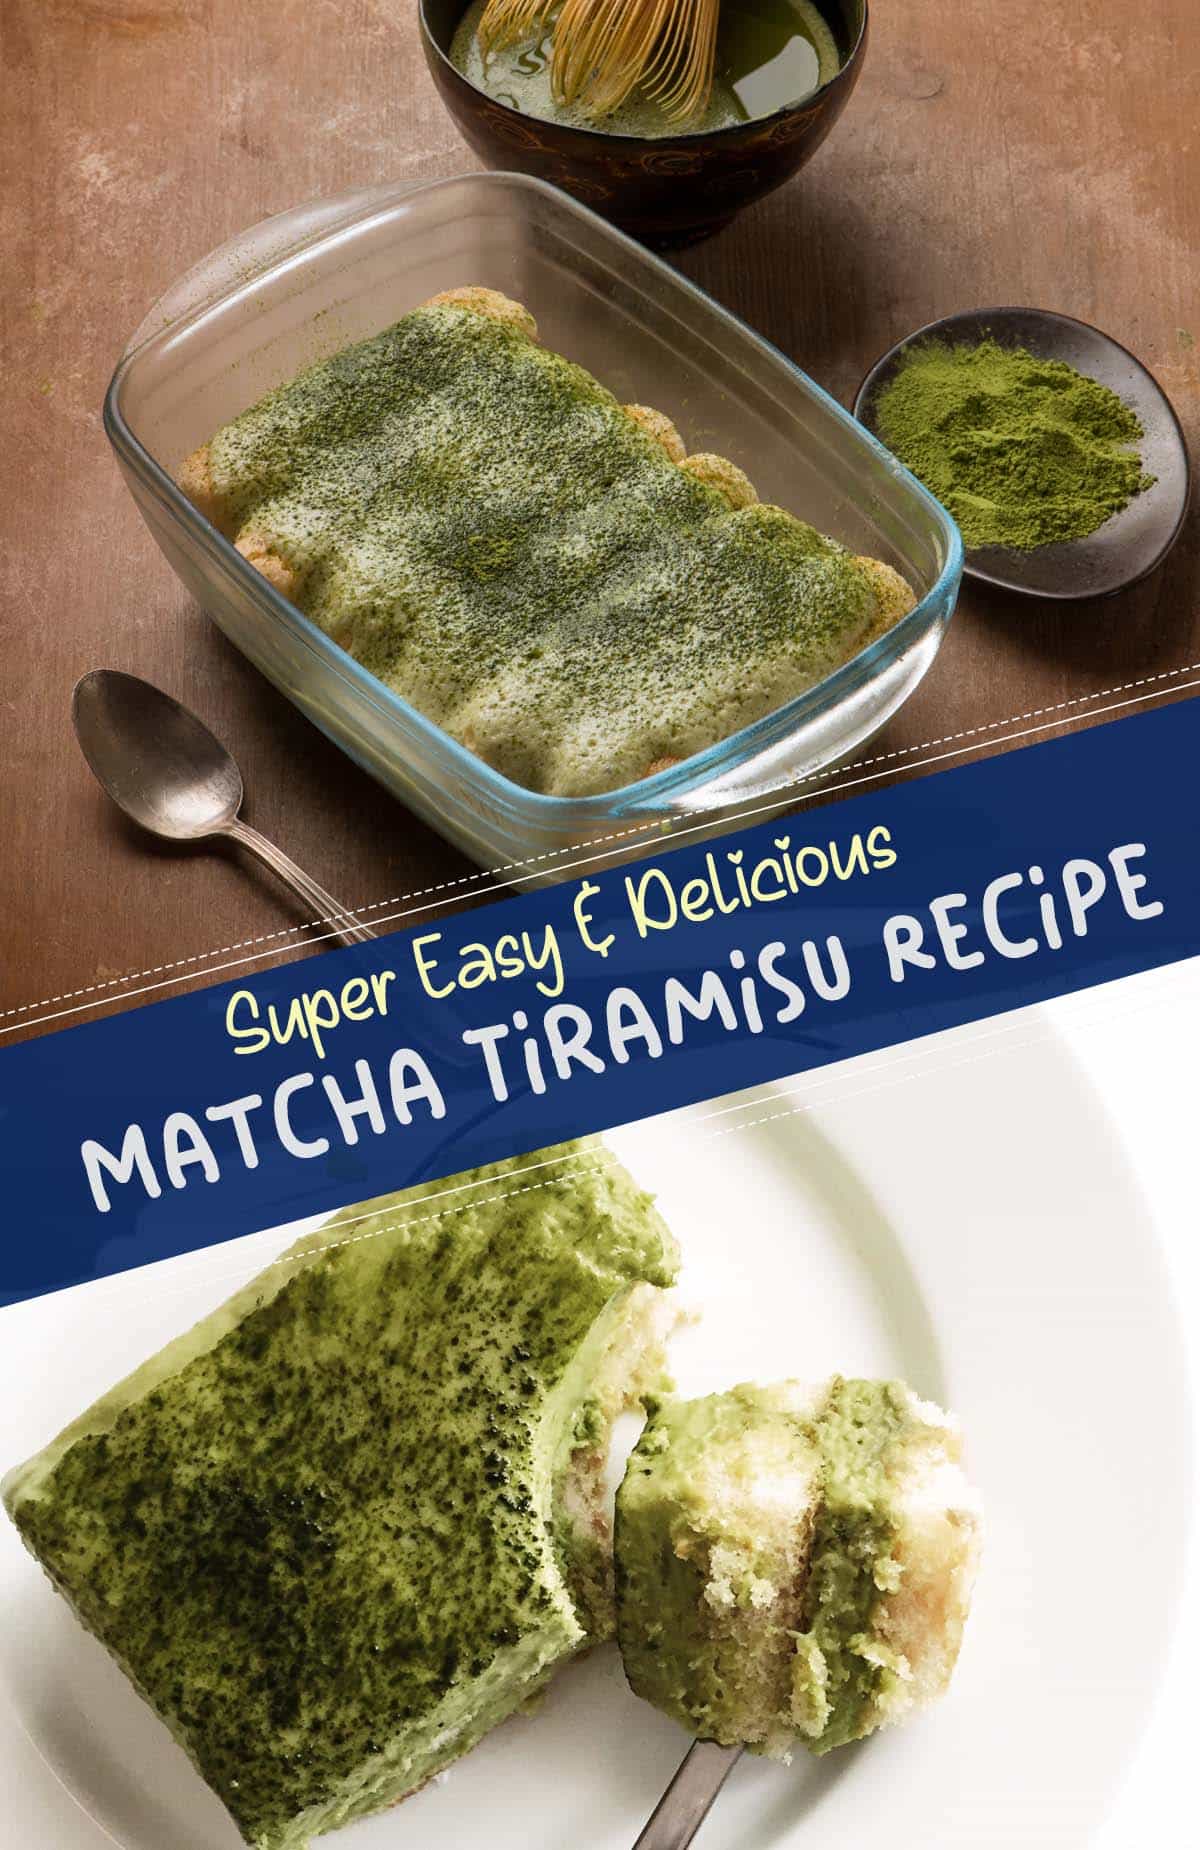
Assembling the First Layer. This is where our ladyfingers come in. Quickly dip each ladyfinger into the matcha water without letting them soak. Arrange them to form a single layer at the bottom of an 8x8" dish. Trim the ladyfingers, if necessary, to ensure they fit and cover the bottom completely.
Layering the Cream. Scoop out half of the whipped cream mixture and spread it over the layer of ladyfingers. Use a spatula to smooth out the cream.
Repeat the Layers. Create another layer of matcha-dipped ladyfingers on top of the cream. Add the remaining whipped cream mixture on top of the second cookie layer, smoothing it out as before.
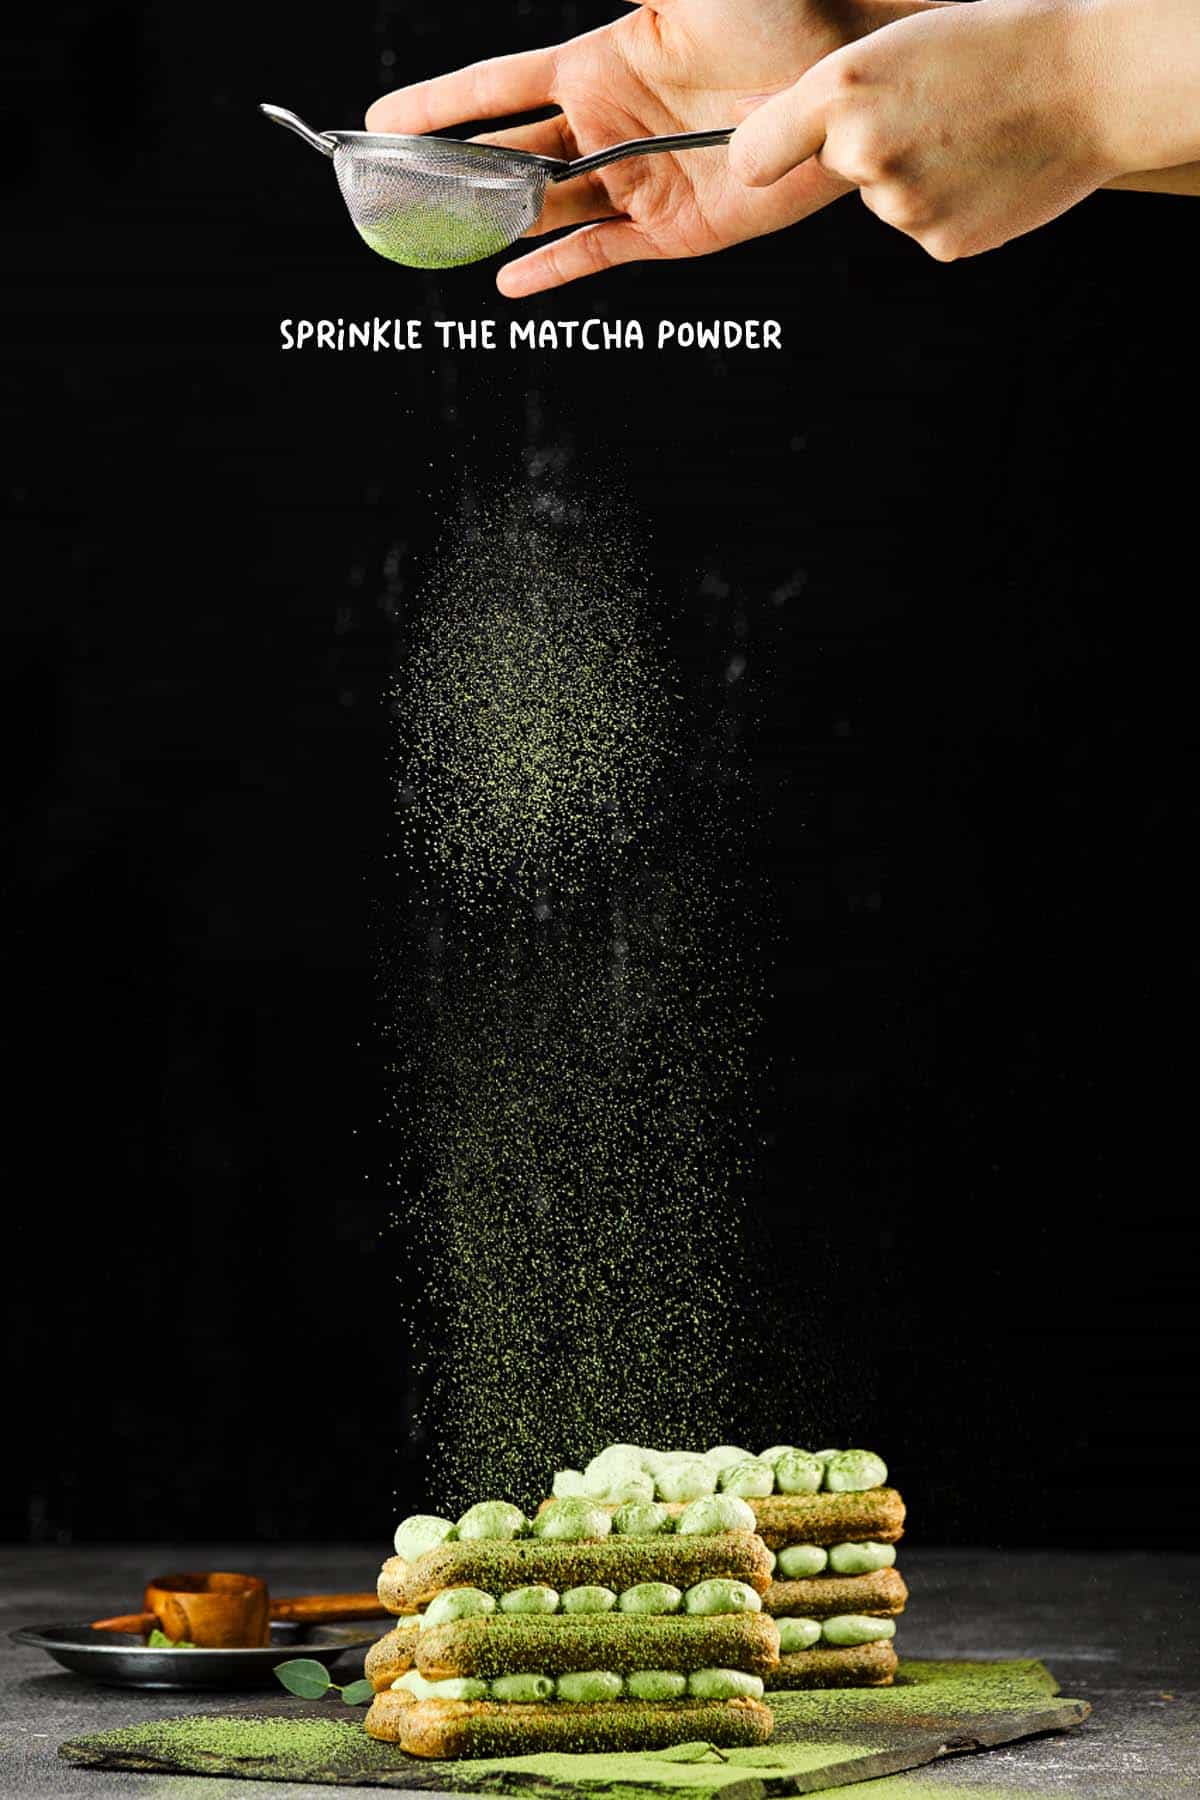
The Finishing Touch. Sift the matcha powder through a fine mesh strainer to even dust the top of the dessert.
Patience Pays Off. The final step is to chill the Matcha Tiramisu in the refrigerator for a minimum of 4 hours or, better yet, overnight. This rest period allows the flavors to meld together and the dessert to firm up. If desired, dust with additional matcha powder just before serving to enhance the look and flavor.
Pro Tips: Making your Matcha Tiramisu shine
- Choosing Ladyfingers: Gluten-free ladyfingers are larger than regular ones. So, if you're using regular ones, double up!
- Alcohol or Not, Your Choice: This recipe doesn't call for alcohol, but if you like a kick, add 2 tablespoon of brandy or Marsala wine to your matcha mix. It's all about personal taste.
- Stand Mixer Magic: Your stand mixer with a whisk attachment does the trick for the mascarpone filling.
- Finding Ladyfingers: Regular ladyfingers are in most grocery stores. For gluten-free, try specialty grocers or online shops.
- Serving Tips: Treat your Matcha Tiramisu as you would the classic version. It's a fantastic dessert after a special meal or even a weekday dinner. With just the right sweetness, it's a guilt-free breakfast treat too!
Can you make this Matcha Tiramisu in Keto?
Making Matcha Tiramisu keto-friendly involves substituting higher-carb ingredients with low-carb options. Here's how you can do it:
- Ladyfingers: Traditional ladyfingers are made from flour high in carbs. You could make your own ladyfingers using almond flour or coconut flour instead for a keto version. You can find many keto ladyfinger recipes online.
- Sugar: Replace the sugar used in traditional recipes with a keto-friendly sweetener like erythritol, stevia, or monk fruit sweetener. Ensure it's a one-to-one sugar substitute to maintain the correct ratios in the recipe.
- Matcha Powder: Ensure to use unsweetened, pure matcha powder, which is naturally low in carbs and perfect for a keto diet.
- Mascarpone Cheese: Mascarpone is already quite low in carbs and perfect for keto diets, so there is no need to substitute this.
- Eggs: Eggs are also keto-friendly, so no changes are needed here, either.
Important Notes:
Remember that when baking with keto substitutes, the texture and taste may differ slightly from the original version. Still, you can create a delicious keto Matcha Tiramisu with the right substitutions. Always check your ingredients' labels to ensure they fit within your daily carb limit if you're following a strict keto diet.
How to assemble Matcha Tiramisu
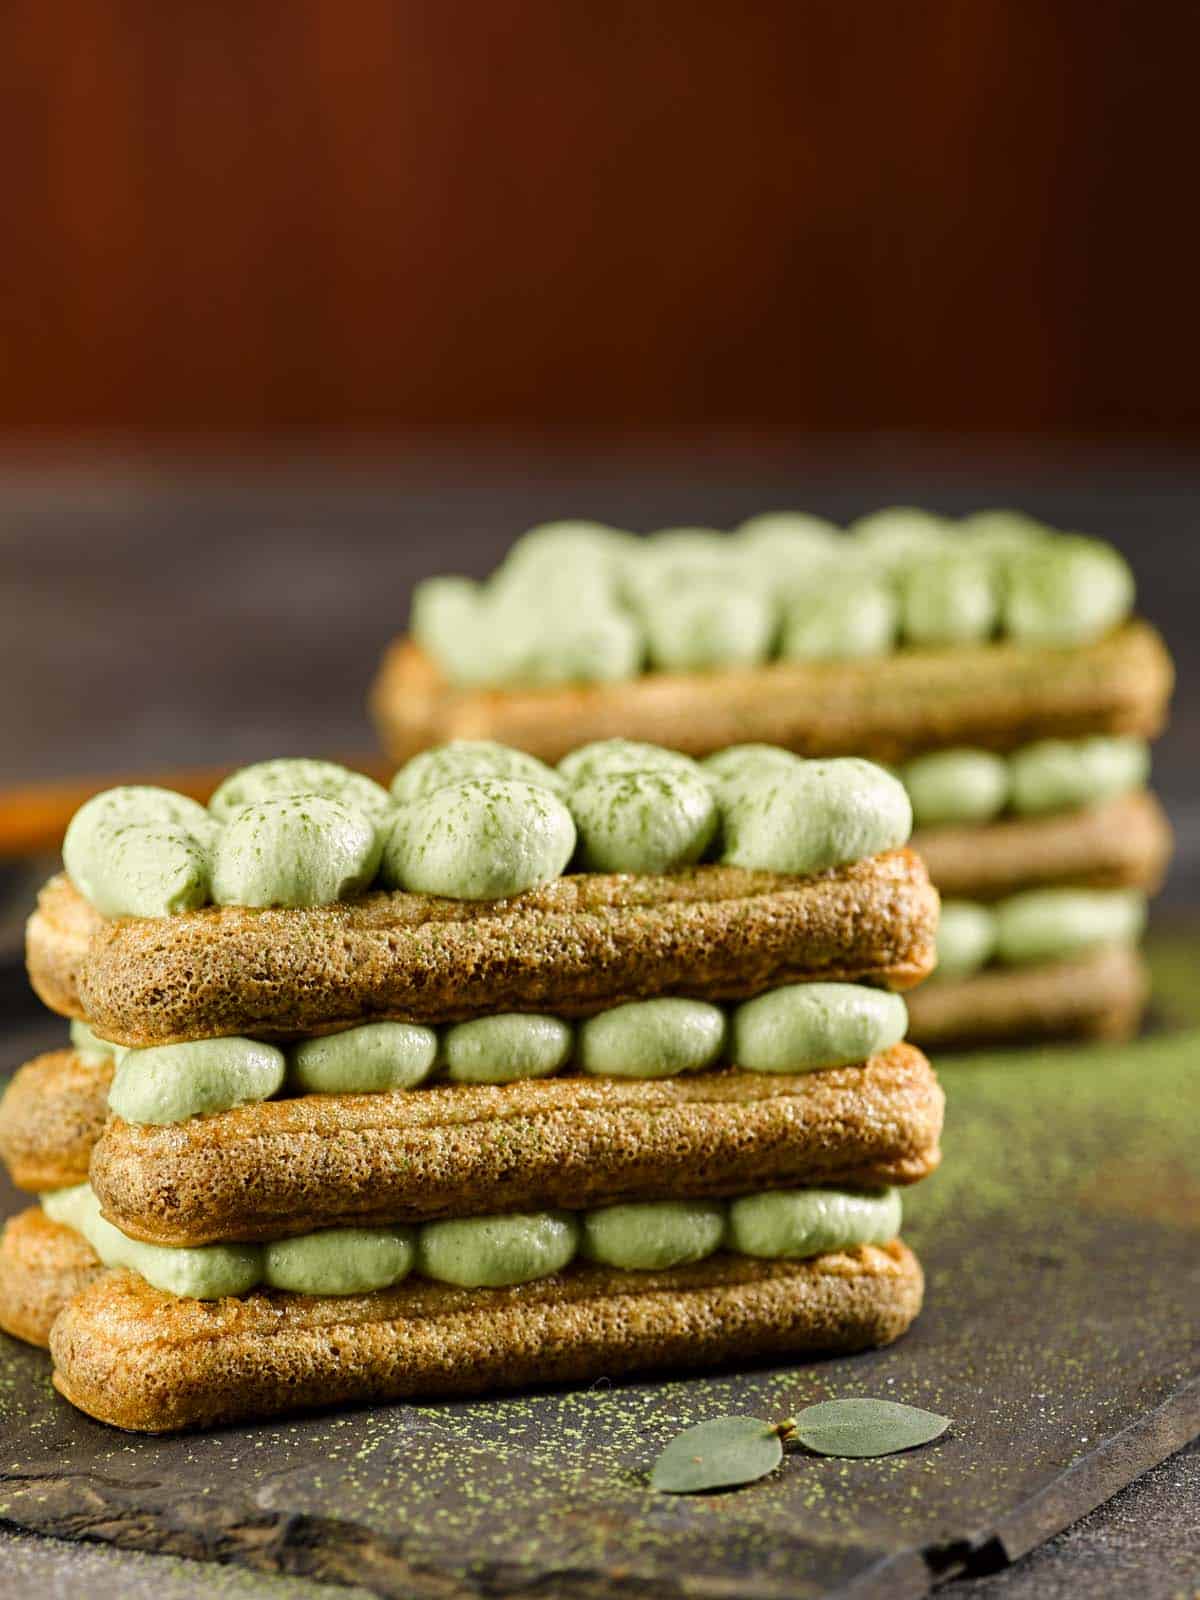
When assembling Matcha Tiramisu, remember the mantra - evenness. Each layer should be of equal thickness for that perfect cross-sectional view and consistent flavor. Also, take care while dipping ladyfingers; they should be moist but not soggy.
Picking the Perfect Stage. Deciding where to place your Matcha Tiramisu is the first step. The choice is yours: a glass container, a bowl, or individual ramekins!
Dive into the Matcha Pool. Now, prepare a bowl of matcha tea. You'll dip each ladyfinger into this liquid goodness. This isn't for drinking, though!
Layer Up, Buttercup. Place your tea-soaked ladyfingers in your chosen container, then layer them with the smooth mascarpone cream. Repeat this step if your container is deep until you fill it up. Remember, mascarpone cream is the showstopper on the final layer.
A Little Tip From Me To You. Quickly dunk each ladyfinger into the Matcha without allowing them to become sodden. Arrange them neatly in a single layer at the bottom of your 8x8 dish. Feel free to trim the cookies as needed to ensure complete coverage. Remember, if your cookies are soaking up more of the matcha mix than expected, you may need to whip up an extra batch.
Perfecting the Top Got a spatula? Great! Use it to smooth the top of the cream layer. It's all about the presentation.
Patience is a Virtue. Finally, let the fridge work its magic. After at least four hours (or, better yet, the next day), you'll have a Matcha Tiramisu masterpiece to enjoy!
Troubleshooting Tips for Matcha Tiramisu
1 When Mascarpone Gets Grainy
Mix Mascarpone with your matcha cream just enough to blend the ingredients without overdoing it. Mascarpone that's beaten too vigorously can end up grainy, affecting your dessert's texture. If it's already grainy, try smoothing it out in a food processor or blender.
2 The Soggy Ladyfinger
Ladyfingers that have absorbed too much matcha water can create a soggy dessert – not what we aim for! Remember, a quick dip is all it takes. If the ladyfingers are too soft and moist, they've soaked too long. Next time, give them a quick dunk, just enough to absorb the matcha flavor.
3 When Cutting into Tiramisu Too Soon
Patience is key. Cutting into your Matcha Tiramisu too soon can result in layers that haven't set and flavors that haven't melded. If this happens, don't despair! Next time, refrigerate your Tiramisu for at least 4 hours, or better yet, overnight. This allows the flavors to meld together and the texture to firm up.
4 That Overflowing Matcha Flavor
Finding the matcha flavor overpowering? Maybe you've added too much matcha powder in the cream or the cookie layer. If this happens, try reducing the amount of Matcha next time. It's crucial to balance Matcha's strong flavor with the other ingredients to avoid overpowering the dessert.
5 The Deflated Whipped Cream
If your whipped cream isn't forming stiff peaks, it can affect the overall texture of your Matcha Tiramisu. Check your cream's fat content—aim for heavy cream with high-fat content, typically around 36%. Also, ensure your equipment is clean and cold. Warm or dirty equipment can prevent peaks from forming.
6 Clumpy or Bitter Tiramisu
Matcha can be a bit tricky to handle. If your Matcha Tiramisu tastes bitter or has green clumps, you might not be sifting or whisking your Matcha properly. Next time, remember to sift your Matcha to break down clumps and whisk it well with the cream to distribute the flavor evenly.
7 The Mascarpone Shortage
Run out of mascarpone cheese? Or maybe the grocery store did? No problem! You can use a mixture of cream cheese and heavy cream or sour cream as a substitute in a pinch. But remember, Mascarpone has a unique taste and texture, so try to use it whenever possible for authentic results.
8 The Ladyfinger Limit: When You Run Out
If you run out of ladyfingers or can't find them in stores, you can make them at home or substitute them with sponge cake. The key here is maintaining the dessert's layered structure and absorbing the matcha flavor.
9 The Matcha Quality: Ensuring the Best Flavor
Matcha quality can significantly impact your dessert. If your Matcha Tiramisu doesn't have a vibrant green color or lacks a rich, slightly bitter yet sweet flavor, it might be time to check your matcha quality. Always opt for high-grade, ceremonial Matcha when possible.
10 When Your Matcha Isn't Green
Matcha should impart a vibrant green hue to your Tiramisu. Your Matcha might have oxidized if your dessert looks more brown than green. It's crucial to store Matcha properly - in a cool, dark place and in an airtight container. Use it for the best color and flavor within a few weeks of opening.
11 When Your Layers Won't Stay Put
If your layers are sliding or won't hold together, it could be that your mascarpone cream is too thin. Ensure you've whipped your cream to stiff peaks before adding it to the Mascarpone. And remember, your Tiramisu needs enough time in the refrigerator to firm up - at least four hours, preferably overnight.
12 When Your Flavors Don't Sing
If the flavors in your Tiramisu don't seem well-developed, it could be a simple matter of seasoning. A pinch of salt can enhance the other flavors in your dessert. Remember, Matcha is a complex flavor that must be balanced with Mascarpone's creaminess and the ladyfingers' sweetness.
13 When Your Matcha Powder Goes Everywhere
Dusting the top of your Tiramisu with matcha powder can be messy. A fine-mesh sieve will make this step more manageable and provide an even, attractive dusting. But if you're still having trouble, try refrigerating your Tiramisu for a bit before adding the matcha dusting.
14 When Your Tiramisu is Too Firm
If your Tiramisu turns out too stiff after refrigeration, you might overbeat your mascarpone and cream mixture. Next time, mix until just combined to keep a smooth, creamy consistency.
How to make homemade Mascarpone
Making homemade Mascarpone isn't as daunting as it seems. It all starts with heavy cream and a splash of lemon juice. Heat the cream gently, stir in the lemon juice, and let the mixture thicken. Strain it overnight in the refrigerator, and you have creamy, fresh Mascarpone!
Note: Store-bought mascarpone can be used as an alternative.
Homemade Mascarpone Ingredients (Optional)
- 3 cups of heavy whipping cream
- 1 ½ tablespoon of lemon juice
Heat It Up. Heat the heavy cream until it's close to boiling, then let it simmer gently for three minutes.
Stir in Citrus. Mix in the lemon juice, stir and simmer gently for another three minutes. Allow the mixture to cool to room temperature.
Strain and Cool. Line a strainer with three layers of cheesecloth and set it over a deep bowl. Pour the cooled cream mixture into the strainer and let it strain overnight in the fridge.
Thick and Ready. Your cheese will be thick and ready the next day. Transfer it to a covered container and store it in the fridge until you can use it in your matcha tiramisu recipe.
Why go homemade?
While store-bought Mascarpone can save time, the homemade version brings something extra. You control the quality of ingredients and the texture, ensuring that your Mascarpone is fresh and free of preservatives. Plus, it adds a personal touch to your Matcha Tiramisu. After all, there's something uniquely satisfying about crafting a dessert from scratch!
How to make your own Ladyfingers
Baking ladyfingers at home is simpler than you think, giving your dishes a unique edge! Sure, store-bought ones are fine, but if you're up, let's dive into crafting homemade ladyfingers.
Ingredients you'll need
Creating 20 appetizing Ladyfingers will need:
- 4 Eggs
- 100 g (½ cups) Granulated sugar
- 60 g (½ cups) Pastry flour
- 50 g (⅓ cups) Corn starch
Step-by-step instructions:
Preparation is Key. First, lay parchment paper on your baking tray or ready your silicone mat. You'll likely need two trays for 20 ladyfingers. I'd also recommend preparing a piping template - an eclair template about 10cm or 4 inches long is a good starting point.
It's All in the Whisk. Whisk it thoroughly as you combine egg yolk and sugar until it dissolves. Rubbing a little of the mixture between your fingers should feel smooth and grain-free.
The Finer Details. Sift the flour and starch to prevent any lumpy surprises, which could lead to unnecessary folding. Moving on to the meringue stage, gradually adding sugar to the egg whites with your stand mixer on is crucial to avoid crystallization. Aim for stiff, shiny peaks, but avoid overbeating into lump formation - we want a consistency that folds in seamlessly with the rest of the ingredients.
Folding in Fluffiness. When your meringue is just right, incorporate about ¼ of the whipped egg white into the flour and egg yolk mixture to lighten it. Then, carefully fold in the rest of the meringue with a rubber spatula. Aim to keep the batter airy before piping; if it is too runny, it will refuse to hold its shape.
Perfect Piping. A simple small 1A Round nozzle tip will do the trick for piping. Remember, the ladyfinger will puff up in the oven, so pipe larger finger shapes. Alternatively, pipe the fingers close together to form a side of the cake in one go.
Into the Oven. Ladyfingers require a short blast of high heat - we're looking at 200° C / 392°F for 10-12 minutes. They will gain a golden-brown hue if baked correctly and only deflate slightly upon cooling.
Recipe Card Instructions:
- Preheat your oven to 200° C / 392°F.
- Beat 4 egg yolks with half the sugar (50g) until the mix is pale, fluffy and the sugar has dissolved. Use a stand mixer for the best results.
- Whip the egg whites with the remaining sugar in your stand mixer, gradually adding the sugar. Whip for around 5 minutes until shiny, stiff peaks form.
- Concurrently, sift flour and cornstarch into the whipped egg yolks and carefully fold them with a rubber spatula until combined. The mixture will become thick, which is normal.
- When the meringue is ready, fold about ¼ of it into the flour and egg yolk mixture to loosen it, then carefully fold in the rest of the meringue using a rubber spatula.
- Fill your piping bag with a round nozzle tip, and pipe out 20 uniform finger shapes onto your prepared baking sheet, leaving some space between each one.
- Now you have your homemade ladyfingers ready for their grand appearance in your Matcha Tiramisu! Bake your ladyfingers for around 10 minutes. After baking, let them cool down on a cooling rack.
Store-bought vs. homemade Ladyfingers
Is there a significant difference between store-bought and homemade ladyfingers? Absolutely! Here's why making ladyfingers from scratch might be worth your time:
- Taste and Texture: Homemade ladyfingers tend to be softer and more delicate than the ones you find at the store. They'll absorb the matcha and mascarpone flavors better, leading to a more flavorful Matcha Tiramisu.
- Quality Control: When you make ladyfingers at home, you're in charge of the ingredients, meaning no preservatives or artificial flavors.
- Baking Fun: There's a certain joy that comes from baking your own components for a dish. Plus, you can bake extra ladyfingers for other desserts or snacking!
Storage and Freezing Tips
Storing Matcha Tiramisu
- Cool down properly: After assembling your Matcha Tiramisu, let it chill in the refrigerator for at least 4 hours. This allows the dessert to set and the flavors to meld.
- Use a suitable container: Airtight containers are perfect for storing Matcha Tiramisu. If you don't have one, you can wrap your serving dish tightly in cling wrap to prevent exposure to air, which can cause the dessert to dry out.
- Monitor the temperature: Keep your Matcha Tiramisu in the refrigerator, ideally at a temperature between 35°F and 40°F (1°C to 4°C).
- Keep track of time: Stored properly; Matcha Tiramisu can last up to 2-3 days in the refrigerator. Beyond this, the texture might start to degrade.
Freezing Matcha Tiramisu
- Use freezer-safe containers: Transfer your Matcha Tiramisu into a freezer-safe container, or if you're freezing the entire dish, ensure it's suitable for freezer use. Airtight is essential to prevent freezer burn.
- Allow space for expansion: When freezing Matcha Tiramisu, leave about 1 inch of space at the top of your container, as the dessert can expand as it freezes.
- Label the container: Don't forget to write the date on the container so you can keep track of how long it's been in the freezer. Matcha Tiramisu can be frozen for up to 3 months without significant loss in quality.
Defrosting Matcha Tiramisu
- Defrost slowly: Transfer your Matcha Tiramisu from the freezer to the refrigerator, letting it thaw slowly for several hours or overnight. A gradual defrosting process will help maintain the texture and flavor of the dessert.
- Avoid microwave defrosting: It's not recommended to defrost Matcha Tiramisu in the microwave as it can result in uneven defrosting and might ruin the texture.
- Consume promptly after defrosting: Once defrosted, consume your Matcha Tiramisu within 24 hours for the best experience. Do not refreeze the defrosted dessert, as it can negatively affect the quality and safety of the dessert.
Tasting Notes and Beverage Pairings
The joy of Matcha Tiramisu lies in the seamless blend of flavors. Mascarpone's mild, sweet creaminess tempers Matcha's slightly bitter notes, resulting in a delicately balanced taste profile. Layered with light, airy ladyfingers soaked in a matcha mixture, every bite offers a pillowy mouthfeel, a hit of creaminess, and a hint of Matcha's grassy undertone.
The dusting of matcha powder on top imparts a vibrant color and an extra kick of matcha flavor that lingers in your mouth.
Beverage Pairings
- Sencha Tea: The freshness of Sencha, a traditional Japanese green tea, complements the rich creaminess of the Matcha Tiramisu. The tea's grassy notes echo the Matcha in the desert, creating a harmonious taste experience.
- Prosecco: A light, crisp Prosecco can provide a delightful contrast to the creamy Matcha Tiramisu if you prefer something bubbly. The wine's acidity and light sweetness make it a good match.
- Latte: Savor the delightful pairing of our Matcha Tiramisu with either a lightly sweetened Matcha Chai Latte or a Blueberry Matcha Latte. The lattes' creamy richness beautifully complements the luxurious texture of the Tiramisu, while their caffeinated essence perfectly balances out the dessert's sweetness. It's a matcha-made in heaven!
- Earl Grey Tea: Earl Grey tea's citrusy notes from the bergamot oil contrast the richness of Matcha Tiramisu. This classic black tea with a twist can cleanse the palate and enhance the Matcha's nuances in the dessert.
Remember, the best pairings enhance the flavors of food and drink. So experiment to find your perfect combination!
Full Recipe
Super Easy Matcha Tiramisu Recipe
Pin RecipeIngredients:
Matcha mascarpone cream:
- 1½ cups heavy cream
- ½ cup granulated sugar
- 2 teaspoon matcha powder
- 1 teaspoon vanilla extract
- 8 oz mascarpone cheese (at room temperature)
Cookie layer:
- ½ cup hot water
- 2 teaspoon matcha powder
- 12 pcs ladyfingers
For toppings:
- 2 tablespoon matcha powder (for dusting)
How to make homemade Mascarpone:
- 3 cups heavy whipping cream
- 1½ tablespoon lemon juice
How to make your own ladyfingers:
- 4 pieces eggs
- ½ cup Granulated sugar
- ½ cup Pastry flour
- ⅓ cup Cornstarch
Instructions:
Making the Matcha Mascarpone Cream:
- Making the Matcha Mascarpone Cream. Begin by adding the heavy whipping cream into a mixing bowl. Use an electric mixer to whip it at medium speed until it thickens. Proceed to incorporate the granulated sugar, vanilla extract, and matcha powder. Continue whipping until the mixture forms stiff peaks.
- Incorporate the Mascarpone. Gently fold in the mascarpone cheese until it's well combined, being careful not to overmix. Set aside.
- Preparing the Cookie Layer. Dissolve matcha powder in hot water using a shallow bowl for this part. Make sure the Matcha is fully integrated into the water.
- Assembling the First Layer. This is where our ladyfingers come in. Quickly dip each ladyfinger into the matcha water without letting them soak. Arrange them to form a single layer at the bottom of an 8x8" dish. Trim the ladyfingers, if necessary, to ensure they fit and cover the bottom completely.
- Layering the Cream. Scoop out half of the whipped cream mixture and spread it over the layer of ladyfingers. Use a spatula to smooth out the cream.
- Repeat the Layers. Create another layer of matcha-dipped ladyfingers on top of the cream. Add the remaining whipped cream mixture on top of the second cookie layer, smoothing it out as before.
- The Finishing Touch. Sift the matcha powder through a fine mesh strainer to even dust the top of the dessert.
- Patience Pays Off. The final step is to chill the Matcha Tiramisu in the refrigerator for a minimum of 4 hours or, better yet, overnight. This rest period allows the flavors to meld together and the dessert to firm up. If desired, dust with additional matcha powder just before serving to enhance the look and flavor.
How to Make Homemade Mascarpone:
- Heat It Up. Heat the heavy cream until it's close to boiling, then let it simmer gently for three minutes.
- Stir in Citrus. Mix in the lemon juice, stir and simmer gently for another three minutes. Allow the mixture to cool to room temperature.
- Strain and Cool. Line a strainer with three layers of cheesecloth and set it over a deep bowl. Pour the cooled cream mixture into the strainer and let it strain overnight in the fridge.
- Thick and Ready. Your cheese will be thick and ready the next day. Transfer it to a covered container and store it in the fridge until you can use it in your matcha tiramisu recipe.
How to Make Your Own Ladyfingers:
- It's All in the Whisk. Whisk it thoroughly as you combine egg yolk and sugar until it dissolves. Rubbing a little of the mixture between your fingers should feel smooth and grain-free.
- The Finer Details. Sift the flour and starch to prevent any lumpy surprises, which could lead to unnecessary folding. Moving on to the meringue stage, gradually adding sugar to the egg whites with your stand mixer on is crucial to avoid crystallization. Aim for stiff, shiny peaks, but avoid overbeating into lump formation - we want a consistency that folds in seamlessly with the rest of the ingredients.
- Folding in Fluffiness. When your meringue is just right, incorporate about ¼ of the whipped egg white into the flour and egg yolk mixture to lighten it. Then, carefully fold in the rest of the meringue with a rubber spatula. Aim to keep the batter airy before piping; if it is too runny, it will refuse to hold its shape.
- Perfect Piping. A simple small 1A Round nozzle tip will do the trick for piping. Remember, the ladyfinger will puff up in the oven, so pipe larger finger shapes. Alternatively, pipe the fingers close together to form a side of the cake in one go.
- Into the Oven. Ladyfingers require a short blast of high heat - we're looking at 200° C / 392°F for 10-12 minutes. They will gain a golden-brown hue if baked correctly and only deflate slightly upon cooling.
Nutrition Information:
Please note that all nutrition information are just estimates. Values will vary among brands, so we encourage you to calculate these on your own for most accurate results.
Frequently Asked Questions
While green tea and Matcha originate from the same plant, their flavor profiles differ significantly. Matcha's intense, vibrant flavor is what gives Matcha Tiramisu its distinctive taste. Regular green tea is likely too subtle and would not provide the same effect.
Mascarpone is a key ingredient in traditional Tiramisu. However, if you can't find it, a good substitute could be a blend of cream cheese and heavy cream. It's not exactly the same, but it can work in a pinch.
Certainly! You would need to find a suitable substitute for the custard layer, such as a vanilla pudding or an eggless custard. There are eggless tiramisu recipes out there.
To make Matcha Tiramisu more kid-friendly, you could omit the Matcha in the ladyfingers and use a non-caffeinated green food coloring instead. You can still dust the top with a little matcha powder for color.
You can make this dessert gluten-free by using gluten-free ladyfingers or a suitable substitute.
Like other tiramisu variations, Matcha Tiramisu variations can be stored in the refrigerator for 2-3 days. The flavors actually deepen over time, so some people prefer to make it a day in advance.
Yes, you can freeze Matcha Tiramisu, but it's best to eat it fresh. If you need to freeze it, wrap it tightly to avoid freezer burn and defrost it in the refrigerator before serving.
You could substitute sponge cake or biscotti if you can't find ladyfingers. They should have a similar ability to soak up the matcha mixture.
Tiramisu is a dessert that tastes better in the fridge after a day or two, as the flavors have time to meld together. It can be stored in the refrigerator for about 2-3 days.
Some people like adding a bit of white chocolate, almond extract, or even a splash of liqueur to their Matcha Tiramisu for extra flavor.
Matcha is a versatile ingredient and can be used in many other desserts, such as matcha cakes, ice cream, matcha macarons, smoothie bowls, and much more.
Typically, it's safe. However, Matcha does contain caffeine, and raw eggs are used in traditional recipes. If there are concerns, it's best to consult a healthcare provider.

