Who doesn't love a good omelet in the morning? This pulled pork omelet is perfect for those who want to switch up their breakfast routine. The savory pork contrasts with the fluffy eggs, and the cheese adds a delicious richness. Give this recipe a try today!
This pulled pork omelet is a hearty, filling breakfast with protein, iron, and other vitamins and minerals.
If you answered "yes," pull out that leftover pulled pork, gather some eggs and a few other simple ingredients and get ready to create some delicious pulled pork omelets!
This recipe includes pulled pork or carnitas, creamy cheddar cheese, luscious eggs, and barbecue sauce. Look at those ingredients! That unique combination sounds spectacular to me!

Why you will love this recipe
This recipe is perfect for those who love pulled pork but want a new way to enjoy it. This omelet has a lot of flavors, and the toppings add a nice touch of sweetness and crunch. Plus, it's a great way to use up leftover pulled pork.
- Part scrumptious souffle, part protein-packed omelet – this highly delectable recipe combines ingredients that create a fluffy, filling three-egg dish that is amazingly light, fluffy, and filling.
- You just take basic condiments in your refrigerator and combine them with pulled pork and eggs to create a highly indulgent breakfast that will please the palates of all who consume it.
One of the most wonderful things about omelets is that – in most instances -all the ingredients that you need, you already have.
Opting for simplicity may create an omelet using only eggs and herbs. You may create one bursting at the seams with rich, creamy cheese and ham for a bit of a yummier omelet!
I love to get creative with my omelet recipes. The best part? Just about any combination of ingredients works!
Pulled pork omelet recipe that is light and fluffy
This recipe is a French technique that only takes two to three eggs to create an immensely fluffy concoction, part souffle, and part omelet.
I have found that with the right combination of ingredients and a strong arm for whisking, it is possible to create a delightful breakfast dish full of flavor and extremely filling.
Step-by-step directions
Step 1 Separate the eggs
- Crack each egg and separate the whites and the yolks into two different bowls.
Click here to learn this brilliant technique for successfully separating the yolk of the egg from the white.
- Season them with salt and pepper, and then whisk the egg yolks until smooth. Set them over to the side.
Step 2 whisk it Up
- Pull out that whisk and start on the egg whites, or whisk using a handheld mixer until it bubbles, then add 1 teaspoon of sugar.
- Whisk until it triples in size and develops glossy, medium peaks.
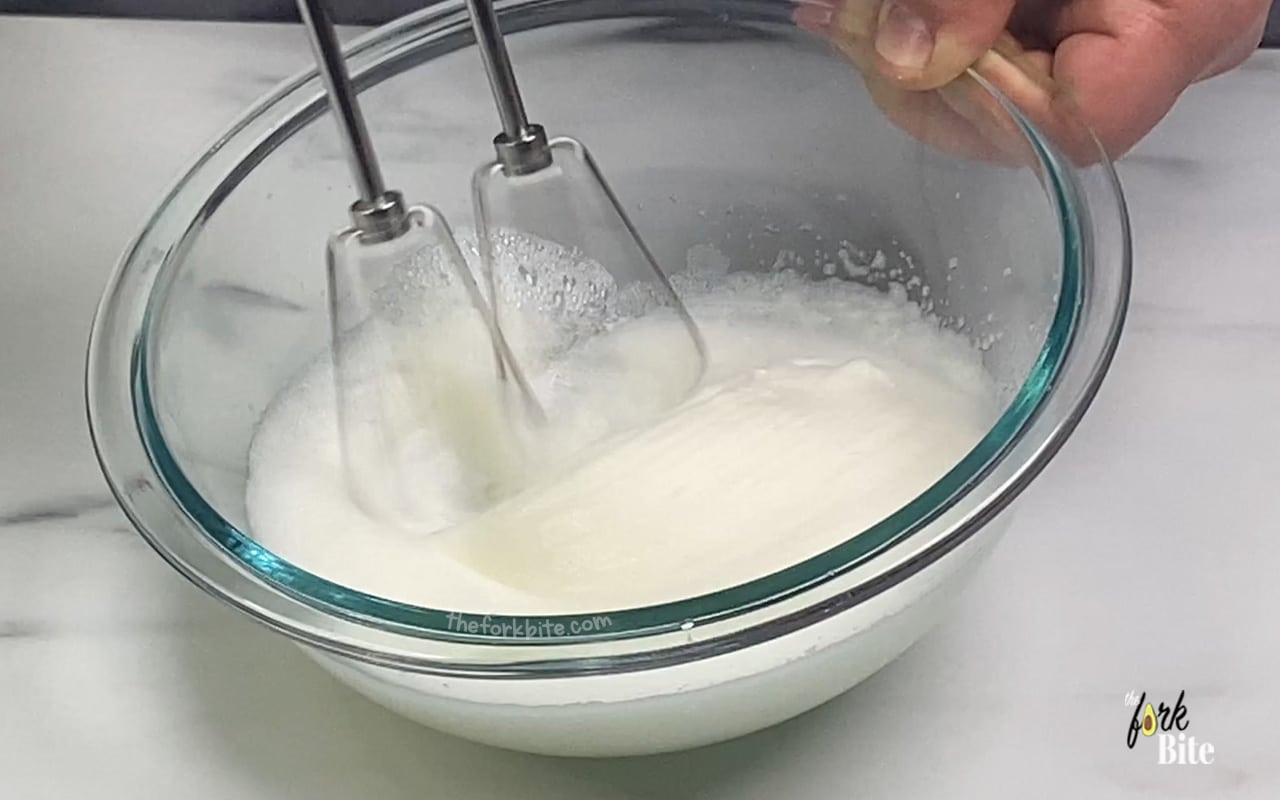
Now - this is very important – do not stop the whisking process until the whites have medium peaks. I am not saying you can't take a break now and then, but – whatever you do – don't give up until you have those peaks!
Step 3 Fold the egg whites into the yolks
- Once those medium peaks have developed, fold your light egg whites into the yolks.
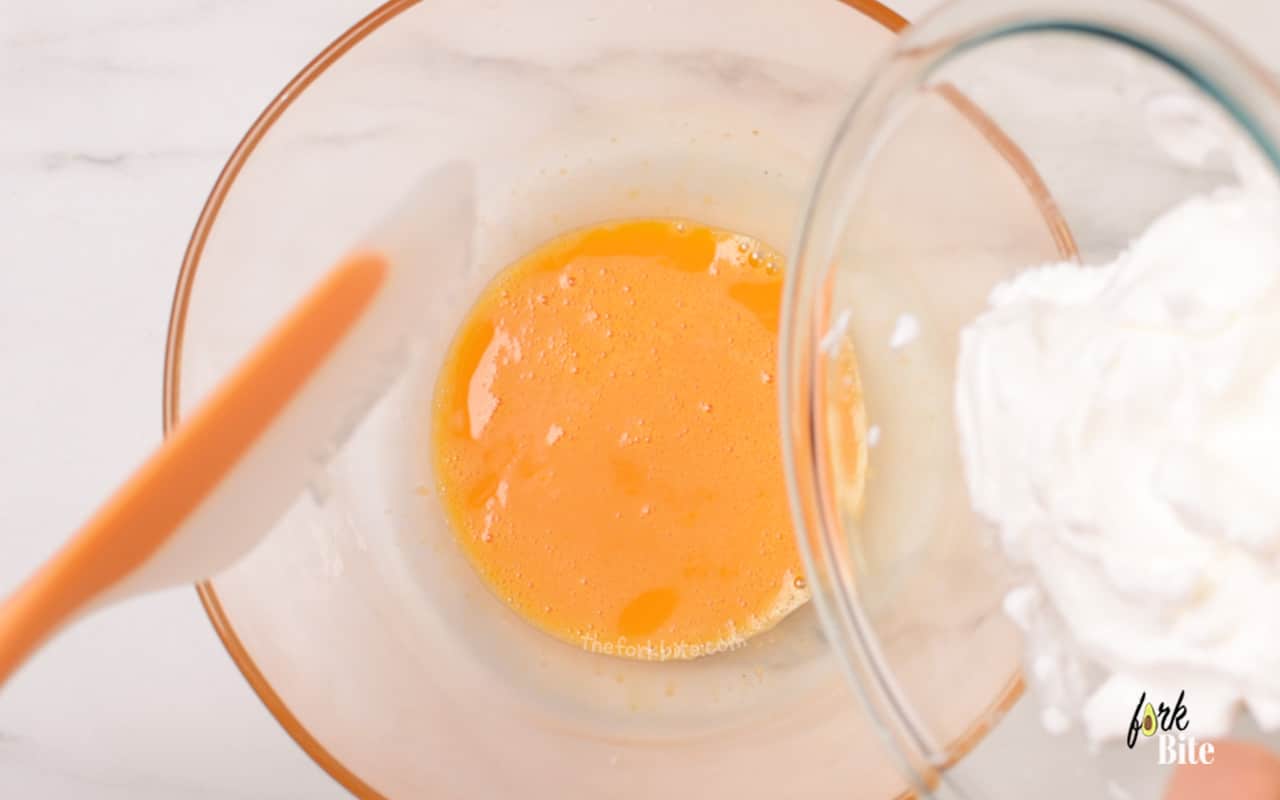
- Take a wide and very flexible spatula and cut straight down the center of your ingredients, ensuring that it goes all the way to the bottom of the bowl.
- Scrape on the bottom of your mixing bowl, pulling it towards you. Then, pull up along the side and scoop that part of the mixture over the rest. That is folding, in its simplest terms.
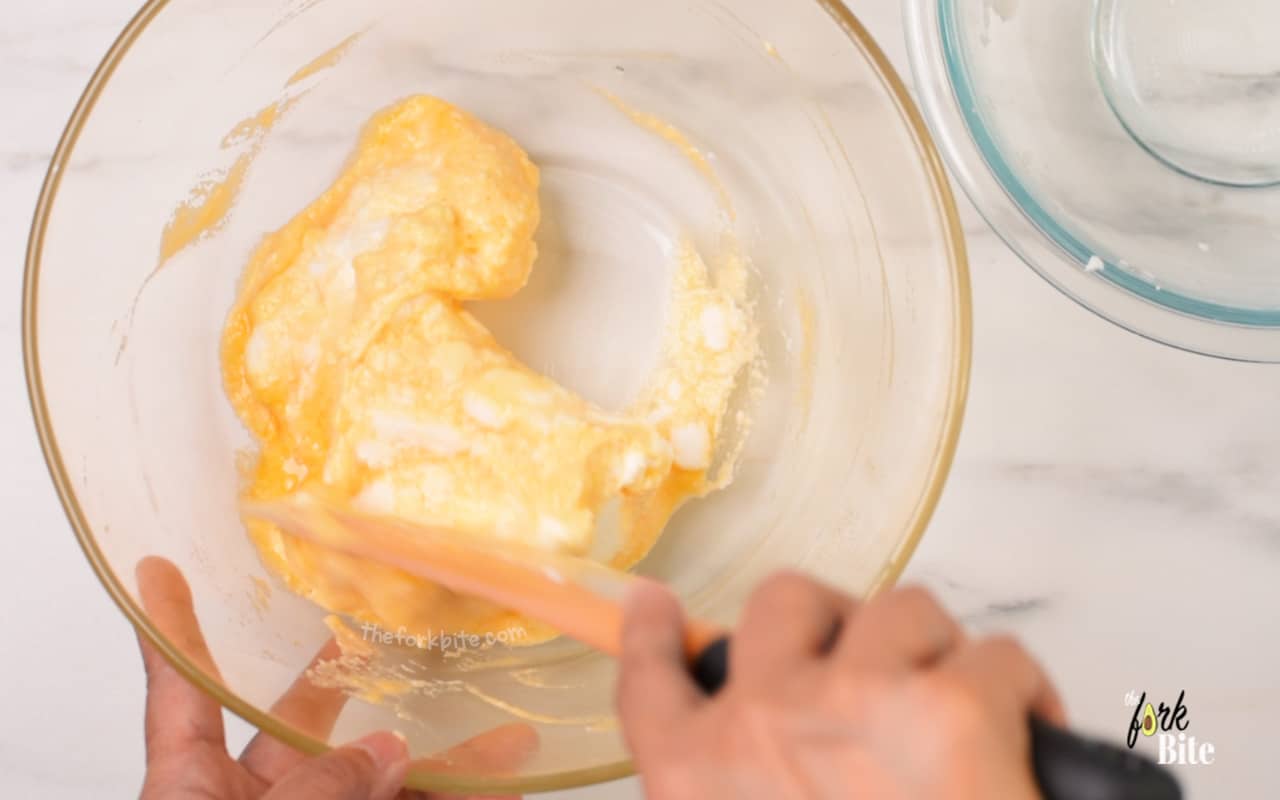
- Rotate the bowl at a quarter of a turn. Repeat the process. Once the mixture has been incorporated and has no globby streaks, the process is all done.
- Resist all temptation to stir up again. Pause and provide yourself a little pat on the back for successfully folding in the kitchen.
Step 4 Cook the omelet
- Heat the pan slowly over low heat (do this while you're whisking the egg whites). Add the oil and swirl to coat the sides of the non-stick 8 inches pan.
- If using oil, wait until it completely coats the pan and becomes shiny. If using butter, wait until it starts foaming.
- Once the oil/butter is heated, pour the egg mixture immediately and spread the surface to even the eggs. Cook to the lowest heat setting. Note: Whipped eggs can deflate easily, so you must cook them asap.
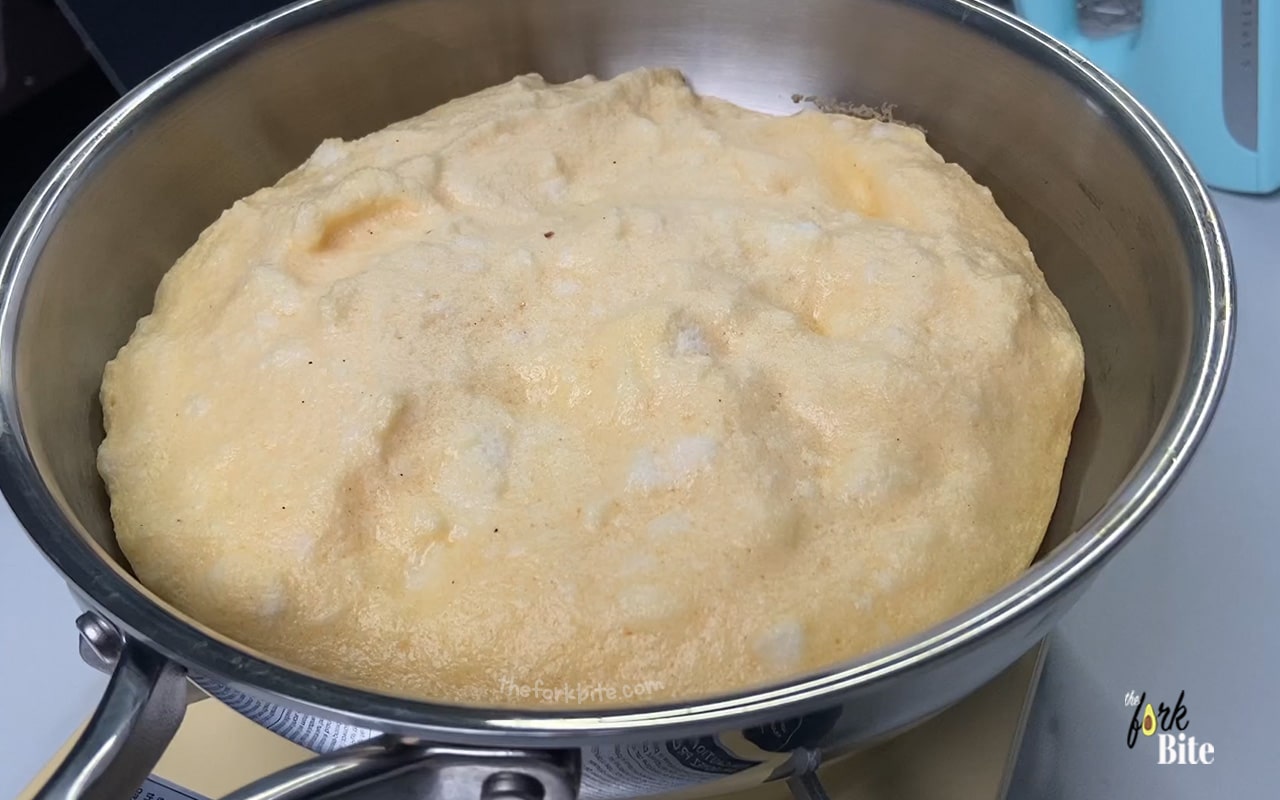
- Cover with a lid, and cook for about 4 minutes until the top of the omelet has set. No poking.
- Once the omelet is set, slowly lift one side of the omelet and drop a knob of butter underneath (this is optional).
- Arrange the pulled pork on top + the toppings (remember, too much of the toppings will make the egg base rip).
- Gently fold it in half, and move it back to make some space. Flip it to the sides to help lock the runny fillings in, and cook for a bit. And you're done!
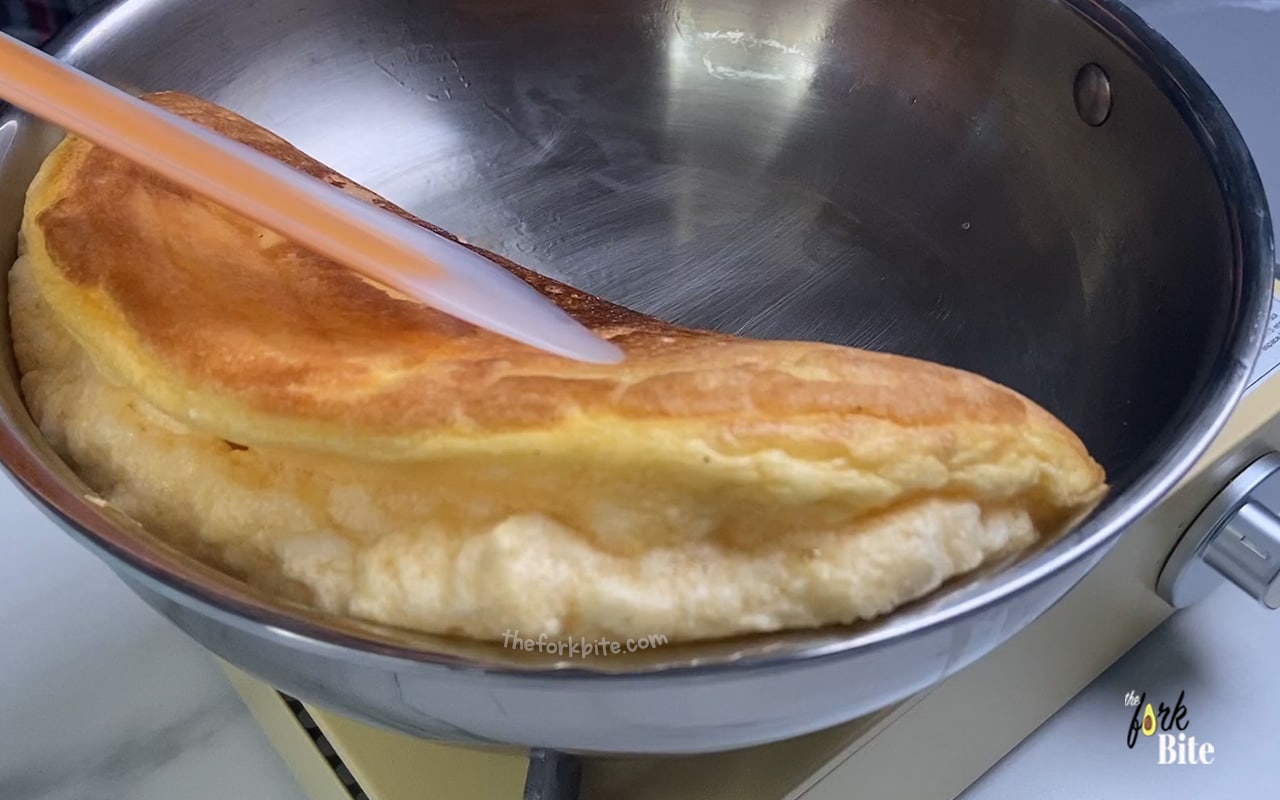
- Serve the eggs and garnish with your favorite toppings.
Personalize the flavor
One of my absolute favorite things about this dish is that the possibilities regarding flavoring personalization are infinite.
You may add a wide assortment of fillings left over from other dishes you have prepared, such as pulled pork, creamy cheese mixes, or even vegetables you have already cooked.
Afterward, fold the omelet and top it with your favorite salsa or that delicious hot sauce you love!
Add a touch of flavor.
I particularly like mixing in some dried herbs or a dab of Greek yogurt. Then, beat in with the yolks and add some whipped-up egg whites.
Whatever you choose, ensure that you do not add any vegetables or meat to the mixture until after cooking. This could significantly change the structure of those delicate eggs.
This could take a light, fluffy omelet and turn it into a boring, flat omelet that lacks taste and appearance.
Never again will you have to fear a nearly empty fridge or struggle with meal ideas.
As long as you have a few eggs on hand, you will always have the ingredients to create an incredibly tasty meal!
Read:
Extra tips
When I first started cooking as a hobby, I noticed two issues that would occur when I created omelets:
- It would tear and fall apart when I attempted to fold over the omelet.
- When I experimented with toppings, I would add too many, and the entire dish looked more like a weird type of egg-based stir-fry than an omelet.
Useful tips on how to cook the omelet
Step 1 "Mise en place"
"Mise en Place" is the French phrase for having everything ready and in its place. The more I prepared and experimented with omelets, the more I learned that you had to approach the dish with a high level of organization.
For example, cut up and dice all the ingredients, such as onions and mushrooms. Grate the cheeses you have, beat your egg mixture, and have all of your seasonings out and ready to go.
If you are trying to dice up your onions or other ingredients while the eggs are cooking, you will likely cook the eggs past the point of having a liquid base.
If this happens, the additional ingredients may not stick to the omelet well.
When preparing your items, these are the basic guidelines that I use:
- Use three eggs -they may be large or extra-large (your choice).
If using two toppings, use up to a ⅓ cup of each
If using three toppings, use up ⅛ of a cup of each
If you use too many toppings or too much of a topping, you will find – as I did -that the egg base rips, and the whole thing becomes more of a scrambled egg dish than an omelet.
Step 2 Heat the oil
I have found that the oil's heat is very important when making omelets.
Place your skillet over low heat. Do this for at least one minute.
Then, pour in the oil that you want to use. If you use butter, place it in the pan instead of the oil.
If using oil, wait until it completely coats the pan and becomes shiny. If using butter, wait until it starts foaming.
If you place your egg mixture in cold oil or butter, the oil will float to the top of the mix and will not stick well to the bottom.
Step 3 Pre-cook toppings
Certain types of ingredients may be used as toppings and additions that require additional cooking time or more cooking time than the egg mixture.
These should be pre-cooked; examples include mushrooms, bell peppers, bacon, ham pieces, and onions.
You should always sauté and prepare these ahead of time.
Step 4 Pour the egg mixture.
Once the oil/butter is heated, pour your egg mixture in and turn to the lowest heat setting.
Then, cover with a lid and cook or steam for anywhere from 4 minutes.
Make sure that your sauteed toppings or pulled pork leftover are easy to reach or next to you.
Then, even the egg's coverage is out. Once all is spread out, cover evenly with the egg mixture.
Step 5 Practice patience
While it may be tempting to poke around at your omelet with the spatula, avoid this temptation. Allow some time to solidify. This will prevent breakage when you attempt to fold it. Just nudge the edges a tad to ensure the eggs are not sticking to the pan.
Tilt the pan and swirl to allow the center egg liquid to flow to the edges. Ensure that the center of the omelet stays on the runny side but is solid on the pan side.
Step 6 Add the delicate ingredients
Now, it is time to sprinkle some delicate ingredients that do not require much time to cook.
Examples include finely chopped tomato pieces, grated cheeses, and various types of herbs and seasonings.
Step 7 Fold the omelet
I have found that this is the most critical of all steps when creating an omelet.
First, get as much of the spatula as possible under half of the omelet. Then, do a quick little flip using your wrist.
If you would rather, you may use one hand to tilt the pan towards the larger portion of the spatula.
Step 8 From pan to plate
Once the omelet is finished, slide it from the pan to the plate you are using. You may then garnish it with a few herbs, seasonings, or grated cheese. Then, serve it up right away.
How to fold ingredients properly
I have discovered that folding is a technique in the kitchen that is highly essential. It aids in making mousses a bit airier, certain cakes lighter, and the omelet-souffle higher.
If using this technique, you will experience a very light texture. Learning to fold properly may prove to be a bit challenging:
If you overmix your ingredients, you will find that the air needed to lift the texture and create a sense of lightness is completely lost.
If you undermix all of the ingredients, the batter will be streaky.
The good news is it is possible to use a few simple strategies to create a perfectly-folded mixture.
What does "Fold" mean in a recipe?
Unlike terms like "toasting" and "whipping," folding may be a bit ambiguous to those specializing in or enjoying baking. It is nothing more than adding a light mixture to create a heavier and thicker mix.
It must be done carefully, though; otherwise, the ingredients will seemingly deflate, and the texture will be lacking. It will likely turn out flat.
When folding, do it slowly and intentionally. You scrap the bottom of what is in the bowl to combine two sets of mixtures.
You must never aggressively do this, or the fold will not be successful.
How do I fold ingredients?
I have found that certain steps aid in any recipe requiring folding.
These are as follows (always follow these instructions step-by-step).
Step 1 Add the light to the heavy mixture
You must always add the lighter mixture to the heavy ingredient mixture:
Start at the very center of the bowl
- Take a wide and very flexible spatula and cut straight down the center of your ingredients, ensuring that it goes all the way to the bottom of the bowl.
- If you are working with a dense ingredient mixture, take a little of the lighter mixture and work it in a little to lessen the density and make it easier to work with. This will help in creating an airy mixture.
Step 2 Scraping the bottom
Scrape on the bottom of your mixing bowl, pulling it towards you. Then, pull up along the side and scoop that part of the mixture over the rest. That is folding, in its simplest terms.
Step 3 Rotate the bowl and repeat
Rotate the bowl at a quarter of a turn. You will then need to repeat that in step 2 above.
Once the mixture is homogeneous, has no streaks, and is incorporated, the process is all done.
Resist all temptation to stir up again. Pause and provide a little pat on the back for successfully folding in the kitchen.
Folding tips
To mix like an expert and fold perfectly, follow the tips outlined below:
- Always use a large bowl. This gives you ample space to incorporate your two different mixtures, and you will avoid deflating your ingredients.
- Use a flexible spatula. These utensils allow you maximum coverage in scraping and combining ingredients.
- Never rush through folding. It takes time to get this technique down. With some effort and patience, you will experience optimal results every time!
How long can you keep an omelet in the fridge?
Assuming that you have made your omelet correctly and it doesn't contain any dairy products or other ingredients that would go bad quickly, you should be able to keep it in the fridge for up to three days. After that, bacteria and mold will start to develop, and you should be thrown out.
How to reheat leftover omelets?
If you have leftovers from a delicious omelet, don't worry, it's easy to reheat them! There are several ways to reheat an omelet, but the most important thing is not to overcook it, or you'll end up with a dry, rubbery omelet.
Using the oven:
Preheat your oven to 350 degrees Fahrenheit. Place the omelet on a baking sheet, and cover loosely with aluminum foil. Bake for 7 to 10 minutes or until heated, depending on the size of your omelet.
Using a stovetop:
If you don't have an oven, you can reheat your omelet on the stove. Just heat a skillet over medium-low heat, cover with a lid and cook the omelet for a few minutes until heated. Don't forget to flip on the occasion so that both sides of the omelet get heated evenly!
If you have any fillings in your omelet, like cheese or veggies, be sure to heat them too.
Reheating using a microwave:
Another method is to place the omelet in a microwave-safe dish. Lay a damp paper towel over the top of the dish and reheat on high power for 30-second intervals. After the first 30-second burst, check the omelet to see if it's heated. If not, nuke it for another 15-30 seconds.
Note: When reheating an omelet, it's important not to overcook it. Omelets are best when cooked quickly, so if you're reheating one, be sure to do it quickly and not overdo it. Otherwise, you'll end up with a dry, rubbery omelet.
Interesting breakfast recipes:
- Japanese Souffle Pancakes
- Chipotle Tuna Salad Stuffed Avocado
- Bell Pepper Egg Boats
- Croissant Breakfast Boats
Full Recipe
Pulled Pork Omelette Recipe (Super Fluffy)
Pin RecipeEquipments:
- Electric handheld mixer
- 8-inches omelette pan
Ingredients:
- 3 pieces fresh eggs (large)
For the Meringue:
- 1 tablespoon oil (or butter)
- salt and pepper to taste
- 1 teaspoon sugar
Toppings
- ⅓ cup pulled pork (leftover)
Instructions:
Prep the Eggs
- Crack each of the eggs and separate the whites and the yolks into two different bowls.
- Season them up with a tad of salt and pepper, and then whisk the egg yolks until smooth. Set them over to the side.
- Pull out that whisk and start on the egg whites. Whisk using a handheld mixer until it bubbles then add 1 teaspoon of sugar. Now, whisk until it tripled in size and developed glossy, medium peaks.
Fold the egg white into the yolks
- Once those medium peaks have developed, fold your light egg whites into the yolks.
- Take a wide and very flexible spatula and cut straight down the center of your ingredients, ensuring that it goes all the way to the bottom of the bowl.
- Scrape on the bottom of your mixing bowl, pulling you. Then, pull up along the side and scoop that part of the mixture over the rest. That is folding, in its simplest terms.
Cook the omelette
- Heat the oil over low heat (do this while you're whisking the egg whites). Swirl the oil to coat the sides of the non-stick 8 inches pan.
- If using oil, wait until it completely coats the pan and becomes shiny. If using butter, wait until it starts foaming.
- Once the oil/butter is heated, pour the egg mixture immediately and cook to the lowest heat setting. Spread the surface to even out the eggs. Note: Whipped eggs can deflate easily, so you must cook them asap.
- Cover with a lid, and cook for about 4 minutes until the top of the omelet has set. No poking.
- Once the omelet is set, slowly lift one side of the omelet and drop a knob of butter underneath (this is optional).
- Arrange the pulled pork on top + the toppings (remember, too much of the toppings will make the egg base rips).
- Gently, fold it in half, move it back a bit to make some space. Flip it to the sides to help lock the runny fillings in. And you're done!
- Serve the eggs and garnish with your favorite toppings.
Notes:
How to fold ingredients?
I have found that certain steps aid in any recipe requiring folding. These are as follows (always follow these instructions, step-by-step).Step 1: add the light mixture to the heavy mixture
You must always add the lighter ingredient mixture to the heavy ingredient mixture.Start at the very center of the bowl
Take a wide and very flexible spatula and cut straight down the center of your ingredients, ensuring that it goes all the way to the bottom of the bowl. If you are working with a dense ingredient mixture, take a little of the lighter mixture and work it in a little to lessen the density and make it easier to work with. This will help in creating an airy mixture.Step 2: scraping the bottom
Scrape on the bottom of your mixing bowl, pulling it towards you. Then, pull up along the side and scoop that part of the mixture over the rest. That is folding, in its simplest terms.Step 3: rotate the bowl and repeat
Once the mixture is homogeneous and incorporated, the process is all done. Resist all temptation to stir up again. Pause and provide a little pat on the back for successfully folding in the kitchen.Nutrition Information:
Please note that all nutrition information are just estimates. Values will vary among brands, so we encourage you to calculate these on your own for most accurate results.


