Once you're successful, you can make perfect flans that you can modify and even add to various desserts. An example is a Filipino dessert called halo-halo, which is a mixture of milk, crushed ice, fruits, and beans. The special version always has ice cream and a slice of flan on top.
Jump to:
I remember the first time I made this leche flan. There was no whisk or any mixer in the house. I only had a blender. The flan that I served that day had pot marks similar to that of a skin plagued by acne. It looked so unappetizing, but my family still ate it.
The texture was not melt-in-your-mouth. It was firmer and chewier. It was not delicate at all. The methods I used were more experimental than well-founded. That was why the resulting flan was not the way anyone would like in a flan at all.
With a lot of trials and errors, I can fairly say that I can make a perfect, smooth, silky, and delicious flan that melts in your mouth.

You'll notice the difference in taste as well. This recipe is less sweet and lighter, making it the ideal dessert after a hearty meal. You can try this flan recipe, or you can just tweak yours with some of the techniques that will be provided later on.
Get these ingredients
For caramel
- ⅓ cup sugar (or 5 tbsp)
- 2 tablespoon water (to moisten the sugar)
- 2 tablespoon (quickly add after the sugar caramelized)
Flan custard Filling
- 3 large eggs
- 2 egg yolks
- 1 teaspoon vanilla extract
- 5 tablespoon sugar (or ⅓ cup)
- 1 ⅔ cups whole milk
- ½ cup heavy cream (+ 2 tbsp)
- a pinch of salt
For extra caramel sauce (optional)
- ⅓ cup sugar (or 5 tbsp)
- 2 tablespoon water
- A splash (5ml) of Kahlúa or flavored liqueur
- A splash (5ml) of lemon juice (optional)
Step by step instructions
Making the Caramel
Step 1
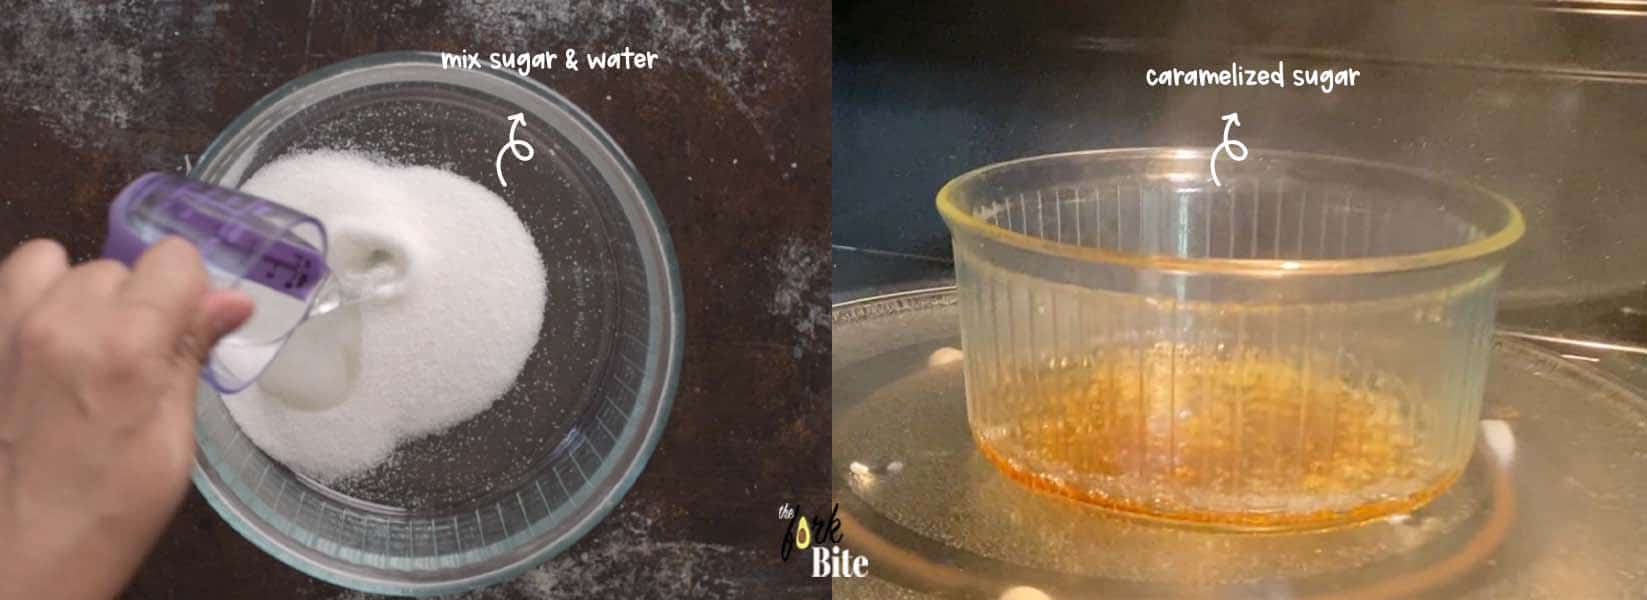
In a heat-proof bowl, add sugar and 2 tablespoon of water. Gently mix and place in the microwave for 3 minutes (the amount of time depends on the power of your microwave). Check the mixture if it turned in golden color.
Step 2
If 3 minutes is not enough to turn the sugar mixture into amber color, add extra 30 seconds (mine took about 3.5 minutes to get the golden color).
Step 3
To make the caramel lighter in color, add two teaspoons of water into your hot caramel. Expect the caramel to bubble up and splatter fiercely. Use a heatproof spoon and give the mixture a quick stir until the caramel becomes a golden sauce.
Step 4
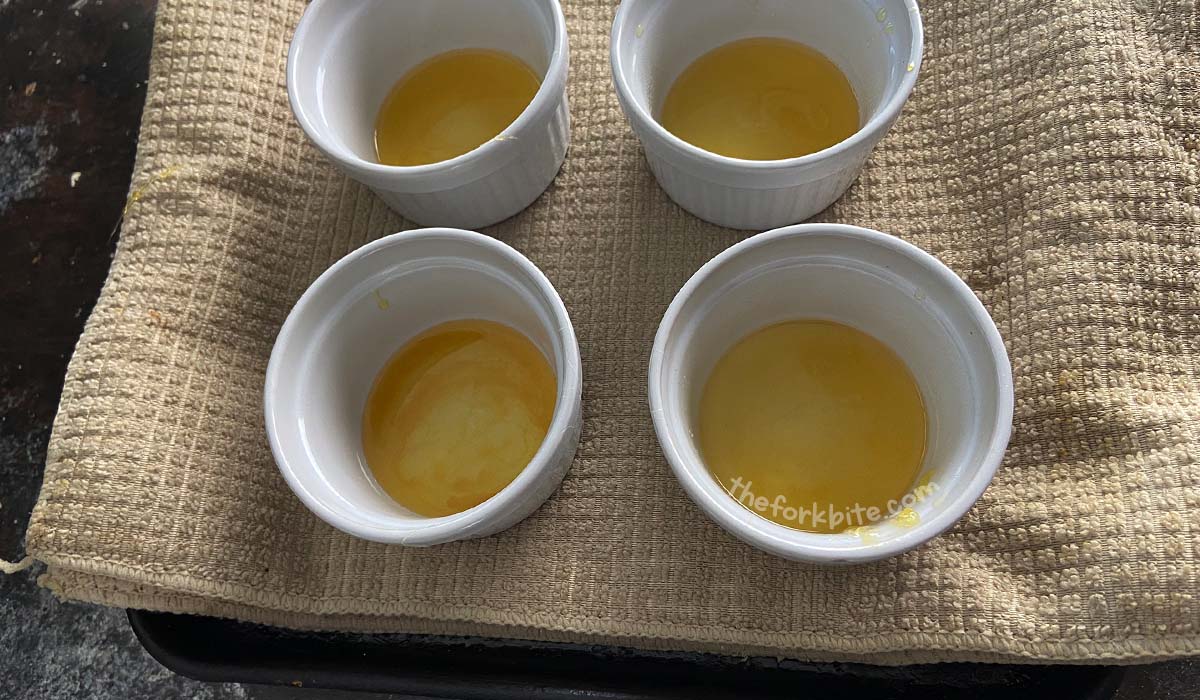
Work quickly in spooning the extremely hot caramel sauce into each of your molds. You can move each mold to ensure that their bottoms are distributed evenly.
Place the ramekins on the kitchen counter for about five minutes. This will be enough time to harden the caramel. If you want more caramel sauce, you can just make some more at this point.
Tempering the milk
Step 1
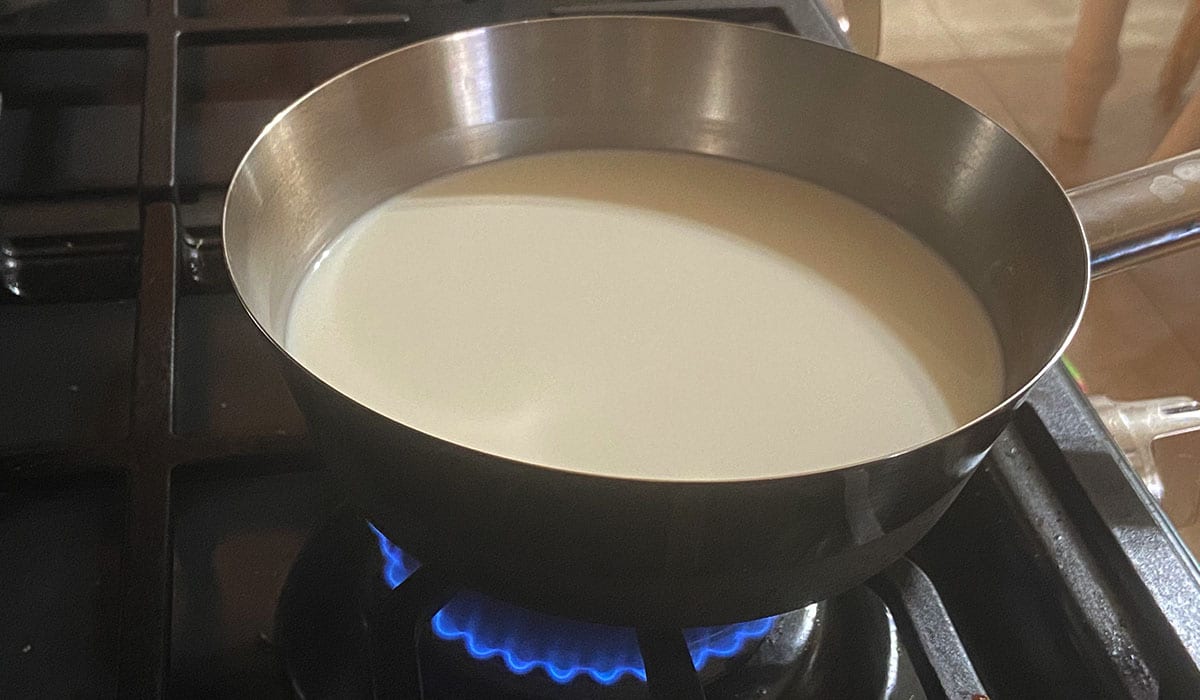
Start tempering your milk by adding the heavy cream, milk, vanilla and a pinch of salt in a saucepan. Heat the mixture in low heat and continue to stir until the sugar dissolves completely. Remember not to let the milk mixture reaches into boiling point, we only need to warm the milk (about 80°C temperature). Pay attention and turn the heat off once the milk reaches to a perfect temperature.
Step 2
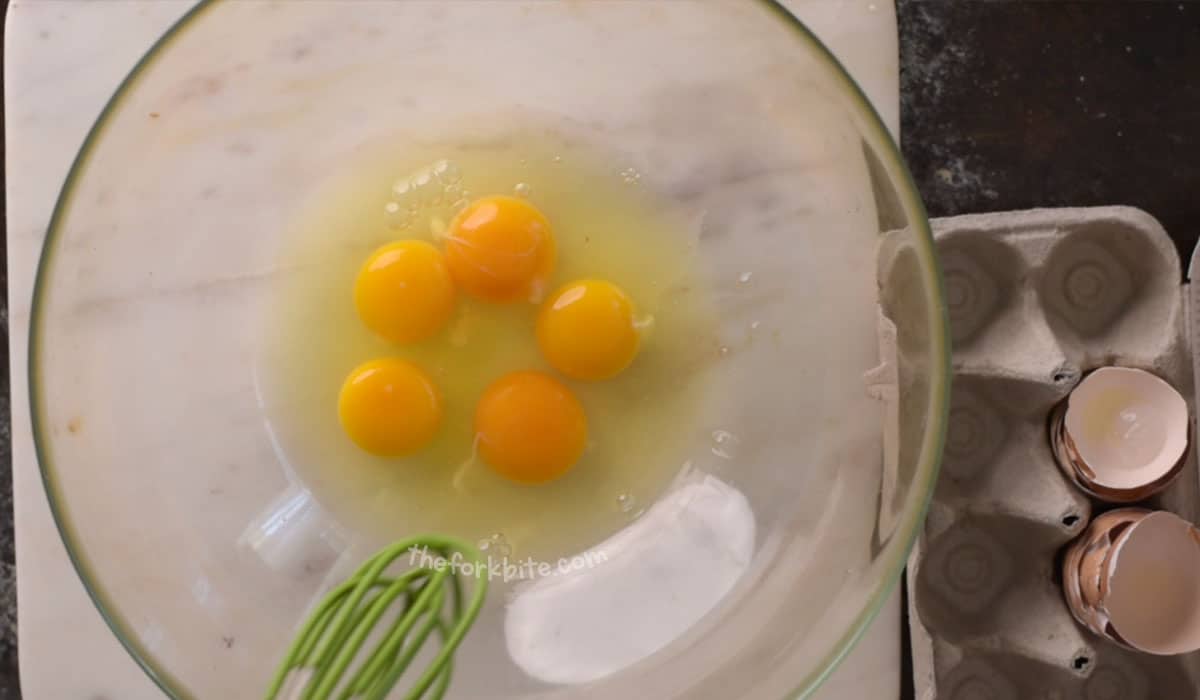
Meanwhile, while waiting for the tempered milk, you can start preparing the egg mixture. Just combine the 3 whole eggs and 2 egg yolks into a separate heat-proof bowl. Whisk or beat the egg gently NOT to get that foamy mixture while avoiding too much air. Simply whisk on one direction, if possible.
Of course, when you whisk, you will always form bubbles, but it's all in the motion of your hands. You don't need to go extraordinarily slow in mixing. You just have to make sure that there are no stringy egg whites.
Some bubbles are acceptable as long as the eggs don't become foamy.
Step 3

Once the milk is perfectly warmed and has reached about 80°C in temperature, gradually ladle the warm milk into the egg mixture. Keep the whisk moving while adding the milk to distribute the temperature. Tempering the eggs helps reduce the eggy smell in the egg custard.
Step 4
Pass the loose custard mixture through a fine sieve. This will eliminate any egg curds or lumps from tempering the eggs earlier.
Double strain the custard mixture to get that smooth Leche flan texture. After straining, let the mixture cool down for about 12 minutes.

As you wait for your egg and milk mixture to cool, preheat your oven to 150°C (302°F). By this time, you can go ahead and start molding your caramel.
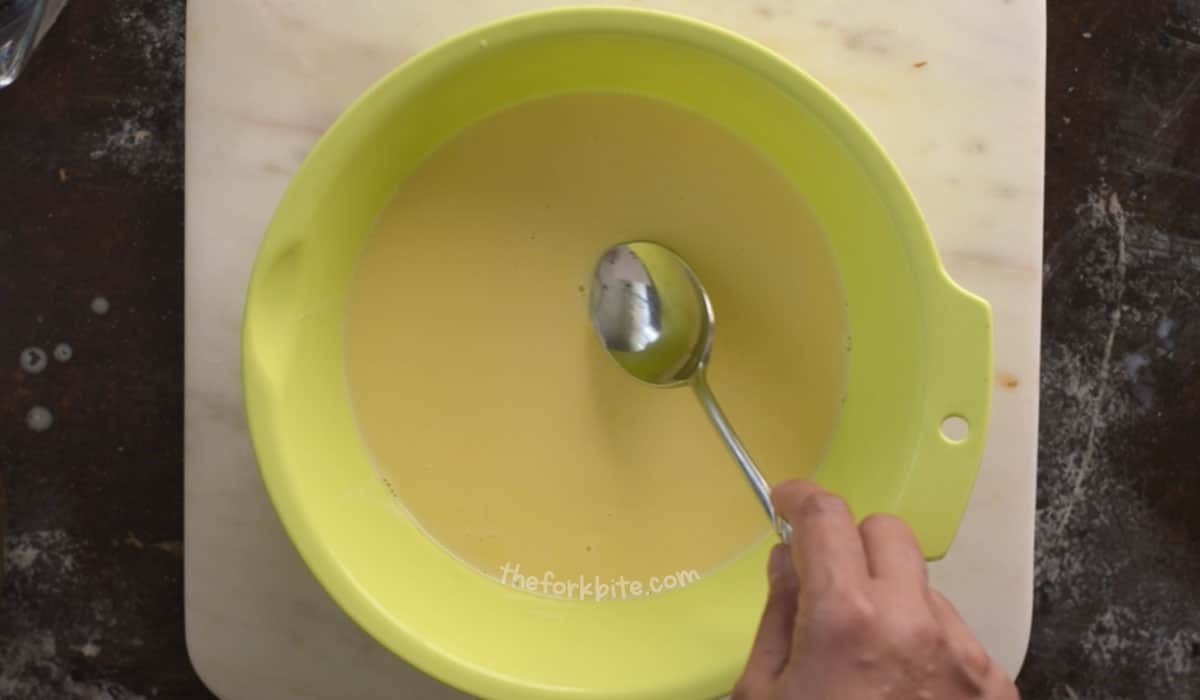
Don't forget to scoop out some bubbles from the custard mixture to eliminate pot marks being formed after cooking.
Secrets to a perfectly smooth flan
From my experience, the ideal way to make this dessert is through water bath baking or Bain-Marie. I also had a successful, super smooth Leche flan using an Instant Pot, you can check the recipe here.
This method involves placing the ramekins in a roasting pan filled with water until it is half or ⅔ up the ramekins. This technique is best for sensitive dishes that require gentle heat to prevent them from burning or curdling. You wouldn't want an overcooked flan after dinner, would you?
Bain-Marie involves heating food on very low heat with prolonged periods of baking. The waiting time is longer but extremely worth it.
Step 1
Boil some water. Once the water has boiled, set it aside. If you use pre-boiled water, your baking time will be shorter.
Step 2
Now, get a deep bottom baking pan. Arrange two layers of towels at the bottom of your baking pan. Lining or cushioning 2 towels will protect the ramekins from the intense heat at the bottom and keep them stable.
When the water starts to boil, the ramekins could wobble around. The kitchen towels will help hold them in place.
Step 3
Now, the oven preheated at 150°C, the boiling water is ready, the caramel coat is set at the bottom of ramekins, the custard mixture is at room temperature; it's time for the magic moments. The BAKING.
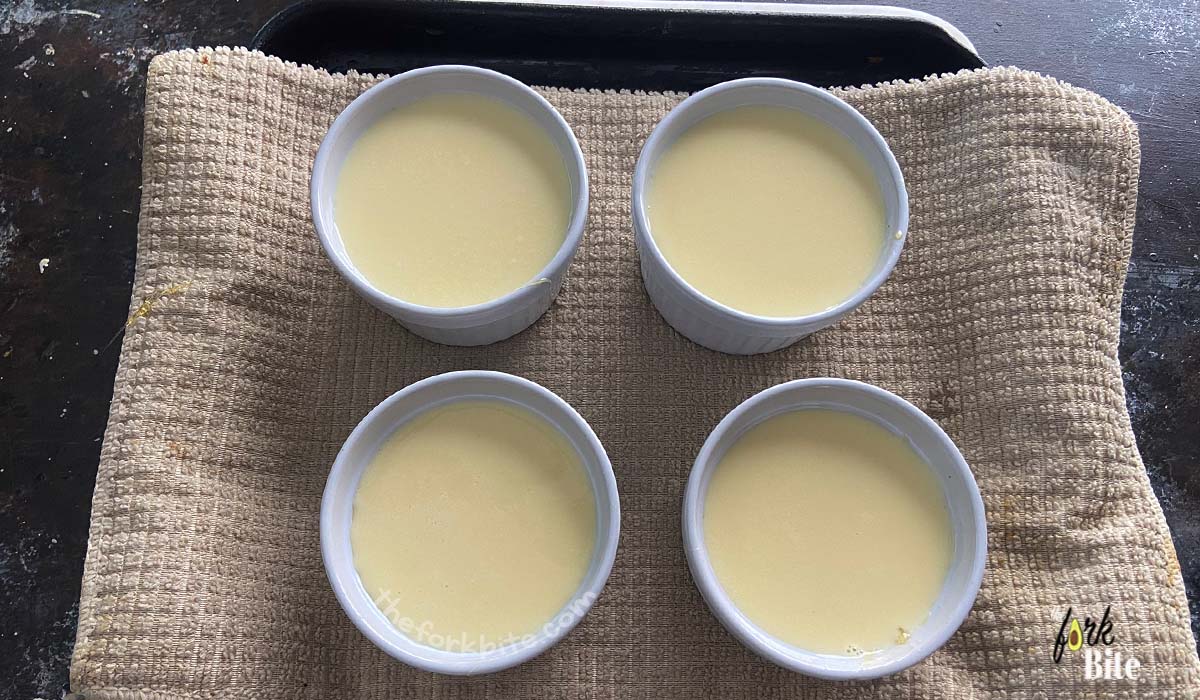
- Pour the custard mix into the ramekins. Try to pour closer to the dishes so as not to cause any splash effects as this will cause bubbles.
- Make sure that the filling reaches ¾ of the ramekins. This ensures prettier, better-tasting flans.
- Cover each ramekins with aluminum foil to keep the water out while steaming.
Step 4
Transfer the waterless pan lined with kitchen towels and filled ramekins into the preheated oven. Now, this is the right time to pour the hot water into the baking pan. Avoid getting the water into the ramekins.
Step 5
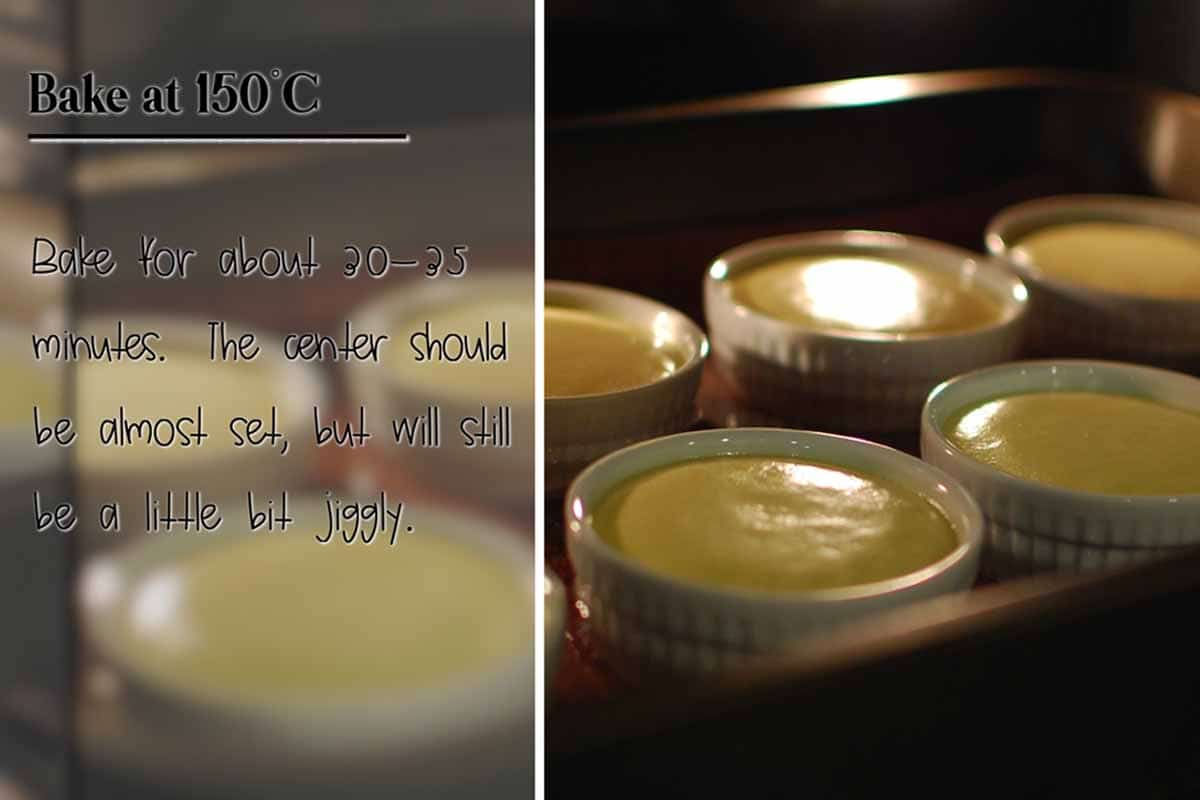
After pouring water into the pan, close the oven doors, and bake at 150°C for about 30 to 35 minutes until the custard is just starting to set. Check them every 15 minutes.
So, avoid the overcooked flan dilemma and remove the container flan from the heat asap. The temptation to cook them a little longer is great, thinking the center is still somewhat jiggly. Please, don't. The flan will continue to cook once outside the oven and even in the cooling process.

Overcooking yields an acne-like surface, with not so smooth texture and eggy taste. Hopefully, after making this recipe at least two times more, you will finally know and feel when the flan is ready. Practice makes perfect as a cliche goes.
In my opinion, I find this method a bit tricky because you won't be able to control the precise temperature unless you're using a Sous vide gadget. Moreover, I believe the flan cooked with the water bath is more yellowish, firmer, and has a more intense flavor.
Every oven has different heating elements (for the electric oven) and gas igniter (for the gas oven). To resolve this, I typically place the baking pan at the lowest rack and bake the flans at 150°C. But if you're lucky to have an oven that renders precise temperature, you can place the baking pan in the middle rack and bake your flan at 160°C.
It all sums upon your oven's temperature. If 150°C is too low which requires longer baking time, try experimenting with your oven that will suit your needs. It is best to avoid making an undercooked or an overcooked flan.
Be vigilant watching over your flan. You have to see how it progresses under a specific temperature or baking/steaming period.

Step 6
Once the flans are done, remove them from the oven asap. Let them cool in the water bath for more than an hour. Once cool enough, cover each with a saran wrap before chilling them in the fridge overnight or at least 4 hours before serving.
Step 7
Run a thin knife around the edge of the ramekin to get it off and break the seal. Expect to see some caramel liquid oozing out once you flip it over.
Step 8
Position a flat serving plate face down on top of the ramekin. Hold the plate firmly as you flip it over. The flan should just drop down onto the plate. Pour extra caramel liquid over the flan.
If the flan doesn't come out easily from the ramekin, place boiling water into a deep bottom dish. Give it a quick dip and flip it again onto the serving plate. Repeat the process until it easily falls down. Get ready to enjoy your tasty and velvety-smooth flan.
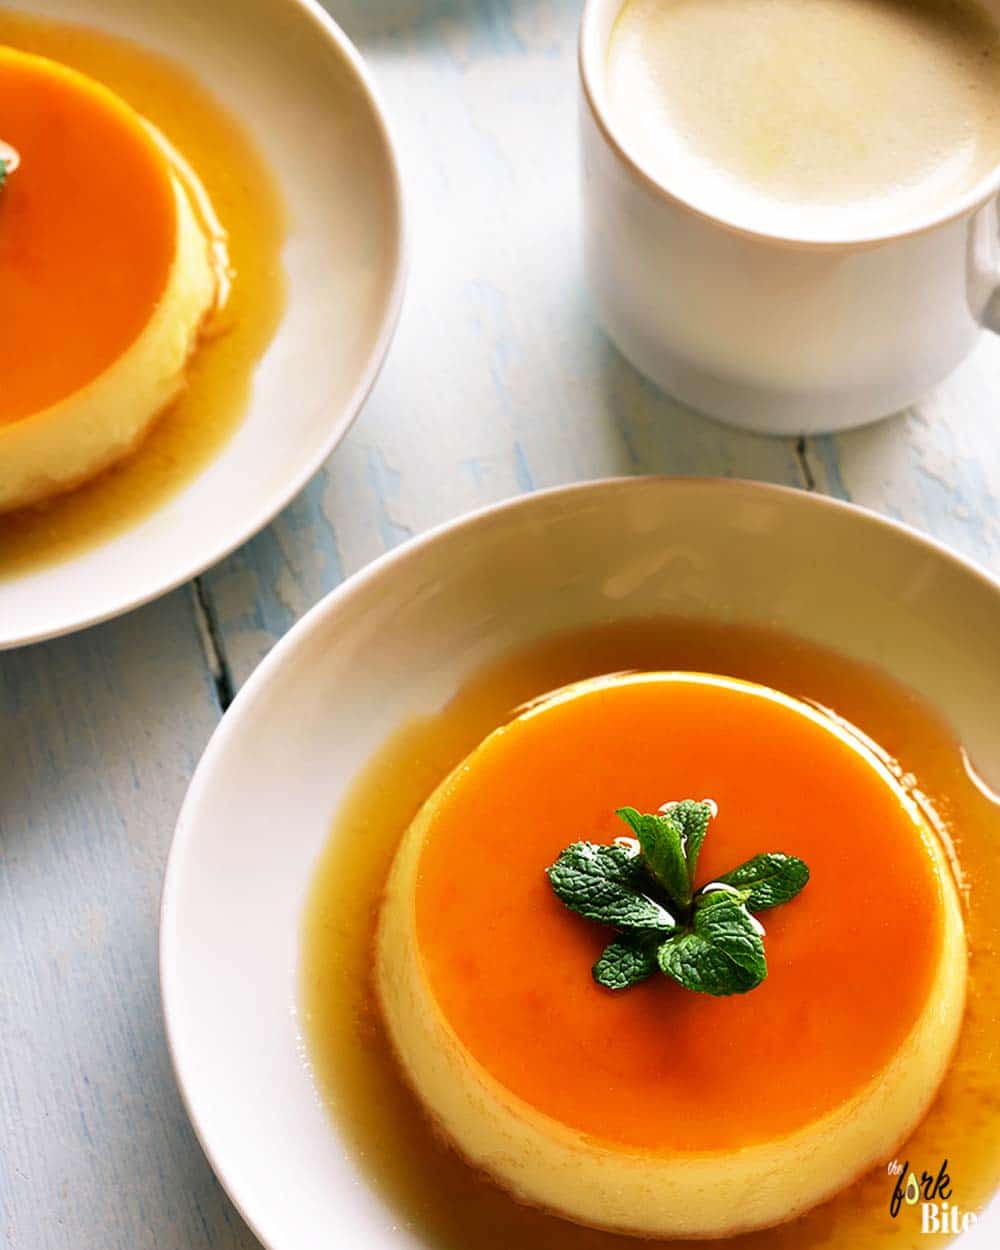
How to serve
Serve the flan as it is. If you want to put Vietnamese elements to your flan, just drizzle some espresso and rich coconut milk. Serve it with crushed ice.
I eat flan straight up because I love it so much. Each time I get a mouthful, my tongue gets all that divine taste and unmatched delicate texture. It just can't wait to reach my tummy each time. You can't just have one spoonful. Try this recipe, and you'll see how smooth this flan is, inside and out.
Common questions and answers
- Problem 1 - Flans do not set or undercooked flan.
This issue may be caused by baking or steaming temperature that's too low. It can result from a very brief baking time. Inadequate amounts of milk or eggs may also cause it. To rectify this, increase your baking temperature by 10 degrees C or add more baking time to 10 to 15 minutes longer. If these remedies still don't set your flan up, perhaps you should just try it again. - Problem 2 - Flans have ugly bubbles all around it; also, the inside is not smooth. When this happens, it may be because your steaming or baking temperature is too high. You should also consider your baking time, is it too long?. The milk in your custard mixture tends to boil, resulting in an overcooked flan.
Unfortunately, there is no way to fix this. Preventing it is the only way to go. Please reread my notes. The results of my flan experiments are the best tips I can give you to avoid overcooked flan.
How long does flan last?
If being stored properly, flan can last in the fridge for up to 5 days. When storing, leave them in its original baking dish and cover tightly with a plastic wrap or aluminum foil.
Once ready, fill a flat bottom dish with hot water and dip the bottom of the container. Let it sit for a moment until the caramel melts a little for easier unmolding. Some caramel will adhere to the dish and scrape it with a rubber spatula to get most of it.
What happens if you overcooked flan?
Translation of "just set" is kinda vague, but essential to making a perfect flan. Meaning, by calling it "just set," the outer edges of the ramekins feel firm when you tap it, but the center is still a bit jiggly (not at all liquid-like feel) while the custard's surface is flat. These signal that it's time for you to finish baking.
So, don't make an overcooked flan and remove them from the heat. The temptation to cook a bit more is understandable, considering the center is still wobbly. Please DON'T. It's better to undercook slightly than overcook (as the flan will continue to cook once you remove from the oven.)
Overcooking will result in an ugly, lumpy, or cottage-cheese texture with an eggy taste. Not good at all. Hopefully, after making this recipe at least two times more, you will finally know and feel when the flans are done.
Does flan need to be refrigerated?
Flan is one custard dessert that requires refrigeration, and the flavor is the best when served cold. If being left unrefrigerated, the consistency and texture will start to break down; hence it won't hold up well for more than a few hours depending on the temperature.
Remember, flan's main ingredients are eggs; I wouldn't leave it at room temperature for an hour at most and even less during the hot weather. It keeps perfectly well in the fridge for 3-5 days, and to keep it fresh and avoid a "skin" from forming on top, cover the top of the flan directly with a cling wrap.
Other dessert recipes:
Full Recipe

Secrets to Making a Perfect Flan Recipe
Pin RecipeEquipments:
- 6oz ramekins
- large roasting pan
- heavy bottom saucepan
- kitchen towel
- strainer or sieve
- tongs or jar lifter
Ingredients:
for Caramel:
- ⅓ cup white sugar
- 2 tablespoon water (to moisten to sugar)
- 2 tablespoon water [ add this after the sugar caramelized]
Custard Fillings:
- 3 whole eggs (large)
- 2 egg yolks
- 1⅔ cup whole milk
- ½ cup heavy cream (+ 2 tbsp)
- ⅓ cup white sugar (or 5 tbsp)
- 1 teaspoon vanilla extract
- A pinch of salt
Extra Caramel Sauce (optional):
- 60 g white sugar
- 2 tablespoon water (to moisten the sugar)
- 5 ml Kahlua (or flavored liqueur of your choice)
- 5 ml lemon juice (**optional or use water)
Watch the Video:
Instructions:
Prep the caramel:
- In a heat-proof bowl, add sugar and 2 tablespoon of water. Gently mix and place in the microwave for 3 minutes (the amount of time depends on the power of your microwave). Check the mixture if it turned in golden color.
- If 3 minutes is not enough to turn the sugar mixture into amber color, add extra 30 seconds (mine took about 3.5 minutes to get the golden color).
- To make the caramel lighter in color, quickly add two teaspoons of water into your hot caramel. Expect the caramel to bubble up and splatter fiercely. Use a heatproof spoon and give the mixture a quick stir until the caramel becomes a golden sauce.
- Work quickly in spooning the extremely hot caramel sauce into each of your molds. You can move each mold to ensure that their bottoms are distributed evenly. Place the ramekins on the kitchen counter for about five minutes. This will be enough time to harden the caramel. If you want more caramel sauce, you can just make some more at this point.
Temper the milk:
- Start tempering the milk. Add the heavy cream, milk, vanilla and a pinch of salt in a saucepan. Heat the mixture in low heat and continue to stir until the sugar dissolves completely. Remember not to let the milk mixture reaches into boiling point, we only need to warm the milk (about 80°C temperature). Pay attention and turn the heat off once the milk reaches to a perfect temperature.
Prep the Custard:
- Meanwhile, while waiting for the tempered milk, you can start preparing the egg mixture. Just combine the 3 whole eggs and 2 egg yolks into a separate heat-proof bowl. Whisk or beat the egg gently NOT to get that foamy mixture while avoiding too much air. Simply whisk on one direction, if possible.
- Once the milk is perfectly warmed and has reached about 80°C in temperature, gradually ladle the warm milk into the egg mixture. Keep the whisk moving while adding the milk to distribute the temperature. Tempering the eggs helps reduce the eggy smell in the egg custard.
- Pass the loose custard mixture through a fine sieve. This will eliminate any egg curds or lumps from tempering the eggs earlier.Double strain the custard mixture to get that smooth Leche flan texture. After straining, let the mixture cool down for about 12 minutes.Don’t forget to scoop out some bubbles from the custard mixture to eliminate pot marks being formed after cooking.
- As you wait for your egg and milk mixture to cool, preheat your oven to 150°C (302°F). By this time, you can go ahead and start molding your caramel.
The Baine-Marie method:
- Bring 1 liter of water to a boil. After the water boils, set into a simmer and proceed to the next step.
- Now, get a deep bottom baking pan. Arrange two layers of towels at the bottom of your baking pan. Lining or cushioning 2 towels will protect the ramekins from the intense heat at the bottom and keep them stable.
- Now, the oven preheated at 150°C, the boiling water is ready, the caramel coat is set at the bottom of ramekins, the custard mixture is at room temperature; it’s time for the magic moments. The BAKING.Pour the custard mix into the ramekins. Try to pour closer to the dishes so as not to cause any splash effects as this will cause bubbles.Make sure that the filling reaches ¾ of the ramekins. This ensures prettier, better-tasting flans.Cover each ramekins with aluminum foil to keep the water out while steaming.
- Transfer the waterless pan lined with kitchen towels and filled ramekins into the preheated oven. Now, this is the right time to pour the hot water into the pan. Avoid getting water into the ramekins.
- Transfer the waterless pan lined with kitchen towels and filled ramekins into the preheated oven. Now, this is the right time to pour the hot water into the baking pan. Avoid getting the water into the ramekins.
- After pouring water into the pan, close the oven doors, and bake at 150°C for about 30 to 35 minutes until the custard is just starting to set. Check them every 15 minutes.So, avoid the overcooked flan dilemma and remove the container flan from the heat asap. The temptation to cook them a little longer is great, thinking the center is still somewhat jiggly. Please, don’t. The flan will continue to cook once outside the oven and even in the cooling process.
- So, avoid the overcooked flan dilemma and remove the container flan from the heat asap. The temptation to cook them a little longer is great, thinking the center is still somewhat jiggly. Please, don’t. The flan will continue to cook once outside the oven and even in the cooling process.
- Once the flans are done, remove them from the oven asap. Let them cool in the water bath for more than an hour. Once cool enough, cover each with a saran wrap before chilling them in the fridge overnight or at least 4 hours before serving.
Before Serving:
- Run a thin knife around the edge of the ramekin to get it off and break the seal. Expect to see some caramel liquid oozing out once you flip it over.
- Position a flat serving plate face down on top of the ramekin. Hold the plate firmly as you flip it over. The flan should just drop down onto the plate. Pour extra caramel liquid over the flan. If the flan doesn’t come out easily from the ramekin, place boiling water into a deep bottom dish. Give it a quick dip and flip it again onto the serving plate. Repeat the process until it easily falls down. Get ready to enjoy your tasty and velvety-smooth flan.
How to serve:
- Serve the flan as it is. If you want to put Vietnamese elements to your flan, just drizzle some espresso and rich coconut milk. Serve it with crushed ice.
Notes:
Nutrition Information:
Please note that all nutrition information are just estimates. Values will vary among brands, so we encourage you to calculate these on your own for most accurate results.


LWilliams says
This is the most comprehensive flan tutorial I've come across. I just pulled my flan out of the oven.
A few days ago I followed another recipe that resulted in an overcooked and curdled result. Such a sad business.
So I searched for a better recipe. This time I didn't make the caramel first, I did it last.
I appreciate the lesson on tempering eggs. From my experience in making chocolate pudding, I think this is a key step. Straining the custard mixture is also something to not skip.
I thought my oven was too hot the first time I made flan using another recipe so your notes on oven temps was helpful. However, my flan was underdone at 300F (150C) after 30 minutes so I kept it in the oven for another full 20 minutes. The tester stick never came out clean but it had all the other signs of being done such as the lovely jiggle you mention. I really, really wanted to avoid overdoneness. So after about 50 min I gave up. It's cooling now. I hope this works out. If not, I'll try again.
Also, adding water to the sugar didn't do anything special. In fact it stayed crystalized and then the water evaporated and it returned to its original dry state. The second time I just dissolved it straight, no water. I don't have a microwave anymore so I melted it on the stove.
Anyway, it's cooling now. Thanks for the post.